Regarding DIY woodworking projects, we should know about Mistakes to Avoid with Your Orbital Sander, an orbital sander can be incredibly useful for achieving a smooth and polished finish.
To achieve the best possible results and avoid costly errors, it’s important to understand the common mistakes to avoid with your orbital sander.
From improper surface preparation to neglecting dust collection, this article will provide essential tips and tricks for using your orbital sander safely and effectively.
12 Common Mistakes to Avoid with Your Orbital Sander:
An orbital sander is essential for achieving a smooth and polished finish when it comes to woodworking. However, improper use of the sander can lead to costly mistakes and damage to the project. In this article, we will discuss common mistakes to avoid with your orbital sander, so you can achieve the best possible results while keeping your project safe from harm.
Orbital sanders smooth rough surfaces and remove paint or varnish from wood, metal, or plastic. Like any power tool, orbital sanders can experience problems requiring troubleshooting. Here are some common issues you may encounter with an orbital sander and how to troubleshoot them:
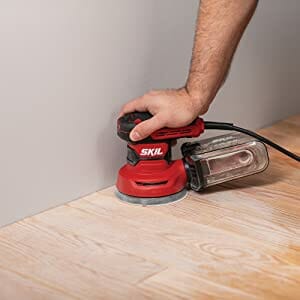
Here are 12 common mistakes to avoid when using an orbital sander.
1. Choosing the Wrong Grit Sandpaper:
One of the most common mistakes is choosing the wrong grit sandpaper. If you use coarse grit sandpaper for finishing, you’ll damage the surface of the wood, and if you use fine grit sandpaper for removing paint or varnish, it will take longer and require more effort.
2. Not Cleaning the Surface:
Another mistake is not cleaning the surface before sanding. The dust and debris on the surface will reduce the effectiveness of the sandpaper and might cause scratches on the surface.
3. Incorrect Speed:
Using the wrong speed on your sander can result in either not removing enough material or removing too much, causing damage to the surface. Make sure to choose the right speed based on the type of material you’re sanding.
4. Overusing the Sander:
Overusing the sander in one spot can create deep scratches or grooves on the surface. Keep moving the sander around in a circular motion to avoid concentrating sanding on one spot.
5. Applying Too Much Pressure:
Applying too much pressure on the sander will not only not increase the speed of the sanding process but will also add more force to the sander’s motor, reducing its lifespan.
6. Not Sanding to the Edge:
Skipping the edges of your project is a common sanding mistake. Sanding only the central part of the surface and forgetting the edges makes the edges look unattractive and mismatched.
7. Neglecting Sandpaper Tears:
Overlooked sandpaper tears can lead to problems, such as leaving deep scratches when sanding or breaking up while sanding. Remember to check the sandpaper before each use and replace it if damaged.
8. Not Keeping the Sander Level:
Keeping your sander level is crucial for achieving a smooth finish. Tilting the sander off-level while sanding leaves swirl marks and might damage the surface.
9. Not Wearing Protective Gear:
Not taking necessary protective measures while sanding can lead to allergies, and respiratory or skin problems from inhaling or touching dust.
10. Misusing the Dust Collection System:
Misusing the dust collection system can cause dust and particles to land on the sanded surfaces. Always make sure that the dust collection system is connected accordingly to avoid dust landing on your workpiece or the workspace.
11. Skipping Sanding Stages:
It’s always advisable to sand in stages because sanding with a coarse grit and then jumping to a fine grit can lead to swirl marks on the surface.
12. Not Taking Breaks:
Sanding for extended periods can lead to exhaustion, which can cause you to make mistakes. Remember to take breaks when sanding for an extended period.
4 Steps to Avoid Mistakes with Your Orbital Sander:

Steps to Avoid Mistakes with Your Orbital Sander include proper preparation, choosing the right sandpaper, applying the right amount of pressure, good dust collection, and prioritizing safety.
By following these steps, you can achieve a smooth and polished finish on your woodworking projects while avoiding costly mistakes and damage to your project.
You can also check out our other related article How to use an orbital sander on cabinets like a pro?
1. Preparation is Key:
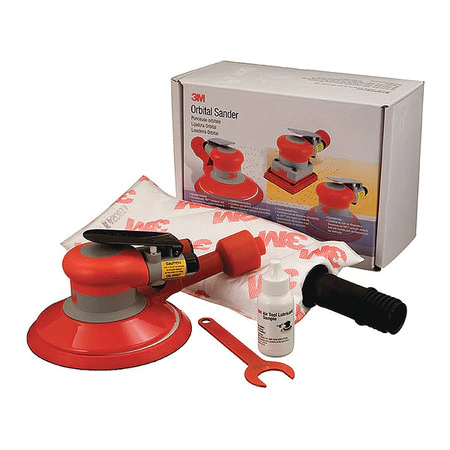
Preparation is Key” refers to the idea that proper preparation of the surface is essential for achieving a smooth and polished finish with your orbital sander. Here are the steps involved in preparing your surface before using your orbital sander:
A. Start with a clean and smooth surface: Before sanding, ensure the surface is clean and free from dust, dirt, and debris. Use a tack cloth or vacuum cleaner to remove any loose particles.
B. Remove all hardware and protrusions: Remove all hardware, such as screws, nails, hinges, and any protrusions that may get in the way of sanding.
C. Fill any gaps and cracks with wood filler: Fill any gaps, cracks, or imperfections in the surface. This will create a smooth and even surface to sand.
2. Choose the Right Sandpaper:
Choosing the Right Sandpaper is crucial for achieving the desired finish with your orbital sander. Here are the steps involved in selecting the appropriate sandpaper:
A. Understand Sandpaper Grits:
- Sandpaper comes in different grits ranging from coarse to fine
- Lower grits are more abrasive and suitable for removing heavy material
- Higher grits are less abrasive and suitable for smoothing and polishing
B. Choose the Right Grit for the JobL
- Identify the material to be sanded and its condition
- Select a lower grit (such as 60-80) for heavy material removal or rough surfaces
- Select a medium grit (such as 120-150) for smoothing and refining the surface
- Select a higher grit (such as 220-320) for polishing and finishing
C. Change the Sandpaper Regularly:
- Sandpaper wears down with use and becomes less effective
- Change the sandpaper regularly to ensure it is working at its best
- Replace the sandpaper if it becomes clogged or damaged
D. Avoid Using Too Coarse Grits for the Final Finish:
- Coarse grits can leave scratches on the surface, making it difficult to achieve a smooth finish
- Use a higher grit sandpaper for the final finish to ensure a polished surface
3. Applying the Right Amount of Pressure:
Applying the Right Amount of Pressure is crucial to ensure that the orbital sander is used effectively without causing damage to the surface. Here are the steps involved in applying the right amount of pressure:
A. Let the Sander Do the Work:
- Do not apply too much pressure or force on the sander
- Allow the sander to move over the surface without pushing or pressing down too hard
- Avoid tilting the sander, as it can create an uneven surface
B. Avoid Pushing Down Too Hard:
- Applying too much pressure can cause the sandpaper to wear out faster and lead to overheating
- Pressing too hard on the sander can also cause the surface to become uneven or damaged
- Use a light touch and let the sander do the work for the best results
C. Use a Light Touch on Delicate Surfaces:
- For delicate surfaces, such as veneer or thin wood, use a lighter touch to avoid damage
- Use a higher grit sandpaper and apply minimal pressure for delicate surfaces
- Avoid leaving the sander in one spot for too long, as this can cause uneven surfaces or burn marks
4. Proper Dust Collection:
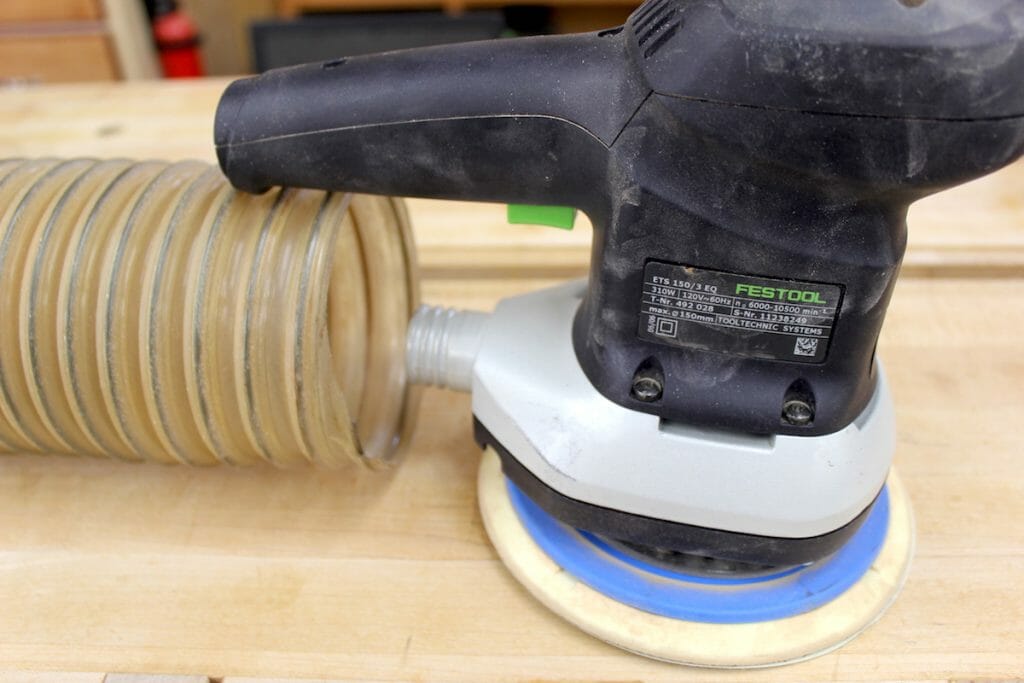
Proper Dust Collection is important for maintaining a clean and healthy work environment and ensuring the effectiveness of your orbital sander. Here are the steps involved in proper dust collection:
A. Use a Vacuum or Dust Collector:
- Attach a vacuum or dust collector to the sander to collect the dust as you work.
- This will prevent dust from accumulating in the air and on the surface, which can affect the finish and cause health issues.
B. Use a Sandpaper with Holes:
- Some sandpapers come with holes that allow for better dust collection
- Using sandpaper with holes can increase the efficiency of the dust collection system
C. Empty the Dust Bag or Canister Regularly:
- Empty the dust bag or canister regularly to prevent it from becoming clogged and affecting the efficiency of the dust collection system.
- A clogged dust bag or canister can cause the sander to overheat and reduce lifespan.
D. Wear Personal Protective Equipment:
- Wear personal protective equipment such as a dust mask or respirator to prevent inhaling dust particles
- Dust particles can cause respiratory problems and other health issues
By following proper dust collection practices, you can maintain a clean and healthy work environment and increase the effectiveness of your orbital sander. Remember to attach a vacuum or dust collector, use sandpaper with holes, empty the dust bag or canister regularly, and wear personal protective equipment.
Explanation of what an orbital sander is and why it’s useful:
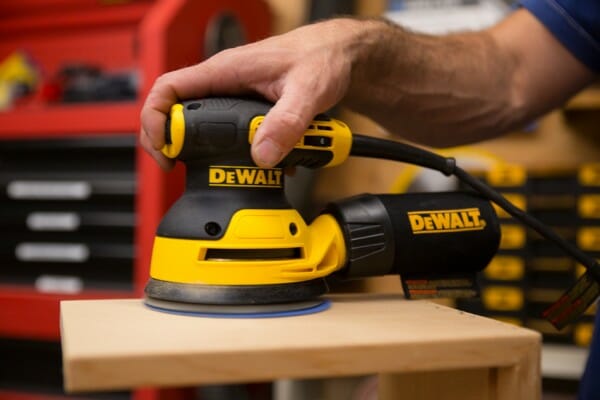
An orbital sander is a power tool for sanding and finishing wood, metal, plastic, and other surfaces. It is called an “orbital” sander because the sanding pad moves in a circular motion while oscillating back and forth. This creates a random orbital pattern, which helps to reduce visible scratches and swirls on the sanded surface.
1. Why is an Orbital Sander Useful?
- An orbital sander is useful for several reasons:
- It’s versatile and can be used on various surfaces, including curved or contoured surfaces.
- It’s faster and more efficient than sanding by hand, allowing you to finish your project in less time.
- It produces a smoother and more even finish than sanding by hand.
- It’s relatively easy to use and requires minimal skill or experience.
- It allows for more precise sanding, particularly for detailed or intricate work.
2. Types of Orbital Sanders:
- There are two main types of orbital sanders:
- Random Orbital Sander: This type of sander has a circular sanding pad that moves in a random orbital pattern, which helps to prevent visible scratches and swirls.
- Orbital Finishing Sander: This type of sander has a square or rectangular sanding pad and moves back-and-forth. It’s primarily used for finishing work and creating a smooth, even surface.
3. Choosing the Right Orbital Sander:
- When choosing an orbital sander, consider factors such as the type of work you’ll be doing, the size of the sanding pad, and the speed and power of the tool.
- A smaller sanding pad may be more suitable if you are doing detailed or intricate work.
- If you sand large, flat surfaces, a larger sanding pad and a more powerful motor may be necessary to complete the job efficiently.
- Look for additional features such as adjustable speed settings, dust collection systems, and comfortable grips to make the sanding process more comfortable and effective.
FAQs:
Here are some FAQs on Mistakes to Avoid with Your Orbital Sander.
What is the most common mistake to avoid when using an orbital sander?
The most common mistake to avoid when using an orbital sander is applying too much pressure. This can cause the sandpaper to wear out faster, overheat the sander, and damage the sanded surface.
How do I choose the right sandpaper for my orbital sander?
Choose sandpaper with the right grit for the surface being sanded. Generally, a lower grit number, such as 60 or 80, is used for rough surfaces, while higher grits, such as 120 or 150, are used for finishing. Choosing sandpaper with the right hole configuration for your sander is important to ensure proper dust collection.
Can I use an orbital sander on metal surfaces?
Yes, an orbital sander can be used on metal surfaces. Still, it’s important to use the appropriate sandpaper with the correct grit and to avoid applying too much pressure to prevent damaging the metal.
Should I wear personal protective equipment when using an orbital sander?
It is recommended to wear personal protective equipment when using an orbital sander. This includes eye protection, a dust mask or respirator, and hearing protection if necessary.
How do I maintain my orbital sander?
To maintain your orbital sander, regularly clean the sandpaper and dust collection system, and lubricate the sander’s moving parts. It’s also important to store the sander in a dry, dust-free area and replace any worn or damaged parts as necessary.
Conclusion:
In conclusion, there are several mistakes to avoid when using an orbital sander to ensure a smooth and successful sanding process. You can avoid common mistakes and achieve the desired finish by properly preparing the surface, choosing the right sandpaper, applying the correct pressure, and ensuring proper dust collection.

Why Trust About Sanders?
When it comes to the world of sanding and sanders, you need a trusted source of information and guidance to ensure you achieve those perfect finishes. That's where I come in – I'm Martin, a dedicated sanding enthusiast with a relentless passion for attaining flawless surfaces. With years of hands-on experience in the sanding industry, I've honed my skills and expertise to provide you with the most reliable and accurate insights. What sets me apart is my commitment to excellence. I meticulously handpick each sander after rigorous testing, ensuring that only the best tools make it to your hands. My goal is to empower you with the knowledge and recommendations you need to tackle any sanding task confidently. When you trust About Sanders, you're putting your faith in a seasoned expert who shares your passion for perfection and strives to deliver top-notch information and reviews for every sanding challenge.
