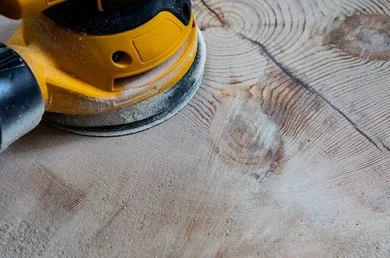
Removing Orbital Sander Swirl Marks: Orbital sanders are a popular tool for smoothing surfaces in woodworking projects, but they can also leave behind unsightly swirl marks. This article will explore some best practices and tips for Removing Orbital Sander Swirl Marks to achieve a professional-looking finish on your woodworking projects.
Whether you’re a seasoned woodworker or just starting, understanding how to remove swirl marks is a critical skill in your arsenal.
Here are 8 reasons for Orbital Sander Swirl Marks

Understanding the reasons behind these swirl marks is crucial in figuring out how to remove them. In this article, we will explore eight common reasons for orbital sander swirl marks and provide some tips on preventing them from occurring in the first place.
1: Sanding in a Circular Motion:
One of the most common causes of orbital sander swirl marks is sanding in a circular motion. This can cause the sander to create circular patterns that can be difficult to remove. To avoid this, try sanding in a straight back-and-forth motion instead.
2: Using the Wrong Grit Sandpaper:
Using the wrong grit sandpaper can also lead to swirl marks. If the sandpaper is too fine, it may not remove enough material, causing the sander to leave behind marks. Conversely, if the sandpaper is too coarse, it can leave deep scratches that are difficult to remove.
3: Applying Too Much Pressure:
Applying too much pressure on the sander can also cause swirl marks. When you push down too hard, the sander can create circular patterns that are difficult to remove. To avoid this, use a light touch when sanding and let the sander do the work.
4: Using Dirty Sandpaper:
Using dirty sandpaper can also lead to swirl marks. If there is debris or dust on the sandpaper, it can get caught under the sander, causing scratches and swirls. Make sure to clean your sandpaper frequently to avoid this issue.
5: Using the Wrong Type of Sandpaper:
Using the wrong type of sandpaper can also cause swirl marks. Use the correct grit and type of sandpaper for the surface you’re working on. For example, using sandpaper meant for metal on wood can leave behind swirl marks.
6: Sanding Against the Grain:
Sanding against the grain can also lead to swirl marks. This can cause the sander to create patterns that are difficult to remove. To avoid this, make sure to always sand with the grain.
7: Moving Too Quickly:
Moving the sander too quickly can also cause swirl marks. This can cause the sander to skip over areas, creating uneven patterns. To avoid this, take your time and move the sander slowly and steadily.
8: Using Worn-out Sandpaper:
Using worn-out sandpaper can also cause swirl marks. If the sandpaper is worn out or damaged, it may not be able to remove material evenly, causing the sander to leave behind marks. Make sure to replace your sandpaper frequently to avoid this issue.
Removing orbital sander swirl marks can be challenging, but understanding the common causes can help prevent them from occurring in the first place. Using the right sandpaper, avoiding circular motions, and taking time, you can achieve a smooth and professional-looking finish on your woodworking projects.
Here are 8 ways to remove swirl marks from the orbital sander
Orbital sanders are a popular tool for smoothing surfaces in woodworking projects, but they can also leave behind unsightly swirl marks.
Fortunately, you can use techniques of removing orbital sander swirl marks and achieve the smooth surface you desire. This article will explore eight effective ways to remove swirl marks from an orbital sander.

1: Sand with a Higher Grit Sandpaper:
A higher-grit sandpaper can help remove swirl marks from an orbital sander. Start with a grit one or two levels higher than the one you used initially, and work your way up gradually until the swirl marks disappear.
2: Use a Foam Sanding Pad:
A foam sanding pad can help remove swirl marks from an orbital sander. Foam pads are softer than regular sanding pads and can conform to the surface better, reducing the chances of creating new swirl marks.
3: Apply Pressure in a Different Direction:
Applying pressure in a different direction than the original swirl marks can help remove them. For example, if the swirl marks go in a circular motion, try sanding in a back-and-forth motion to remove them.
4: Sand by Hand:
Sanding by hand can be an effective way to remove stubborn swirl marks from an orbital sander. Use a sanding block or a piece of sandpaper wrapped around a flat object and sand in the direction of the grain.
5: Buff with a Polishing Compound:
Buffing with a polishing compound can help remove swirl marks from an orbital sander. Apply the compound to a soft cloth and buff the surface in a circular motion until the swirl marks disappear.
6: Wet Sanding:
Wet sanding can help remove swirl marks from an orbital sander. Wet the surface and the sandpaper, and sand in a back-and-forth motion. The water will help lubricate the surface and prevent new swirl marks from forming.
7: Use a Random Orbital Sander
Using a random orbital sander can help prevent swirl marks from forming in the first place. These sanders move randomly, reducing the chances of creating circular patterns that can lead to swirl marks.
8: Use a Sanding Sealer:
Applying a sanding sealer can help fill in the swirl marks and create a smooth surface. Apply the sealer with a brush or a rag, and let it dry before sanding the surface again with higher grit sandpaper.
You can also check out our other related article 7 best sanders for removing paint from metal:
8 tips to prevent swirl marks from the orbital sander
Preventing swirl marks from an orbital sander is much easier than removing them. Swirl marks can be frustrating to deal with, especially when you’re trying to achieve a flawless finish on your woodworking project.
However, by following simple tips, you can avoid creating swirl marks altogether. This article will explore eight effective tips for preventing swirl marks from an orbital sander.
1: Start with a Coarser Grit Sandpaper:
Starting with a coarser grit sandpaper can help prevent swirl marks from an orbital sander. A coarser grit will remove more material, making it easier to achieve a smooth surface without creating circular patterns that can lead to swirl marks.
2: Use a Vacuum or Dust Collector:
Using a vacuum or dust collector can help prevent swirl marks from an orbital sander. Dust buildup can clog the sandpaper and create uneven pressure, leading to swirl marks. By keeping the surface clean, you can prevent this from happening.
3: Keep the Sander Moving:
Keeping the sander moving can help prevent swirl marks from an orbital sander. Holding the sander in one spot for too long can create uneven pressure and circular patterns, leading to swirl marks. Keep the sander moving in a back-and-forth motion to avoid this.
4: Use a Random Orbital Sander:
Using a random orbital sander can help prevent swirl marks from forming in the first place. These sanders move randomly, reducing the chances of creating circular patterns that can lead to swirl marks.
5: Sand in the direction of the Grain:
Sanding in the direction of the grain can help prevent swirl marks from an orbital sander. Sanding across the grain can create circular patterns that can lead to swirl marks, so always sand in the direction of the grain.
6: Apply Even Pressure:
Applying even pressure can help prevent swirl marks from an orbital sander. Uneven pressure can create circular patterns that can lead to swirl marks. Make sure to apply even pressure across the surface to avoid this.
7: Use a Sanding Block:
Using a sanding block can help prevent swirl marks from an orbital sander. A sanding block will distribute pressure evenly and prevent circular patterns that can lead to swirl marks.
8: Finish with Fine Grit Sandpaper:
Finishing with fine-grit sandpaper can help prevent swirl marks from an orbital sander. Fine-grit sandpaper will remove any remaining imperfections and create a smooth surface without creating circular patterns that can lead to swirl marks.
FAQs
Removing orbital sander swirl marks can be challenging, especially if you’re new to woodworking or DIY projects.
This section will address some frequently asked questions (FAQs) about removing orbital sander swirl marks. By understanding these common questions, you can gain insight into the best ways of removing swirl marks and achieving a flawless project finish.
What causes orbital sander swirl marks?
Orbital sander swirl marks are typically caused by using too fine sandpaper or by applying too much pressure to the sander. Uneven pressure or sanding in circular patterns can also contribute to forming swirl marks.
Can I remove orbital sander swirl marks by hand?
Removing orbital sander swirl marks by hand is possible, but it can be a time-consuming and labor-intensive process. Using a sanding block and gradually working to a finer grit sandpaper can help remove swirl marks.
How have I removed all of the swirl marks?
You can use a light source to inspect the surface to ensure you have removed all the swirl marks. Shine a light at a low angle across the surface and look for circular patterns or imperfections. If you notice any, continue sanding until they are no longer visible.
Can I prevent orbital sander swirl marks from forming?
Yes, you can prevent orbital sander swirl marks from forming by using a random orbital sander, starting with coarser grit sandpaper and keeping the sander moving back and forth. A dust collector or vacuum can also help prevent swirl marks by keeping the surface clean and free from dust buildup.
Should I use a sanding sealer to prevent swirl marks?
A sanding sealer can help prevent swirl marks from forming, but it is unnecessary in all cases. A sanding sealer can help fill the pores and create a smoother surface if you are working with porous or open-grain wood.
Conclusion
Preventing swirl marks from an orbital sander requires attention to detail and proper techniques. You can prevent swirl marks from forming by starting with coarser grit sandpaper, using a vacuum or dust collector, and keeping the sander moving.
Using a random orbital sander, sanding in the direction of the grain, and applying even pressure are effective ways to prevent swirl marks.

Why Trust About Sanders?
When it comes to the world of sanding and sanders, you need a trusted source of information and guidance to ensure you achieve those perfect finishes. That's where I come in – I'm Martin, a dedicated sanding enthusiast with a relentless passion for attaining flawless surfaces. With years of hands-on experience in the sanding industry, I've honed my skills and expertise to provide you with the most reliable and accurate insights. What sets me apart is my commitment to excellence. I meticulously handpick each sander after rigorous testing, ensuring that only the best tools make it to your hands. My goal is to empower you with the knowledge and recommendations you need to tackle any sanding task confidently. When you trust About Sanders, you're putting your faith in a seasoned expert who shares your passion for perfection and strives to deliver top-notch information and reviews for every sanding challenge.
