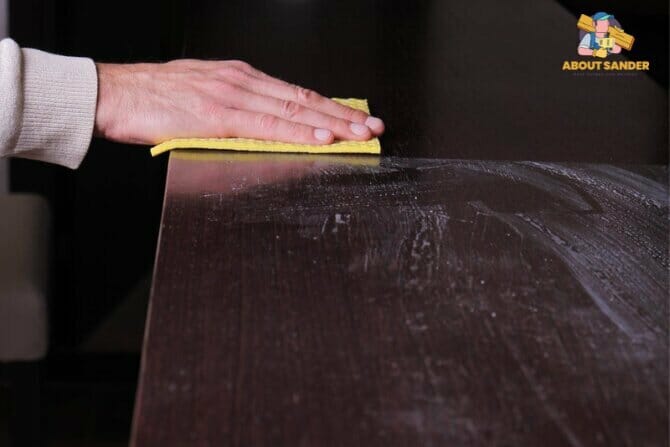
Understanding how to use liquid sandpaper is essential to achieving a smooth and clean finish. Liquid sandpaper, also known as deglosser, is a convenient alternative to traditional sandpaper, providing an efficient and effective way to prepare surfaces for painting or staining.
So, let’s dive in and discover how to use liquid sandpaper to transform your feelings with ease and precision.
Types of Liquid Sandpaper and Their Uses
| Types of Liquid Sandpaper | Sizes Available | Definition | Benefits | Common Applications | Safety Precautions |
| Gel Liquid Sandpaper | Various | A chemical solution used for surface prep | – Removes glossy finishes and prepares surfaces for painting or refinishing | – Woodworking projects | – Read and follow the manufacturer’s instructions carefully |
| Spray Liquid Sandpaper | Aerosol cans | An easy-to-use spray form of liquid sander | – Provides quick and convenient application | – Smaller projects and intricate areas | – Work in a well-ventilated area or use a respiratory mask |
| Liquid Sandpaper Wipes | Pre-soaked pads | Pre-soaked pads for effortless application | – Offers convenience and eliminates the need for additional tools | – Quick touch-ups and small-scale projects | – Wear protective gloves and eye goggles to prevent skin and eye irritation |
Key Takeaways:
- Liquid sandpaper, also known as deglosser, is a convenient and efficient product for surface preparation before painting or refinishing projects.
- When using liquid sandpaper, it is important to prioritize safety by reading and following the manufacturer’s instructions, wearing protective gear, working in a well-ventilated area, and avoiding skin and eye contact.
- Liquid sandpaper may have some disadvantages, including limited removal of deep stains or imperfections, potential chemical hazards, inability to correct structural damage, limited application on certain surfaces, and the possibility of residue or adhesion issues.
- Understanding the compatibility of liquid sandpaper with different surfaces and materials is crucial. While it is generally suitable for wood, metal, and painted surfaces, it may not be appropriate for plastic or laminate surfaces.
- By addressing frequently asked questions and understanding the nuances of using liquid sandpaper, you can make informed decisions and achieve professional results in your surface preparation projects.
What is liquid sandpaper?

Liquid sandpaper, or diglossia, is a chemical solution to prepare surfaces for painting or refinishing without traditional sanding. It is an alternative to the labor-intensive process of manually sanding surfaces with sandpaper.
Liquid sandpaper typically contains solvents that dissolve the glossy or varnished finish on the surface, creating a rougher texture that allows paint or primer to adhere better.
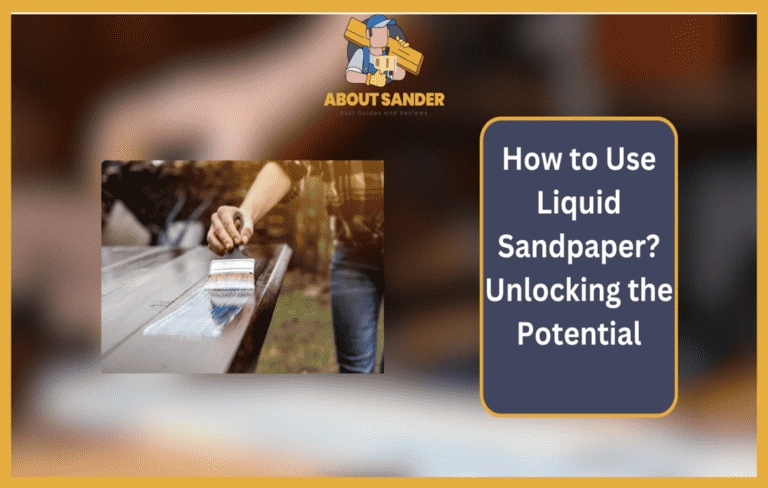
Here are 6 steps of How to use liquid sandpaper.
In this comprehensive guide, we will walk you through the step-by-step process of using liquid sandpaper to prepare your surfaces flawlessly. So, let’s delve into the world of liquid sandpaper and unlock its potential for transforming your projects.
Step 1: Gather the Necessary Materials
Before diving into the process, ensure you have all the materials required. You will need liquid sandpaper, disposable gloves, a lint-free cloth or sponge, and safety goggles. It’s essential to prioritize safety throughout the process.
Step 2: Prepare the Work Area
Create a well-ventilated workspace by opening windows or using fans. Adequate ventilation helps dissipate any fumes from the liquid sandpaper. Cover the surrounding areas and flooring with drop cloths or plastic sheets to protect them from potential spills or splatters.
Step 3: Wear Protective Gear
Put on your disposable gloves and safety goggles before handling the liquid sandpaper. This will protect your hands from chemical exposure and your eyes from potential splashes.
Step 4: Apply the Liquid Sandpaper
Dampen a lint-free cloth or sponge with liquid sandpaper. Apply the solution generously onto the surface you wish to prepare. Work in small sections to ensure even coverage and avoid drying out the liquid sandpaper before it can dissolve the finish properly.
Step 5: Allow Dwell Time and Wipe Off
Allow the liquid sandpaper to dwell on the surface for the recommended time specified on the product label. This dwell time allows the solution to dissolve the existing finish and prepare the surface for painting or refinishing. After the designated dwell time, use a clean cloth or sponge to wipe off the dissolved residue and the loosened finish.
Step 6: Clean and Dry the Surface
Once you have wiped off the liquid sandpaper residue, clean the surface thoroughly with a damp cloth or sponge to remove any remaining debris or residue. Then, use a dry cloth to ensure the surface is completely dry before proceeding with your painting or refinishing project.
5 Best Techniques for Using Liquid Sandpaper Effectively.
As an expert in surface preparation, you understand the importance of using the proper techniques to achieve outstanding results. This guide will delve into five expert techniques for using liquid sandpaper effectively, ensuring a smooth and professional finish on your woodworking projects.
1: Choose the Right Type of Liquid Sandpaper
Not all liquid sandpapers are created equal. It’s important to select the right product for your specific project. Some liquid sandpapers are designed for delicate surfaces, while others are more suitable for heavy-duty applications.
2: Test on a Small, Inconspicuous Area
Before applying liquid sandpaper to the entire wood surface, it’s advisable to perform a test on a small, inconspicuous area. This will help you determine the product’s effectiveness and ensure it doesn’t cause any adverse reactions or damage to the wood. Apply a small amount of liquid sandpaper and follow the instructions.
3: Follow the Manufacturer’s Instructions
Each liquid sandpaper product may have specific instructions for application and dwell time. It’s crucial to carefully read and follow the manufacturer’s instructions provided on the label. These instructions will guide you on correctly using liquid sandpaper, ensuring optimal results and preventing potential issues.
4: Use Appropriate Tools and Techniques
To maximize the effectiveness of liquid sandpaper, it’s essential to use the right tools and techniques. Apply the liquid sandpaper evenly using a lint-free cloth or sponge, working in small sections. Ensure thorough coverage and avoid excessive application, possibly leading to a longer drying time.
5: Follow Up with Proper Cleaning and Priming
After using liquid sandpaper, cleaning the wood surface thoroughly is crucial. Use a damp cloth or sponge to remove residual liquid sandpaper and debris. Allow the surface to dry completely before proceeding with priming or painting. Applying a suitable primer will further enhance the adhesion of the paint or finish, ensuring a durable and long-lasting result.
Benefits of Using Liquid Sandpaper Deglosser Over Traditional Sanding Methods
There are several benefits to using liquid sandpaper deglosser over traditional sanding methods, including:
Faster and more efficient:
Wood deglosser is much faster and more efficient than sanding, as it can cover large areas quickly without creating dust or debris.
Easier to use:
Liquid sandpaper deglosser is easy to apply with a brush or cloth and doesn’t require any special tools or equipment.
Less mess:
Unlike sanding, liquid sandpaper deglosser doesn’t create dust or debris, making it less messy and easier to clean up.
More environmentally friendly:
Liquid sandpaper deglosser is more environmentally friendly than sanding, as it doesn’t create any dust or debris that can harm the environment.
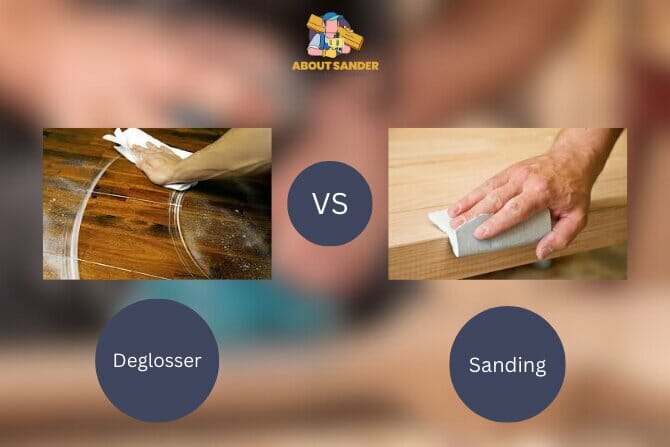
Comparison of Deglosser vs. Sanding

While both liquid sandpaper deglosser and traditional sanding methods are used to prepare wooden surfaces for refinishing or painting, there are several differences between the two methods.
Speed:
Liquid sandpaper deglosser is much faster than sanding, as it can cover large areas quickly without creating dust or debris.
Mess:
Liquid sandpaper deglosser is less messy than sanding, as it doesn’t create dust or debris.
Efficiency:
Liquid sandpaper deglosser is more efficient than sanding, as it can effectively remove the glossy finish from the wood surface.
Cost:
Liquid sandpaper deglosser is generally more expensive than sandpaper, but it can be more cost-effective in terms of time and labor savings.
Safety First: Important Tips for Using Liquid Sandpaper for Wood and Other Materials

As an expert in surface preparation, your expertise extends beyond achieving flawless finishes. Ensuring safety during the process is of utmost importance. This guide will discuss five crucial safety tips on using liquid sandpaper effectively while protecting yourself and your surroundings.
1: Read and Follow the Manufacturer’s Instructions
Before using any liquid sandpaper product, thoroughly read and understand the manufacturer’s instructions on the label. The instructions will outline the recommended safety precautions, such as using protective gear and working in well-ventilated areas.
2: Wear Protective Gear
When working with liquid sandpaper, protecting yourself from potential hazards is crucial. Wear protective gear, including safety goggles to shield your eyes from splashes or fumes, and disposable gloves to prevent direct contact with the product. Additionally, consider wearing a respiratory mask if working in an area with poor ventilation.
3: Work in a Well-Ventilated Area
Liquid sandpaper may emit fumes that can be harmful if inhaled in excessive amounts. Always work in a well-ventilated area or use fans and open windows to ensure proper air circulation. Adequate ventilation will help dissipate fumes and minimize respiratory irritation risk.
4: Avoid Skin and Eye Contact
Liquid sandpaper can cause skin irritation or chemical burns upon contact. Avoid direct skin contact by wearing protective gloves and long sleeves. In case of accidental contact, rinse the affected area with water and seek medical attention if necessary. Similarly, protect your eyes by wearing safety goggles to prevent splashes or drips from coming into contact with your eyes.
5: Properly Dispose of Waste and Clean Up
After using liquid sandpaper:
- Handle waste and clean up with care.
- Dispose of used cloths, sponges, or any other materials saturated with liquid sandpaper properly.
- Seal them in a plastic bag and dispose of them according to local regulations.
- Thoroughly clean any spills or drips with an absorbent material and dispose of it similarly.
5 Advantages of Using Liquid Sandpaper

When it comes to sanding surfaces for various projects, traditional sandpaper has long been the go-to tool. However, liquid sandpaper is a more convenient and efficient option today. As someone experienced in sanding using sandpaper, I can attest to the numerous advantages liquid sandpaper brings. This article will explore how these benefits can enhance your sanding experience and overall project outcomes.
Convenience and Ease of Use:
One of the critical advantages of liquid sandpaper is its convenience and ease of use. With traditional sandpaper, you often spend considerable time and effort changing grits, dealing with dust, and discarding worn-out sheets. Liquid sandpaper eliminates the need for conventional sandpaper. It comes in a liquid form that can be easily applied with a cloth or sponge. The smooth application and absence of dust make it a breeze, saving you valuable time and effort during your sanding process.
Versatility:
Liquid sandpaper is a highly versatile product used on various surfaces. Whether you’re working on wood, metal, or plastic, this product is designed to accommodate different materials, making it a valuable tool for many projects. Liquid sandpaper can deliver consistent and effective results regardless of your project needs.
Better Adhesion and Paint Finish:
A flawless paint finish requires a smooth and clean surface. Liquid sandpaper excels in this regard. It effectively removes old finishes, stains, and imperfections, providing a fresh canvas for your paint. Creating a smooth surface enhances paint adhesion, producing a more professional-looking finish. Say goodbye to the frustration of bumpy or uneven paint surfaces—liquid sandpaper ensures a seamless painting experience.
Cost-Effective:
Another significant advantage of using liquid sandpaper is its cost-effectiveness. Traditional sandpaper often needs frequent replacement as it wears down quickly. Liquid sandpaper, on the other hand, offers a long-lasting and efficient formula. A little goes a long way, requiring less product than traditional sandpaper. This saves you money on sandpaper replacements and makes it a cost-effective choice for your sanding projects.
Environmentally Friendly:
Considering our choices’ environmental impact is essential in today’s eco-conscious world. Liquid sandpaper offers an environmentally friendly alternative. It significantly reduces waste generated by disposable sandpaper sheets. Additionally, liquid sandpapers with non-abrasive properties help minimize material loss during the sanding process. Some liquid sandpaper products are biodegradable or water-based, reducing their ecological footprint.
Understanding the Disadvantages of Using Liquid Sandpaper
While liquid sandpaper, also known as diglossia, offers convenience and efficiency in surface preparation, it is important to be aware of its potential drawbacks. This guide will explore five common disadvantages of using liquid sandpaper, allowing you to weigh the pros and cons
before incorporating it into your workflow.
1: Limited Removal of Deep Stains or Imperfections
Liquid sandpaper is primarily designed to remove glossy finishes and prepare surfaces for painting or refinishing. However, it may be less effective in removing deep stains, heavy blemishes, or imperfections on the surface. In such cases, traditional sanding methods may be more suitable for achieving the desired level of surface restoration.
2: Potential Chemical Hazards
Liquid sandpaper contains solvents and chemicals that can be hazardous if not handled properly. While using the product, following safety guidelines, such as wearing protective gear and working in well-ventilated areas, is crucial. Failure to do so may result in skin irritation, respiratory issues, or other adverse health effects.
3: Inability to Correct Structural Damage
Liquid sandpaper is not a solution for repairing structural damage, such as cracks, dents, or gouges in the surface. It is primarily focused on surface preparation rather than structural repairs. Addressing the underlying issues appropriately before using liquid sandpaper for significant damage is recommended.
4: Limited Application on Certain Surfaces
While liquid sandpaper is versatile and suitable for various surfaces, specific materials may have limitations. Some characters, such as plastic or laminate, may not be compatible with liquid sandpaper and require alternative methods for surface preparation. Always check the product instructions and consult with experts if you still decide to use liquid sandpaper on a particular surface.
5: Potential Residue or Adhesion Issues
If liquid sandpaper residue is cleaned correctly or is compatible with the subsequent coatings, it may lead to adhesion issues or compromise the quality of the finish. It is crucial to thoroughly clean the surface after using liquid sandpaper and ensure compatibility with the paint or finish you intend to apply.
FAQs
Understanding the ins and outs of this product will empower you to achieve professional results on your painting or refinishing projects. This guide will address three frequently asked questions (FAQs) about using liquid sandpaper, providing you with the clarity you need to proceed confidently.
Can liquid sandpaper be used on all surfaces?
Liquid sandpaper is generally suitable for various surfaces, including wood, metal, and painted surfaces. However, it may not be compatible with certain materials, such as plastic or laminate. Always check the product label and instructions to ensure it is appropriate for the specific surface you intend to prepare.
Is liquid sandpaper a substitute for traditional sanding?
Liquid sandpaper is not a direct substitute for traditional sanding. While it offers convenience and time-saving benefits, it may be less effective in removing deep stains, heavy blemishes, or correcting structural damage.
How should I clean the surface after using liquid sandpaper?
After using liquid sandpaper, it is crucial to clean the surface thoroughly to remove any residue and prepare it for the subsequent steps, such as priming or painting. Use a damp cloth or sponge to remove the dissolved residue and debris. Ensure that the surface is completely dry before proceeding with the next steps.
What is liquid sandpaper used for?
Liquid sandpaper is used for prepping surfaces before painting or refinishing by removing the glossy finish, dirt, and grease.
Is liquid sandpaper good to use?
Yes, liquid sandpaper is good to use as it effectively prepares surfaces for painting or refinishing, offering convenience and ease of use.
How long do you leave liquid sandpaper on?
Typically, you leave liquid sandpaper on for a few minutes before wiping it off. However, specific instructions may vary by product.
Does liquid sandpaper remove varnish?
Yes, liquid sandpaper can remove varnish by softening and dissolving the finish, making it easier to remove with a cloth or scraper.
Is liquid sandpaper deglosser safe to use?
Yes, liquid sandpaper deglosser is safe according to the manufacturer’s instructions. However, wearing gloves and protective eyewear and working in a well-ventilated area is essential.
Can liquid sandpaper deglosser be used on all types of wood?
Liquid sandpaper deglosser can be used on most types of wood, including oak, maple, and pine. However, it is always a good idea to test the product on a small, inconspicuous area before applying it to the entire surface.
Can I apply a new finish immediately after using liquid sandpaper deglosser?
No, you should wait at least 24 hours after using liquid sandpaper deglosser before applying a new finish. This allows the wood to dry thoroughly and the solvents in the deglosser to evaporate.
Do I still need to sand the wood surface after using a liquid sandpaper deglosser?
No, sanding is not necessary after using a liquid sandpaper deglosser. However, if the wood surface has rough spots or imperfections, sanding can be done to smooth it out before applying a new finish.
Can I use a liquid sandpaper deglosser to remove the paint?
Yes, liquid sandpaper deglosser can remove paint from wood surfaces. However, it may take several applications and some scraping to clear the paint fully. It is also important to wear gloves and protective eyewear and work in a well-ventilated area when using liquid sandpaper deglosser to remove paint.
How Long to Wait Before Applying a New Finish
After using the paint deglosser, you should wait at least 24 hours before applying any new finish or paint. This will give the surface enough time to dry and ensure the new finish adheres appropriately.
Conclusion
In conclusion, understanding how to use liquid sandpaper effectively is crucial for achieving outstanding results in surface preparation. By following the recommended techniques, you can ensure a smooth and professional finish on your woodworking projects. Additionally, prioritizing safety by wearing protective gear, working in well-ventilated areas, and avoiding skin and eye contact is essential.

Why Trust About Sanders?
When it comes to the world of sanding and sanders, you need a trusted source of information and guidance to ensure you achieve those perfect finishes. That's where I come in – I'm Martin, a dedicated sanding enthusiast with a relentless passion for attaining flawless surfaces. With years of hands-on experience in the sanding industry, I've honed my skills and expertise to provide you with the most reliable and accurate insights. What sets me apart is my commitment to excellence. I meticulously handpick each sander after rigorous testing, ensuring that only the best tools make it to your hands. My goal is to empower you with the knowledge and recommendations you need to tackle any sanding task confidently. When you trust About Sanders, you're putting your faith in a seasoned expert who shares your passion for perfection and strives to deliver top-notch information and reviews for every sanding challenge.
