This comprehensive guide teaches how to use wet and dry sandpaper on metal. Whether trying to remove rust, corrosion, or imperfections or achieve a smooth, mirror-like finish, damp and dry sandpaper can be a powerful tool in your arsenal.
From selecting the correct grit to proper technique and safety tips, this guide covers everything you need to know to get the most out of your sandpaper and achieve the results you’re looking for.
Key Takeaways:


- Wet and dry sandpaper can be a powerful tool for improving the look and feel of metal surfaces, whether you want to remove rust, imperfections, or achieve a polished finish.
- Selecting the correct grit of sandpaper is crucial. Coarser grits (80 or 120) are best for removing rough spots and rust, while finer grits (220 or 320) are ideal for achieving a polished finish.
- Prepare your workspace and tools before sanding, including covering the area with a drop cloth, having all necessary tools ready, and wearing safety gear like goggles and gloves.
- Follow a step-by-step guide for sanding metal, which includes cleaning the surface, using coarse grits first and then progressing to finer grits, and checking progress regularly.
- Tips for achieving the best results: start with coarse grit and work up to finer grit, use light pressure to avoid deep scratches, keep the sandpaper and metal surface wet during wet sanding to prevent clogging and reduce heat buildup, and be patient as sanding metal can be time-consuming.
How to use wet and dry sandpaper on metal: A Friendly Guide

If you want to improve the look and feel of your metal surfaces, sanding with wet and dry sandpaper can be a game-changer. In this guide, we’ll show you how to use wet and dry sandpaper on the metal to achieve various finishes.
From removing rust and imperfections to achieving a smooth, mirror-like surface, this guide covers everything you need to know to get started.
How to sand metal?
Knowing how to use wet and dry sandpaper on metal is essential for achieving a smooth, polished finish on your metal projects. By following these simple steps and tips, you can achieve great results and take pride in your finished work!
Step 1: Choosing the Right Sandpaper Grit for Your Metal:
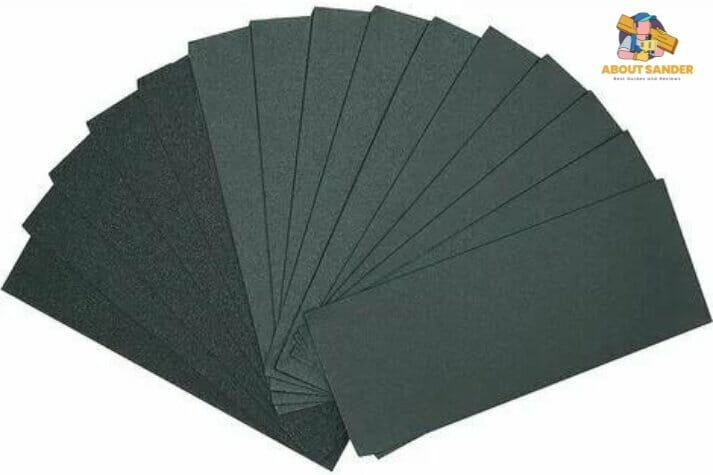
The first step in sanding metal is to choose the correct sandpaper grit for your project. Coarser grits, such as 80 or 120, are best for removing rough spots, rust, or old paint. Finer grits, such as 220 or 320, are ideal for smoothing scratches and achieving a polished finish.
When using wet and dry sandpaper on metal, selecting sandpaper suitable for both wet and dry sanding is essential. Wet and dry sandpaper is made with waterproof backing material, which allows it to be used with water or other liquids to reduce friction and prevent clogging.
Step 2: Preparing Your Workspace and Tools:
Before you start sanding, it’s essential to prepare your workspace and tools. Cover your work area with a drop cloth or newspaper to protect it from scratches and debris.
Ensure you have all the necessary tools and materials, including sandpaper, a sanding block, a bucket of water, and safety gear such as goggles and gloves.
Step 3: Step-by-Step Guide to Sanding Metal:
Now that you have everything you need, it’s time to start sanding your metal project! Here’s a step-by-step guide:
- Begin by cleaning the metal surface with soap and water to remove any dirt or grease.
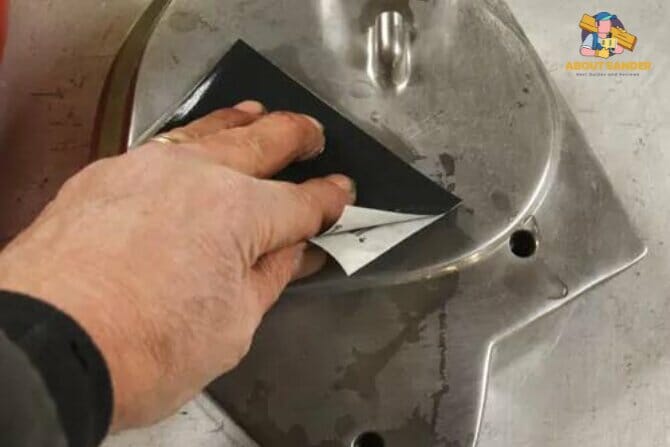
- If there are any rough spots, rust, or old paint, use coarse grit sandpaper to remove them.
- Next, switch to a finer grit sandpaper and continue sanding until the surface is smooth and even.
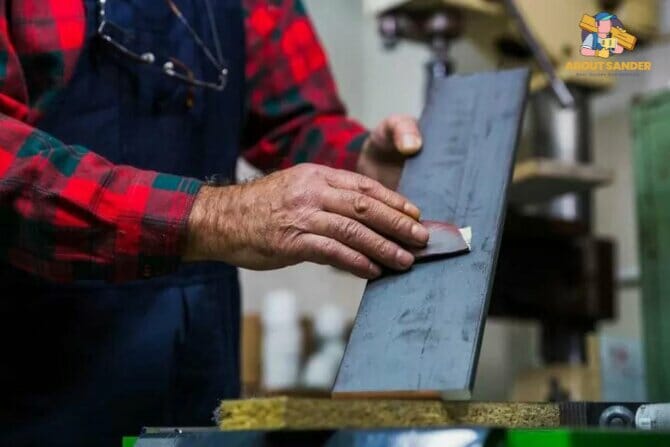
- If sanding a curved or irregular surface, wrap the sandpaper around a sanding block to ensure even pressure and avoid scratches.
- After achieving the desired smoothness level, wipe the surface with a clean, damp cloth to remove any dust or debris.
Step 4: Tips for Achieving the Best Results When Sanding Metal:
To get the best results when sanding metal, here are some tips to keep in mind:
- Start with a coarse grit sandpaper and work up to a finer grit.
- Use light pressure when sanding to avoid creating deep scratches or dents.
- Keep the sandpaper and metal surface wet when wet sanding to prevent clogging and reduce heat buildup.
- Check your progress frequently to ensure you’re achieving the desired level of smoothness.
- Finally, take your time and be patient – sanding metal can be time-consuming, but the results are worth it!
Best way to sand metal:
Here’s a comprehensive guide on the best way to sand metal using wet and dry sandpaper:

Step 1: Determine the Type of Metal Surface:
Before you start sanding, it’s essential to determine the type of metal surface you’re working with. The kind of metal surface will select the grit size of the sandpaper you’ll need to use.
Step 2: Prepare the Surface for Sanding:
The metal surface should be thoroughly cleaned and dried before you begin sanding. Any dirt, debris, or rust should be removed to prevent it from being ground into the surface during sanding.
Step 3: Choose the Right Sandpaper Grit:
Select the appropriate sandpaper grit based on the type of metal surface you’re working with. For rough surfaces or surfaces with rust, use coarse grit sandpaper, such as 80 or 120. For smoother surfaces, use finer grit sandpaper such as 220 or 320.
Step 4: Wet or Dry Sanding:
Decide whether you’ll be wet or dry sanding. Wet sanding involves using water or a lubricant to reduce heat and friction while sanding. Dry sanding does not include any added oil. Wet sanding is recommended for larger surfaces or surfaces that require more smoothing.
Step 5: Sanding Technique:
Use a sanding block or wrap the sandpaper around a piece of wood to ensure even pressure and avoid creating deep scratches or dents. Begin sanding with the coarsest grit sandpaper and work up to the finer grit sandpaper. Be sure to keep the sandpaper wet or lubricated during the process to prevent clogging.
Step 6: Check Your Progress:
Check your progress frequently to ensure that you achieve the desired smoothness level. If you notice any deep scratches or uneven surfaces, switch to coarser grit sandpaper and continue sanding until you reach the desired level of smoothness.
In conclusion, knowing how to use wet and dry sandpaper on metal is essential for achieving a smooth surface when sanding metal.
By following these simple steps and tips, you can achieve great results and take pride in your finished work! Remember to select the appropriate grit sandpaper, decide whether you’ll be wet or dry sanding, and use the proper sanding technique to achieve the best results.
Maintaining Your Tools:
When using wet and dry sandpaper on metal, keeping your tools in good condition is essential. Proper maintenance can help your sandpaper last longer and ensure that your sanding results are consistent and effective. Here are some tips on how to maintain your tools when using wet and dry sandpaper on metal:

1. Clean Your Sandpaper:
Regularly One of the best ways to extend the life of your sandpaper is to clean it regularly. Over time, dirt, dust, and debris can accumulate on the sandpaper, making it less effective. You can use a sandpaper cleaning block or a rubber eraser to clean your sandpaper.
Simply rub the block or eraser over the sandpaper to remove any build-up. This will help restore the sandpaper’s abrasiveness and ensure it lasts longer.
2. Store Your Sandpaper Properly:
Another way to maintain it is to store it properly. Wet and dry sandpaper should be held in a cool, dry place to prevent moisture from affecting the abrasive material.
You can also store your sandpaper in a plastic bag or container to keep it clean and protect it from dust and debris.
3. Take Care of Your Sanding Tools:
Your sanding tools also require proper maintenance to ensure they last a long time. After each use, clean your sanding tools thoroughly to remove any debris or residue.
This will prevent the build-up of waste that can reduce the effectiveness of your tools. You should also lubricate any moving parts of your tools to prevent rust and corrosion.
4. Replace Worn-out Sandpaper:
No matter how well you maintain your sandpaper, it will eventually wear out. When your sandpaper becomes worn or torn, it’s time to replace it. Using worn-out sandpaper can make your sanding job more complex and less effective. Keep a variety of grits on hand so you can return your sandpaper as needed.
5. Keep Safety in Mind:
Finally, when maintaining your tools, make sure to keep safety in mind. Always wear eye protection and a dust mask when sanding metal.
Ensure your sanding tools are in good condition and functioning correctly before use. And always follow proper safety guidelines when working with wet and dry sandpaper on metal.
FAQs:
Here are some possible FAQs on using wet and dry sandpaper on metal:
What is damp and dry sandpaper?
Wet and dry sandpaper is an abrasive material that can remove rust, corrosion, and imperfections from metal surfaces. It can be used damp or dry and comes in various grit sizes.
What grit size should I use for sanding metal?
The grit size you use will depend on the type of metal you are sanding and the level of abrasion you need. Generally, for heavy-duty sanding and removing imperfections, you should use a coarse grit (e.g., 60-80 grit), while for finishing and smoothing, you should use a finer grit (e.g., 200-400 grit).
How do I know when to replace my sandpaper?
You should return your sandpaper when it becomes worn or torn. Using worn-out sandpaper can make your sanding job more complex and less effective.
Should I use wet or dry sandpaper on metal?
Both wet and dry sandpaper can be used on metal. Wet sanding is preferred for removing heavy rust or corrosion, while dry sanding is better for polishing and finishing.
How do I clean wet and dry sandpaper?
You can use a sandpaper cleaning block or a rubber eraser to clean your sandpaper. Simply rub the block or eraser over the sandpaper to remove any build-up. This will help restore the sandpaper’s abrasiveness and ensure it lasts longer.
Conclusion:
In conclusion, using wet and dry sandpaper on metal can effectively remove rust, corrosion, and other imperfections from metal surfaces. You can achieve a smooth and polished finish on your metal projects by following proper techniques and using the correct grit size.
Maintaining your sanding tools and sandpaper is essential to ensure their effectiveness and longevity. With these tips and precautions, you can safely and effectively use wet and dry sandpaper on metal for your DIY projects or professional work.

Why Trust About Sanders?
When it comes to the world of sanding and sanders, you need a trusted source of information and guidance to ensure you achieve those perfect finishes. That's where I come in – I'm Martin, a dedicated sanding enthusiast with a relentless passion for attaining flawless surfaces. With years of hands-on experience in the sanding industry, I've honed my skills and expertise to provide you with the most reliable and accurate insights. What sets me apart is my commitment to excellence. I meticulously handpick each sander after rigorous testing, ensuring that only the best tools make it to your hands. My goal is to empower you with the knowledge and recommendations you need to tackle any sanding task confidently. When you trust About Sanders, you're putting your faith in a seasoned expert who shares your passion for perfection and strives to deliver top-notch information and reviews for every sanding challenge.
