Master how to sand metal surfaces faster. Expert tips for achieving a smooth finish on different metal projects. Elevate your skills!
Do you know How to Sand Metal Faster? Sanding metal can be a tedious and time-consuming process, with many surfaces requiring several hours to properly sand down and achieve the desired finish. But it doesn’t have to be this way!
By carefully selecting the correct sandpaper grit and utilizing the appropriate techniques, you can sand metal faster while achieving similar results as if you’d spent hours doing it by hand. This complete guide will give you step-by-step instructions on sanding metal faster, allowing you to spend less time on this process while still achieving great results.
Key Takeaways:
- Sanding metal is a great way to achieve a smooth and polished finish on your metal projects.
- You can sand metal by hand using sandpaper and a sanding block or pad.
- Choosing the right sandpaper grit is important for achieving the desired finish.
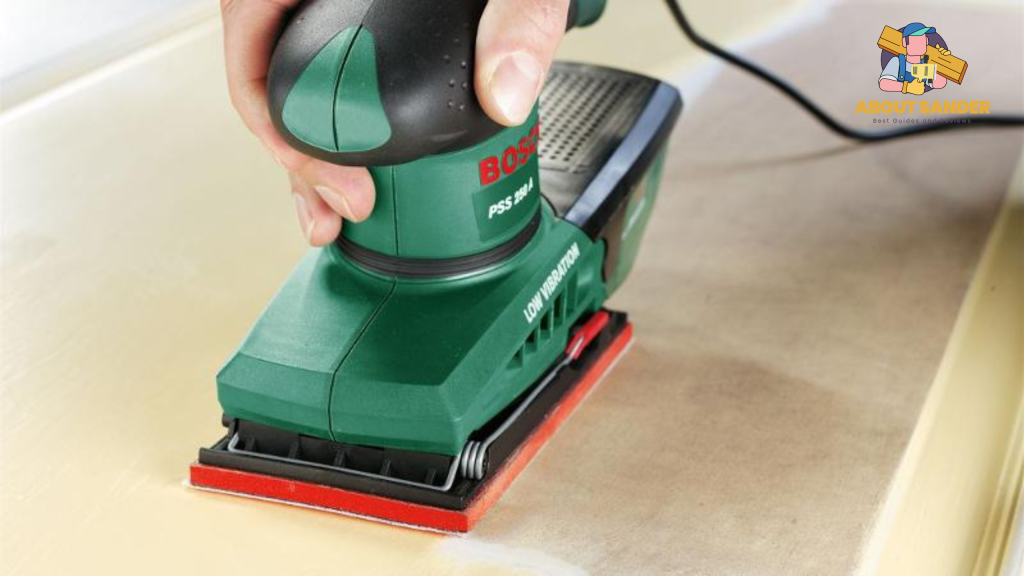
- A power sander can make the sanding process quicker and easier, but it’s only sometimes necessary.
- To achieve a polished finish when sanding metal, here we start with a coarse grit sandpaper and work up to a very fine grit, such as 220 or 320.
How to Sand Metal Faster in Easy Steps
- Sand 1/2 of the item at a time, turn over after sanding one side.
- Use 220 grit sandpaper and rub firmly in straight lines across metal with a back-and-forth motion for 5-10 seconds for each metal section until the entire area is flat with no ridges left from the sandpaper.
- Move on to 400 grit sandpaper (if needed), rubbing as before in straight lines, but only in one direction (back and forth) again for 5-10 seconds per section.
- Use 600 grit sandpaper, if necessary, again using it only in one direction (back and forth) for 5-10 seconds per section. Sand until all ridges are gone.
- Use 800 grit sandpaper, if necessary, once more using it only in one direction (back and forth) for 5-10 seconds per section.
- Finally, use 1000 grit sandpaper to smooth out any remaining imperfections or rough spots on your metal piece that remain after steps 1 through 6 have been completed.
- Wipe down all surfaces of your metal piece with a cloth soaked in mineral spirits.
- Allow your piece to dry completely.
- Polish your metal by hand with steel wool, and then buff it by hand with a soft cotton cloth
- Repeat steps 1 through 10 to sand another side of the object
- Apply clear coat sealant
- Enjoy!
2 Ways to sand down the metal faster
Sanding metal with sandpaper can be a lengthy and tedious process. It’s also an essential part of many metalworking projects, so it’s something you have to do if you want your project to look nice and want to know how to sand metal smoothly.
1st Method: Sanded Steel – The Best Way to Sand Metal:
Here’s what you need to know:
1. Why sanded steel is superior:
Sanded steel is a popular option because it offers several advantages over other types of metal. For example, it is smoother, more polished, and has fewer imperfections than other types of metal. Additionally, sanded steel is more resistant to rust and other types of corrosion.
2. Different sanding methods for different metals:
The type of metal you work with will dictate the sanding method you should use. For example, softer metals like aluminum may require a finer grit sandpaper than harder metals like steel.
3. Choosing the right sandpaper grit:
To achieve the best results, it’s important to choose the right sandpaper grit. For example, if sanding down a rough surface, start with a coarse grit and work up to a finer grit for a smoother finish.
4. Mastering the Art of Metal Sanding:
When sanding metal, it’s important to take time and use even pressure to avoid damaging the surface. A sanding block or pad can help you achieve a more even finish.
Following these tips, you can achieve a beautifully sanded steel finish to make your metal project stand out. So if you’re wondering how to sand metal, consider sanded steel your go-to option for professional-looking results.
2nd Method: Strip it Down
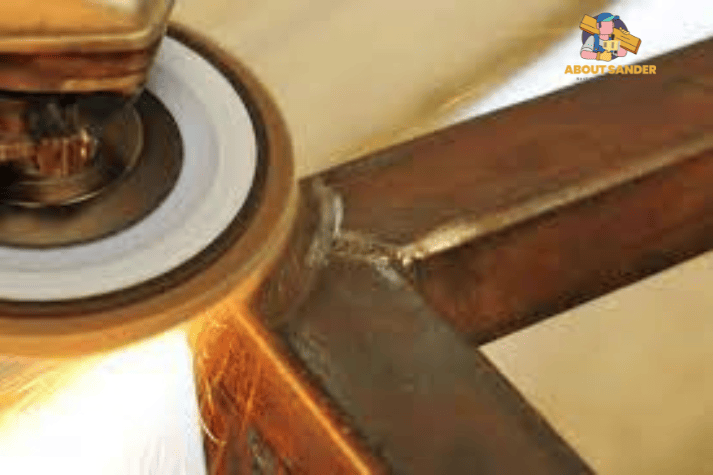
If you want to achieve a smooth and polished finish on your metal project, knowing how to sand down metal properly is important. Here are the steps to get you started:
1. Understand the metal surface:
Before you start sanding, it’s important to understand the surface of the metal you’re working with. Is it smooth or rough? Are there any dents or scratches? Understanding the surface will help you determine the right sanding method and sandpaper grit.
2. Tools needed for sanding down metal:
You’ll need a few tools to get started, including sandpaper, a sanding block or pad, and possibly a power sander. Choosing the right sandpaper grit for the job and using a sanding block or pad to ensure even pressure is important.
3. A step-by-step guide to sanding down metal:
Start by rough sanding the surface with coarse grit sandpaper, such as 60 or 80. Use a circular motion and apply even pressure to avoid creating scratches or uneven areas. As you progress, move up to a finer grit sandpaper, such as 120 or 150, until you achieve a smooth surface. If necessary, use a power sander for larger or more complex surfaces.
4. Finishing touches:
Once you’ve achieved a smooth surface, finish with a final sanding using very fine grit sandpaper, such as 220 or 320. This will give you a polished and professional-looking finish.
Following these steps, you can strip it down and achieve a smooth finish when sanding down metal. So if you’re wondering how to sand metal, remember to take your time and use the right tools and techniques.
Understanding the Different Types of Metal Surfaces:
Understanding the different types of metal surfaces is crucial when it comes to sanding metal. Different types of metal surfaces require different sanding techniques and sandpaper grits. Here are some common types of metal surfaces and how to approach sanding them:
| Type of Metal Surface | Description | Recommended Sanding Technique | Recommended Sandpaper Grit |
| Smooth and Shiny | These surfaces are already smooth and shiny, such as chrome or stainless steel. | Use a very fine grit sandpaper, such as 320 or higher, and use a polishing compound for a mirror-like finish. | 320 or higher |
| Painted or Coated | These surfaces have a layer of paint or coating on them. | Use a medium grit sandpaper, such as 120, to remove the paint or coating. Then switch to a finer grit, such as 220 or higher, to smooth out the surface. | 120, then 220 or higher |
| Rough and Rusty | These surfaces are rough and may have rust or other imperfections. | Start with a coarse grit sandpaper, such as 60 or 80, to remove the roughness and imperfections. Then work your way up to a finer grit, such as 220 or higher, for a smoother finish. | 60 or 80, then 220 or higher |
Types of sandpaper for sanding metal
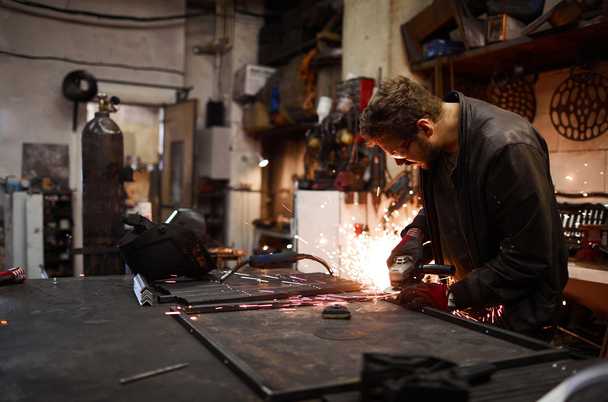
There are several different types of sandpaper out there, and each kind has a different purpose. The type of sandpaper you choose will depend on what type of project you’re working on and how fine you want your surface to be. Sandpaper can be made with many different materials as well.
Most commonly, it’s made from glass or emery paper, which comes in various grits (fineness). The standard grit sizes are 40, 60, 80, 100, 120, 150, and 180. The higher the number, the finer and smoother your sanded surface will be. You can also find sandpaper coated with aluminum oxide or silicon carbide for use on steel, cast iron, and other hard metals.
Other kinds of sandpaper you must know.
While sanding metal with sandpaper you may need these:
• Sanding blocks:
Sanding blocks are an easy way to sand small areas without using a lot of elbow grease. They’re often used for smoothing surfaces before painting them or applying varnish or lacquer.
• Hook-and-loop disc pads:
These discs consist of hook-and-loop fasteners attached to two pieces of sandpaper—one rough side for removing material quickly and one smooth side for finishing work. Many woodworkers like these because they’re easy to use and don’t require any sanding blocks.
• Wet/dry sandpaper:
This sandpaper can be used wet or dry, depending on what you need. It comes in rolls and sheets, but most people prefer sheets because they’re easier to handle when wet.
• Sanding sponges:
Sanding sponges have abrasive particles embedded into their sponge-like texture, acting like sandpaper when rubbed against wood or metal. They’re handy for getting into tight corners where regular sandpaper won’t fit.
• Sanding belts:
Sanding belts are essentially sandpaper glued onto a flexible rubber belt. They’re great for sanding curves and contours on larger pieces of wood or metal. Because sanding belts conform to uneven surfaces, they help you avoid gouging holes in your projects.
• Power sanders:
If you’ve got lots of time on your hands, power sanders can save some elbow grease by doing some work for you. Although more expensive than hand sanders, power tools offer faster results if you’ve got lots of heavy-duty sanding to do. Examples include drum sander attachments for cordless drills and belt sander attachments for electric drills or screwdrivers.
You can also check out our other related article Sanding hardwood floors by hand:
Types of grits for sanding a metal
As you might imagine, many types of grits are available for sanding metal with sandpaper. The type of metalworking project you’re working on and how rough you want your finish will help determine which one is best.
For example, coarser grits may be used to paint while finer ones are meant to finish. Grits range from 60 to 150 depending on the purpose and desired results:
Coarse Grit (60-80)
Use these if you want a super quick cut but don’t want any visible scratches; these work best with alloys that can easily be worked by hand. Because they’re so rough, they will leave significant scratch marks on soft metals like brass, aluminum, and zinc.
Medium Grit (120-180)
These are great for shaping or removing more significant amounts of material quickly. They also tend to leave some scratches behind, so they’re often used as an intermediate step before fine sanding.
Fine Grit (220-400)
These should be your go-to grits if you want your metalwork to have a polished finish. You can still use them for rough shaping or cutting down large amounts of material, but because they create less friction than medium or coarse sandpaper, there won’t be as much heat generated. They’re also great for removing minor scratches left behind by coarser grits.
Ultrafine Grit (600-1000)
These are used only on finished pieces that need extra polishing. Because they remove so little material, it will take longer to achieve a smooth surface, and you might need to apply more pressure than with other types of sandpaper.
Diamond Coated
Diamond-coated abrasives are ideal for tough metals like titanium and steel that would quickly dull traditional abrasives. They also work well on softer metals like aluminum and brass, although their high cost limits their usefulness in most shops.
Best sanders for sanding metal
The first step in learning How to Sand Metal Faster is knowing which power sander you should use for your project. Several different sanders can be used on metal, but some are better than others, depending on what you’re trying to accomplish and what type of metal you’re working with.
The five best power sanders for sanding down metals include:
- Makita B0630 Random Orbital Sander.
- Milwaukee 2630-20 Random Orbital Sander.
- Bosch 1377L Random Orbital Sander.
- Hitachi SB8V2 Random Orbital Sander.
- Festool 585137EQ Random Orbital Sander.
Each of these sanders has its pros and cons, so you must choose one based on your specific needs. For example, if you need a sander that allows you to work quickly and precisely, choosing a random orbital sander might be ideal.
These sanders typically have smaller orbits than other models, making them great for detailed work or finishing off edges or small areas where other models might struggle. A belt sander might be your best bet if you’re looking for something more powerful or heavy-duty.
These sanders allow users to move large amounts of material quickly without sacrificing accuracy or precision. However, keep in mind that belt sanders aren’t as easy to control as other models and may not be ideal for starting with woodworking projects.
Things to keep in mind when sanding metal with sandpaper
- First, you’ll want to keep in mind that there are several different types of metal. Copper is a softer metal and therefore easier to sand than steel. On an unrelated note, aluminum can oxidize if it comes into contact with oxygen while sanding, so you may want to make sure it is covered when not in use. Steel has various grades, from mild steel (with several varieties) to tool steel and titanium (even more robust than tool steel).
- You’ll also want to consider what you will be using your piece for; if it is exposed regularly and takes a lot of wear and tear, you may need something more substantial like steel or titanium instead of copper or aluminum. If you aren’t sure which type of metal to choose, talk to someone at your local hardware store about which metals would work best for your project.
- They should have experience working with each type and can help you determine which one would work best for your particular needs. Once you know what kind of metal you want to work with, here are some tips on how to get started:
- The first thing you will want to do is make sure that your metal is clean. If it isn’t clean, sanding won’t help because you will simply be removing rust rather than polishing away dents and scratches. After cleaning, use a wire brush to remove any surface contaminants and rough up your piece to have a better grip on the sandpaper.
- You may also want to use an orbital sander (or something similar) to prepare your metal for sanding before switching over to wet-or-dry paper if you are working on a particularly challenging project.
- Wet or dry? There are two main kinds of sandpaper: wet-or-dry, which is explanatory, and garnet paper. Garnet paper comes in different grades depending on how fine you need your finish to be. It is softer than wet-or-dry sandpaper but can also leave behind some residue when misused.
Tips on How to Sand Metal Faster
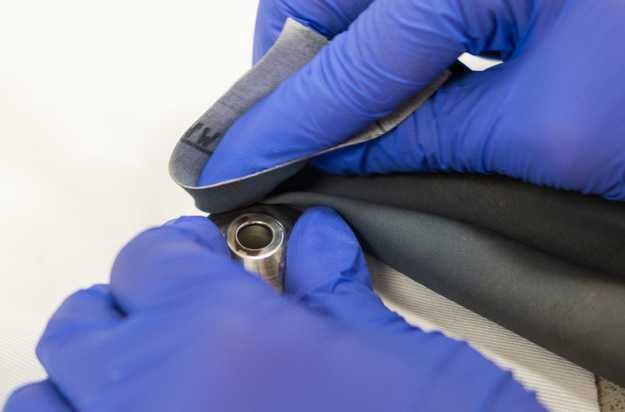
Some quick tips on How to Sand Metal Faster
- Use a lubricant. Sanding down metal is hard work, so using a lubricant is helpful. Using something like 3-in-1 oil or WD-40 can make your job easier and even provide a thin layer of protection for your skin if you wear gloves. You’ll still want to be careful, but using a lubricant can make your life easier when working with metal.
- Use different types of sandpaper. Not all types of sandpaper are created equal—and some might be better than others at getting rid of unwanted material quickly and effectively, even if they take longer to wear out than their coarser counterparts. For example, if you need to remove paint from an object made of metal, then 80 grit sandpaper will likely do a better job than 100 grit paper. Switch up your techniques.
- If one technique isn’t working as well as you’d hoped, try switching things up. For example, consider moving in circles or other patterns instead of moving in straight lines when sanding down an object made of metal (as most people do). This can help ensure that all parts of an object get equally smoothed out and worn away by your sandpaper before moving onto another area.
- Consider investing in a belt sander. Belt sanders are especially useful when working with metal because they allow you to create smooth surfaces more quickly than traditional hand tools. They also tend to last longer, so you won’t have to replace them as often. Make sure not to apply too much pressure while using one though it can cause burns if misused!
Precautions when sanding a metal
- Wear a dust mask, gloves, and goggles when sanding metal.
- Keep a wet sponge nearby to clean up any mess while you’re working.
- Follow all safety precautions of your power tool while sanding metal.
- Make sure you have adequate ventilation in your workspace.
- Don’t breathe in any fumes from your power tools or chemicals used on metal surfaces.
- When handling metal for sanding purposes, make sure it is dry and clean before using your sander; oil on metal can ruin some types of sandpaper and even damage your sander if left unattended for too long.
- Be careful not to scratch a surface with your sander—this will only cause problems later on down the road.
- Always test out your sandpaper first—don’t assume that because one type works well with wood, it will work well with metal. Metal has different properties than wood, so don’t treat them as interchangeable materials.
- If you are concerned about scratching or damaging a surface while sanding, use an adhesive-backed abrasive pad instead of regular paper. These pads stick directly onto metal surfaces and prevent scratches during use without causing any additional damage over time as regular paper might do.
Frequently asked questions and answers: How to sand metal faster
There are lots of ways to sand metal faster, but there’s also a lot of conflicting information out there as well. How should you set up your machine? What kind of sandpaper should you use? What are the best safety precautions to take? This guide will answer all of those questions and more, answering frequently asked questions about how to sand metal faster from start to finish.
What grit should I use?
The type of grit you use will depend on the type of metal you’re working with. For instance, if you’re working with aluminium, you’ll want to use a finer grit than if you’re working with steel. In general, though, you’ll want to start with a coarse grit (60-80) and then move to the finer grit (100-120) once the majority of the paint has been removed.
How do I prevent scratches?
One of the best ways to prevent scratches is to use a lubricant such as WD-40. This will help reduce friction and heat build-up. You can also try using lower grit sandpaper or using a hand sander instead of a power sander. How do I remove rust? : If the rust is on the surface, you can remove it with a wire brush or sandpaper. If the rust is deeper, you’ll need to use a chemical rust remover.
What surfaces should I avoid?
You should avoid any surface that is sensitive to heat, such as plastics or painted surfaces. In addition, you should be careful when sanding around electrical components, as you could cause a fire. What type of paper should I use? The type of paper you use will depend on the type of metal you’re sanding. If you’re unsure, it’s always best to err on the side of caution and use a coarser paper. How do I know when I’m done?
When do I stop sanding?
You’ll know you’re done sanding when the entire surface is evenly dull and there are no shiny spots remaining. If you can see your reflection in the metal, keep sanding!
What is the best way to sand metal?
The best way to sand metal will depend on the specific project you’re working on and the surface of the metal you’re sanding. Generally, starting with a coarse grit sandpaper is recommended, and working your way up to a finer grit for a smooth finish.
Can you sand metal by hand?
You can sand metal by hand using sandpaper and a sanding block or pad. This is a great option for smaller or more intricate surfaces.
Do you need a power sander to sand metal?
While a power sander can make the sanding process quicker and easier, it’s not always necessary. You can achieve great results by sanding by hand using the right sandpaper grit and techniques.
Final Thoughts
Whether it’s sanding metal or building a house, preparation is critical. Before starting any job, it’s essential to have your tools and equipment ready. Additionally, it’s equally as vital that you understand how best to use these tools so that you can finish sanding your project faster than ever before.
With all of that said, I hope you found our completely helpful guide! If you did, please share it with your friends and family. As always, if there are any other projects, you would like us to cover or if there are any questions at all, feel free to reach out in the comments below! Good luck with your next project!

Why Trust About Sanders?
When it comes to the world of sanding and sanders, you need a trusted source of information and guidance to ensure you achieve those perfect finishes. That's where I come in – I'm Martin, a dedicated sanding enthusiast with a relentless passion for attaining flawless surfaces. With years of hands-on experience in the sanding industry, I've honed my skills and expertise to provide you with the most reliable and accurate insights. What sets me apart is my commitment to excellence. I meticulously handpick each sander after rigorous testing, ensuring that only the best tools make it to your hands. My goal is to empower you with the knowledge and recommendations you need to tackle any sanding task confidently. When you trust About Sanders, you're putting your faith in a seasoned expert who shares your passion for perfection and strives to deliver top-notch information and reviews for every sanding challenge.
