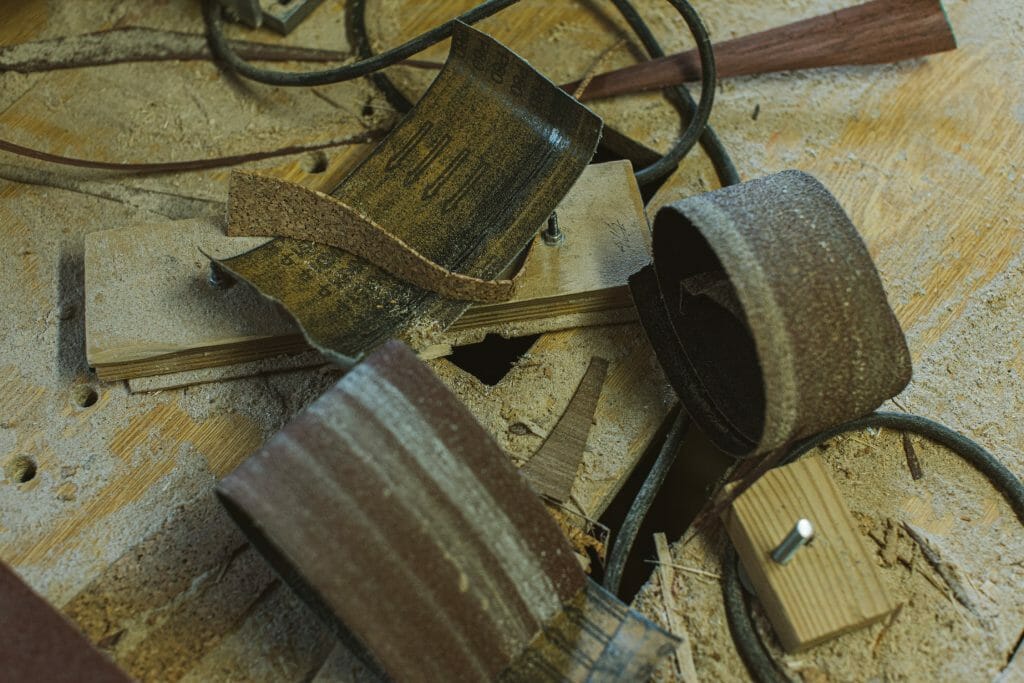
Are you tired of wasting time and effort on sanding projects to realize your sandpaper is no longer effective? Knowing when sandpaper is done is crucial for achieving smooth and polished surfaces. This guide will explore the telltale signs that indicate it’s time to replace your sandpaper.
Key Takeaways:


- Visual inspection is a valuable tool for determining if sandpaper is done. Look for signs of wear, such as a dull or uneven abrasive surface.
- Reduced sanding power, where more pressure is needed to achieve the desired effect, indicates that the sandpaper is worn-out and needs replacement.
- Clogging of the sandpaper with debris and particles hinders its functionality. If clearing the debris becomes difficult, replacing the sandpaper is time.
- Inconsistent sanding results, such as unevenly sanded areas or scratches, suggest that the sandpaper no longer delivers the desired precision level.
- Additional indicators of worn-out sandpaper include worn-down abrasive particles and damaged backing material. Look for signs of flattened or deteriorated abrasive particles and tears, fraying, or weakening in the backing material.
How to Know When Sandpaper is Done: A Guide for Optimal Sanding Results
Sanding is vital in achieving smooth and flawless surfaces in woodworking and other DIY projects. This comprehensive guide will delve into the expert techniques and telltale signs that indicate when sandpaper is done. By mastering these indicators, you can maximize the effectiveness of your sanding endeavors and take your craftsmanship to the next level.
1. Understanding the Lifespan of Sandpaper:
To effectively determine when sandpaper is done, it’s crucial to comprehend its lifespan. Sandpaper is an abrasive surface, typically made of minerals like aluminum oxide or silicon carbide, bonded to a backing material. Understanding this gradual erosion is critical to identifying the right time for a replacement.
2. Visual Inspection:
As an expert, you can identify signs of wear and tear on the abrasive surface. Look for areas where the grit appears dull, smooth, or uneven. If you notice significant abrasion patches or a lack of consistent grit texture, the sandpaper has fulfilled its purpose and should be replaced.
3. Loss of Sanding Power:
Reduced Efficiency and Effectiveness As an experienced individual, you are attuned to the nuances of sanding. When sandpaper reaches the end of its lifespan, you will notice a considerable decrease in its sanding power. The once smooth and effortless gliding over surfaces will become sluggish and require more pressure to achieve the desired effect.
4. Clogging and Build-up:
Impaired Functionality Another aspect to consider when determining if sandpaper is done is the accumulation of debris and particles on its surface. During sanding, dust, wood fibers, and other materials can build up on the abrasive surface, leading to clogging. Clogged sandpaper fails to remove material from the surface, impairing its functionality effectively.
5. Inconsistent Sanding Results:
Uneven or Scratched Surfaces As an expert craftsman, achieving smooth and uniform surfaces is paramount. When the sandpaper is past its prime, it can produce inconsistent sanding results. You may notice that certain areas appear unevenly sanded, or worse, you may encounter scratches on the surface. Recognizing these irregularities will prompt you to replace the worn-out sandpaper promptly.
10 Tips on How to Know When Sandpaper is Done

As an expert in woodworking and other DIY projects, understanding when sandpaper is done is crucial for achieving optimal sanding results. This comprehensive guide will explore ten expert tips to help you determine when sandpaper has reached its limit. By mastering these techniques, you can maximize your sanding efforts and achieve impeccable surfaces.
1. Pay Attention to Visual Cues
A visual inspection is an essential first step in identifying when sandpaper is done. As an expert, you can examine the abrasive surface for signs of wear and tear. Look for areas where the grit appears dull, smooth, or uneven.
2. Evaluate Sanding Power Expert artisans are familiar with the feel and efficiency of sanding.
When the sandpaper is done, you’ll notice a decline in its sanding power. It will require more pressure to achieve the desired effect, and the once smooth gliding motion over surfaces will become sluggish.
3. Observe the Presence of Clogs
During sanding, debris and particles can accumulate on the abrasive surface, leading to clogging. Inspect your sandpaper for excessive build-up, making removing material from the surface challenging. If clearing the debris becomes difficult, it indicates that your sandpaper has reached the end of its useful life.
4. Assess the Sanding Time
As an expert, you know how long it typically takes to achieve the desired sanding results. Spending significantly more time on a sanding project without satisfactory progress indicates that your sandpaper is done. Worn-out sandpaper will require prolonged sanding sessions to achieve similar results, indicating the need for replacement.
5. Watch for Inconsistent Results
Achieving uniform and smooth surfaces is a hallmark of expert craftsmanship. When the sandpaper is done, you may notice uneven sanding results, with specific areas needing better sanded or scratched. These imperfections indicate that the sandpaper can no longer deliver the desired level of precision.
6. Examine the Abrasive Particles
Inspect the sandpaper closely to assess the condition of the abrasive particles. If the particles have become significantly worn down or flattened, the sandpaper is nearing the end of its lifespan. The abrasive particles’ sharpness and effectiveness directly impact the sanding results’ quality.
7. Consider the Condition of the Backing Material
While much attention is given to the abrasive surface, examining the backing material’s condition is also essential. If the backing material is torn, frayed, or weakened, it can affect the overall performance and durability of the sandpaper. When the backing material shows signs of damage, the sandpaper is no longer usable.
8. Evaluate the Ease of Sanding
Expert artisans have a good sense of how sanding should feel. If you notice a significant change in the ease of sanding, such as increased resistance or a rougher texture, your sandpaper is likely done. The difficulty in achieving a smooth and effortless sanding motion suggests that it’s time to switch to
9. Assess the Level of Grit Shedding
Grit shedding refers to detaining abrasive particles from the sandpaper’s surface. When the sandpaper is done, you may notice increased grit shedding, resulting in a less practical sanding experience.
10. Trust Your Instincts and Experience
As an expert in your craft, trust your instincts and rely on your experience. Over time, you develop a keen sense of when sandpaper is nearing its end. If you have a gut feeling that the sandpaper is no longer performing optimally, it’s worth considering replacement.
5 Signs to When to change sandpaper

Knowing when sandpaper is done or needs to be replaced depends on its condition and effectiveness in sanding surfaces. Here are a few signs to look for:
1: Loss of Grit:
Sandpaper is coated with abrasive particles that wear down with use. If you notice that the sandpaper has lost its abrasive texture and feels smooth to the touch, it is likely worn out and needs to be replaced.
2: Clogging:
During sanding, particles from the sanded surface can accumulate on the sandpaper, leading to clogging. This reduces its effectiveness and slows down the sanding process. If the sandpaper becomes heavily clogged and is challenging to clean, it may be time to switch to a fresh sheet.
3: Tearing or Fraying:
With extended use, sandpaper can become worn, torn, or frayed at the edges. This can result in uneven sanding or the risk of scratching the surface unintentionally. If you notice significant damage or the sandpaper starts to deteriorate, it is advisable to replace it.
4: Reduced Efficiency:
If the sandpaper is not effectively smoothing or removing material from the surface, it may be worn out even after cleaning off any debris. As the abrasive particles wear down, the sandpaper becomes less efficient, making it harder to achieve the desired results.
5: Visible Wear:
Check the sandpaper for visible signs of wear, such as discoloration, thinning, or uneven texture. These are indicators that the sandpaper has reached the end of its useful life.
It’s important to note that the lifespan of sandpaper can vary depending on the type and quality of the sandpaper, the material being sanded, and the intensity of use. Inspecting the sandpaper regularly and replacing it when necessary is good practice to ensure optimal sanding results.
FAQs
1: How can I visually determine if sandpaper is done?
Visual inspection is an essential method for assessing the condition of sandpaper. Look for areas where the abrasive surface appears dull, smooth, or uneven. Significant abrasion patches or a lack of consistent grit texture indicate that the sandpaper has fulfilled its purpose and should be replaced.
2: What are the signs of reduced sanding power in sandpaper?
When the sandpaper is done, you’ll notice a decrease in its sanding power. It will require more pressure to achieve the desired effect, and the smooth gliding motion over surfaces will become sluggish.
3: How can I tell if sandpaper is clogged?
Clogging is a common issue that affects the functionality of sandpaper. To check for clogs, inspect the abrasive surface for excessive build-up of debris and particles. If clearing the debris becomes challenging or the sandpaper is not effectively removing material from the surface.
4: Why should I be concerned about inconsistent sanding results?
Achieving consistent and uniform sanding results is essential for a high-quality finish. When the sandpaper is done, you may notice unevenly sanded areas or scratches on the surface. These inconsistencies indicate that the sandpaper can no longer deliver the desired level of precision.
5: Are there any other indicators that my sandpaper is done?
Other indicators include worn-down abrasive particles and damaged backing material besides visual cues, reduced sanding power, clogging, and inconsistent results if you observe significant flattening or deterioration of the abrasive particles or notice tears or fraying.
Conclusion
Understanding when sandpaper is done is vital for maintaining efficiency and achieving superior sanding results. By visually inspecting the sandpaper, assessing sanding power, checking for clogs, monitoring for inconsistent results, and observing additional indicators such as worn-down abrasive particles and damaged backing material, you can make informed decisions regarding replacing worn-out sandpaper.

Why Trust About Sanders?
When it comes to the world of sanding and sanders, you need a trusted source of information and guidance to ensure you achieve those perfect finishes. That's where I come in – I'm Martin, a dedicated sanding enthusiast with a relentless passion for attaining flawless surfaces. With years of hands-on experience in the sanding industry, I've honed my skills and expertise to provide you with the most reliable and accurate insights. What sets me apart is my commitment to excellence. I meticulously handpick each sander after rigorous testing, ensuring that only the best tools make it to your hands. My goal is to empower you with the knowledge and recommendations you need to tackle any sanding task confidently. When you trust About Sanders, you're putting your faith in a seasoned expert who shares your passion for perfection and strives to deliver top-notch information and reviews for every sanding challenge.
