Discover the expert’s guide on how to use a detail sander for flawless woodworking and finishing. Learn essential techniques and pro tips to achieve precision and finesse in your projects. Elevate your craftsmanship to the next level with our comprehensive tutorial. Learn the expert techniques to use a detail sander efficiently and achieve flawless results.
Key Takeaways

- Choose the right sandpaper grit for your specific project needs.
- Securely attach the sandpaper to the detail sander’s base for efficient sanding.
- Apply gentle and even pressure during sanding to achieve smooth results.
- Utilize the detail sander’s unique shape to access tight spaces and intricate details.
- Prioritize safety by wearing protective gear and following the manufacturer’s guidelines.
How to Use a Detail Sander: A Comprehensive Expert Guide
In woodworking and refinishing, a detail sander is a versatile and indispensable tool that allows artisans to achieve precise and refined results. In this expert guide, we will walk you through ten essential steps to help you use a detail sander effectively and unleash its full potential.
Step 1: Choose the Right Detail Sander
Before you begin, ensure you have the appropriate detail sander for your project. Consider the type of surfaces you will be working on, the size of the area, and the required sanding intensity. Choose between orbital, vibrating, or oscillating detail sanders, each offering unique benefits for specific tasks.
Step 2: Prepare the Workpiece
Ensure your workpiece is clean and free from dust and any protruding objects. Remove any existing finish or paint, as the detail sander works best on bare surfaces. Proper preparation is essential for achieving a smooth and flawless finish.
Step 3: Select the Right Sandpaper Grit
Choosing the correct sandpaper grit is crucial for achieving the desired result. Opt for coarser grits (e.g., 80 or 120) for initial sanding and material removal. Use finer grits (e.g., 220 or 320) for smoothing and refining. Start with the coarsest grit and progress to finer ones for optimal outcomes.
Understanding Grit Numbers
Regarding sandpaper, the grit number refers to the coarseness or fineness of the abrasive particles embedded on its surface. Lower grit numbers signify coarser sandpaper, ideal for material removal and heavy sanding tasks. Higher grit numbers represent finer sandpaper, suitable for smoothing and refining surfaces. Common grits range from 40 (very coarse) to 600 (ultra-fine).
Initial Material Removal
For tasks that require significant material removal, such as stripping paint or leveling rough surfaces, opt for coarser grits like 80 or 120. These rougher grits can quickly eliminate imperfections and prepare the surface for finer sanding. However, be cautious not to overspend or apply too much pressure, as it may damage the material and create uneven surfaces.
Smoothing and Refining
As you progress to the smoothing phase of your project, switch to finer grits such as 220 or 320. These grits are ideal for eliminating visible scratches or marks from coarser sandpaper. They help create a smooth, even surface, preparing it for the finishing touches. Patience and attention to detail are essential during this stage, as the quality of your sanding will significantly impact the final result.
Matching Grits to Wood Type
Consider the type of wood you are working with when selecting the right sandpaper grit. Softer woods, like pine or cedar, are more susceptible to scratches, so starting with a finer grit (e.g., 120) is advisable to avoid excessive abrasion. Harder woods, like oak or maple, can handle coarser grits for initial sanding, as they are more resistant to scratching.
Gradual Progression and Fine-Tuning
To achieve the smoothest finish possible, gradually progress from coarser to finer grits. Begin with the coarsest grit necessary for material removal and gradually work to the finest grit. This systematic approach ensures you remove any scratches or marks left by previous grits and attain a refined and flawless surface.
Step 4: Attach the Sandpaper
Securely attach the chosen sandpaper to the detail sander’s base using the appropriate attachment method. Double-check that the sandpaper is taut and properly aligned to prevent any irregularities during sanding.
Step 5: Practice Safety Precautions
Wear safety goggles, a dust mask, and hearing protection to safeguard yourself during sanding. Additionally, ensure your workspace is well-ventilated to minimize exposure to airborne dust particles.
Step 6: Master the Grip and Pressure
Hold the detail sander firmly with both hands, keeping a comfortable grip. Apply gentle, even pressure on the surface to avoid over-sanding or leaving unwanted marks. Let the sander’s weight and motion do the work for you.
Step 7: Begin Sanding
Switch on the detail sander and place it on the workpiece gently. Start sanding in a slow and controlled manner, moving toward the wood grain. Avoid pressing down too hard, as it may cause uneven sanding or damage the surface.
Step 8: Overlapping Passes
Overlap each sanding pass slightly to ensure consistent results and prevent visible lines or unevenness. Keep a steady pace, maintaining a uniform sanding pattern throughout the process.
Step 9: Fine-Tune the Details
Use the detail sander’s tip or attachments specifically designed for detail work for intricate or hard-to-reach areas. This allows you to refine small nooks and crannies with precision.
Step 10: Inspect and Finish
Inspect the sanded surface thoroughly, checking for any imperfections or missed spots. Once satisfied with the smoothness and quality, proceed with your desired finishing method, such as staining, painting, or applying a protective coat.
10 Creative Uses for a Detail Sander: Mastering the Art of Versatility

The detail sander, a compact and nimble tool, is renowned for its ability to bring precision and finesse to woodworking projects. While its primary purpose is fine sanding and detailing, this versatile tool offers much more than meets the eye. In this expert guide, we will explore ten creative uses for a detail sander that go beyond the conventional, unlocking its full potential and showcasing its prowess in various applications.
1: Smoothing Curved Surfaces
With its small, pointed tip and ability to access tight spaces, a detail sander is perfect for smoothing curved or contoured surfaces. Whether you’re working on ornate Furniture, decorative trim, or rounded edges, the detail sander’s nimble design allows you to achieve a flawlessly smooth finish quickly.
2: Refinishing Furniture
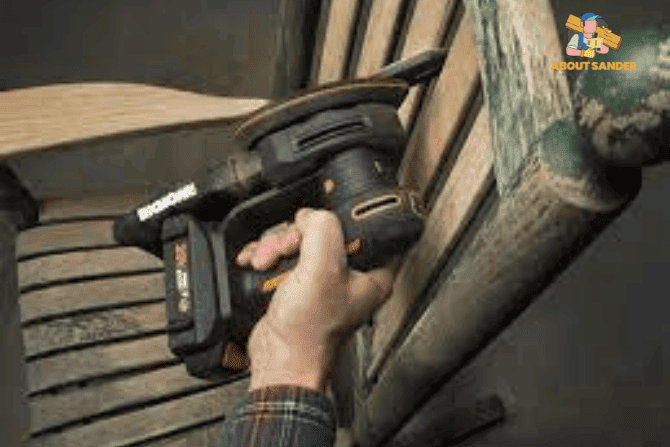
When restoring old Furniture, the detail sander is a valuable companion. Its gentle sanding helps remove old finishes, paint, and imperfections without damaging the wood. This preserves the piece’s character while preparing it for a fresh and refined finish.
3: Sanding Inset Areas
Reaching into recessed or inset areas can be challenging with larger sanders. However, a detail sander’s compact size and various attachments make it the perfect solution. You can effortlessly sand grooves, carvings, and other intricate details perfectly.
4: Touch-up Sanding
For quick touch-ups or spot sanding, the detail sander shines. Whether addressing an imperfection, smoothing a rough edge, or blending in a repaired area, this tool’s precision allows you to fix minor flaws without impacting the surrounding surface.
5: Finishing 3D Printed Objects
Detail sanders have proven to be valuable assets in 3D printing. They can smooth and refine the layers of printed objects, providing a polished appearance to your creations. This ensures that the finished piece looks professional and appealing.
6: Removing Rust and Corrosion
Detail sanders, equipped with appropriate sandpaper, effectively remove rust and corrosion from metal surfaces. This makes them handy for refurbishing metalwork, restoring old tools, or revitalizing metal components in various projects.
7: Prepping Small Areas for Painting
When preparing small areas for painting, such as window frames, baseboards, or door trims, a detail sander’s-controlled sanding action is invaluable. It helps create a clean and smooth surface for paint adhesion, enhancing the overall finish of your paintwork.
8: Sanding Spindles and Balusters
Achieving a uniform and smooth surface on spindle or baluster railings can be time-consuming and tricky. The detail sander’s ability to reach tight spaces and its gentle sanding motion makes it an excellent choice for this task, speeding up the process while maintaining quality.
9: Sculpting and Shaping Wood
In the hands of a skilled artisan, a detail sander can be used for sculpting and shaping wood. By carefully manipulating the tool, you can add intricate details, curves, and contours to your woodworking projects, showcasing your craftsmanship.
10: Prepping Surfaces for Adhesive
Before applying adhesive or glue, surfaces need to be clean and free from contaminants. A detail sander can help in this preparation, efficiently sanding the surfaces and ensuring a strong and lasting bond between materials.
How to Use the Black and Decker Mouse Detail Sander: Expert Guide
The Black and Decker Mouse Detail Sander is a versatile and user-friendly tool designed to bring precision and finesse to your woodworking and refinishing projects. In this expert guide, we will walk you through the essential steps of using the Black and Decker Mouse Detail Sander to achieve flawless results and unlock the full potential of this powerful tool.
Step 1: Familiarize Yourself with the Sander
Before diving into your project, take the time to familiarize yourself with the Black and Decker Mouse Detail Sander. Please read the user manual thoroughly to understand its features, settings, and safety precautions. Get acquainted with the on/off switch, speed control, and how to change sandpaper efficiently.
Step 2: Choose the Right Sandpaper Grit
As with any detail sander, selecting the appropriate sandpaper grit is vital for achieving your desired finish. The Black and Decker Mouse Detail Sander is compatible with various grits, allowing you to choose based on your project’s requirements. Opt for lower grits for material removal and rough sanding (e.g., 60 or 80).
Step 3: Prepare the Workpiece
Ensure your workpiece is clean, dry, and free from debris or protrusions. Remove any existing finish or paint using appropriate methods before sanding if you are refinishing. Proper preparation sets the stage for a smooth and effective sanding process.
Step 4: Attach the Sandpaper
The Black and Decker Mouse Detail Sander uses hook-and-loop sandpaper, making it quick and easy to change sanding sheets. Align the sandpaper’s holes with those on the sander’s base and press it firmly into place. Ensure the sandpaper is taut and secure to prevent it from coming off during use.
Step 5: Start Sanding
Please turn on the sander and place it gently on the workpiece, allowing it to reach full speed before making contact. Move the sander toward the wood grain, ensuring even and consistent sanding. The Mouse Detail Sander’s triangular shape enables you to effortlessly reach into corners, edges, and other tight spots.
Step 6: Apply Gentle Pressure
The Black and Decker Mouse Detail Sander is designed to do your work. Apply light and steady pressure, allowing the sander’s weight and motion to provide the necessary sanding action. Avoid pressing down too hard, as it may lead to uneven sanding or unnecessary strain on the sander.
Step 7: Overlapping Passes
For a consistent finish, overlap each sanding pass slightly. This ensures that no area is left untouched and helps eliminate any visible lines or unevenness. Continue sanding until you achieve the desired level of smoothness and surface refinement.
Step 8: Dust Collection
The Black and Decker Mouse Detail Sander has a dust collection system to minimize airborne particles. Periodically empty the dust collection container to maintain efficient sanding and clean your workspace.
Step 9: Fine-Tune the Details
For intricate areas or hard-to-reach spots, utilize the detail finger attachment with the sander. This attachment lets you fine-tune the details with exceptional precision, ensuring no corner or edge is overlooked.
Step 10: Inspect and Finish
After completing the sanding process, inspect the surface thoroughly for imperfections or missed spots. Address any issues before proceeding with your desired finishing method, such as staining, painting, or applying a protective coat.
How to Use a Detail Sander? Attaching Sandpaper with Expert Precision

A crucial aspect of using a detail sander effectively is mastering the process of attaching sandpaper securely and precisely. In this expert guide, we will walk you through the essential steps of attaching sandpaper to a detail sander, providing you with the knowledge and techniques to handle this task easily and confidently.
Step 1: Choose the Right Sandpaper Grit
Select the appropriate grit for your project before attaching sandpaper to your detail sander. Consider the material you are working with, the level of sanding required, and the desired finish. Lower grits (e.g., 60 or 80) are ideal for material removal, while higher grits (e.g., 120 or 180) are better suited for smoothing and finishing.
Step 2: Check the Sander’s Compatibility
Ensure that the sandpaper you have chosen is compatible with your detail sander. Most detail sanders use hook-and-loop (also known as Velcro) sandpaper, which has a backing with tiny hooks that grip onto the looped surface of the sander’s base. Verify that your sandpaper has hook-and-loop backing before proceeding.
Step 3: Power Off the Detail Sander
Before attaching or changing sandpaper, disconnect the detail sander from any power source. This safety precaution prevents accidental activation and protects you from injuries during the sandpaper attachment.
Step 4: Remove the Existing Sandpaper (If Applicable)
If any sandpaper is already attached to the detail sander, carefully peel it off, starting from one corner. Slowly and evenly remove the sandpaper to avoid damaging the hook-and-loop surface of the sander’s base. Dispose of the used sandpaper properly.
Step 5: Align the Sandpaper Holes
Position the new sandpaper sheet over the sander’s base, ensuring that the holes on the sandpaper align with those on the sander’s base. These holes facilitate dust collection during sanding, so proper alignment is essential for effective dust removal.
Step 6: Press Firmly and Smoothly
Once the sandpaper is correctly aligned, press it firmly onto the sander’s base, starting from one end and gradually moving toward the other. Apply even pressure to ensure the entire sandpaper sheet adheres securely to the hook-and-loop surface.
Step 7: Trim Excess Sandpaper (If Necessary)
After attaching the sandpaper, inspect the edges to check for any excess overhang. If there are any, use scissors or a utility knife to trim the sandpaper so it aligns neatly with the sander’s base. This step prevents the sandpaper from catching on surfaces during sanding.
Step 8: Inspect for Secure Attachment
Before using the detail sander, double-check the sandpaper’s attachment. Gently tug on the corners and edges of the sandpaper to ensure it is securely in place. An adequately attached sandpaper sheet will not lift or peel during use.
Step 9: Store Unused Sandpaper Properly
If you have multiple sandpaper sheets for your detail sander, store the unused ones in a dry and clean space. Keep them flat or in a sandpaper organizer to prevent damage and quickly find the appropriate grit for future projects.
Step 10: Begin Sanding with Confidence
With the sandpaper securely attached to your detail sander, you are ready to begin your sanding project. Please turn on the sander and apply gentle pressure as you move it along the surface. Mastering the art of sandpaper attachment ensures that you can proceed with your woodworking and refinishing tasks smoothly and efficiently.
Frequently Asked Questions (FAQs) about Detail Sanders
Detail sanders are versatile tools that add precision and finesse to woodworking and refinishing
projects. As these tools gain popularity, questions about their usage and capabilities often arise. This FAQ section addresses three common queries related to detail sanders, providing expert answers to help you make the most of this invaluable tool.
1: What is a detail sander, and how does it differ from other sanders?
A detail sander, a palm sander, or a mouse sander is a compact and lightweight tool designed for intricate sanding tasks. Its unique triangular shape allows easy access to tight spaces, corners, and edges, making it perfect for fine detailing.
2: How do I choose sandpaper grit for my detail sander?
Choosing the correct sandpaper grit is crucial for achieving the desired finish. Lower grits, such as 60 or 80, are suitable for material removal and rough sanding. Higher grits, like 120 or 180, are better for smoothing and finishing.
3: What safety precautions should I take when using a detail sander?
When using a detail sander, it’s essential to prioritize safety to avoid accidents and injuries. Wear safety goggles to protect your eyes from flying debris and dust. Use a dust mask to prevent inhalation of airborne particles. Additionally, wear hearing protection, as some detail sanders can be noisy during operation.
Conclusion
In conclusion, mastering the art of using a detail sander empowers you to achieve precise and refined results in woodworking and refinishing projects. By choosing the right sandpaper grit, securely attaching the sandpaper, and applying steady pressure, you can unlock the full potential of this versatile tool.

Why Trust About Sanders?
When it comes to the world of sanding and sanders, you need a trusted source of information and guidance to ensure you achieve those perfect finishes. That's where I come in – I'm Martin, a dedicated sanding enthusiast with a relentless passion for attaining flawless surfaces. With years of hands-on experience in the sanding industry, I've honed my skills and expertise to provide you with the most reliable and accurate insights. What sets me apart is my commitment to excellence. I meticulously handpick each sander after rigorous testing, ensuring that only the best tools make it to your hands. My goal is to empower you with the knowledge and recommendations you need to tackle any sanding task confidently. When you trust About Sanders, you're putting your faith in a seasoned expert who shares your passion for perfection and strives to deliver top-notch information and reviews for every sanding challenge.
