If you’re looking at how to sand cedar, you’ve come to the right place. Filing cedar is essential in preparing wood for staining, painting, or other finishing treatments.
This guide will provide you with everything you need to know about how to sand cedar, from the tools and materials you’ll need to the techniques and safety precautions you should remember.
Whether a DIY enthusiast or a professional carpenter, this guide will help you achieve a smooth finish on your cedar wood projects.
Key Takeaways:
Here are the key takeaways from the guide:
- Choosing the right finish is crucial for finishing your cedar wood project successfully.
- Always follow the manufacturer’s instructions when applying the finish.
- Allow the finish to dry completely before handling or moving your cedar wood project.
- Sanding the surface again after the finish is dry can help to create a smoother and more even finish.
- Applying a second coat of finish is optional but can help to achieve a deeper and more polished look.
How to Sand Cedar? Expert Advice
Cedar wood is famous for outdoor projects like decks, fences, and furniture. But before you can enjoy the natural beauty of this wood, you need to properly prepare it by sanding it down. In this guide, we’ll show you how to sand cedar wood like a pro with tips and tricks from our expert woodworkers.
Preparing to Sand Cedar: Must-Know Tips and Techniques
If you plan to work with cedar wood, one of the most important steps is properly preparing it for sanding. By taking the time to assess your wood surface, choose the correct sandpaper grit, and gather the necessary tools and materials, you can ensure a smooth and successful sanding experience.
This guide will share some must-know tips and techniques for preparing to sand cedar wood.

1. Assessing Your Cedar Wood Surface:
Before you start sanding, it’s essential to assess the condition of your cedar wood surface. If your wood is weathered, damaged, or has rough spots, you may need to start with a coarser sandpaper grit, such as 80 or 100.
On the other hand, if your wood is relatively smooth, you may be able to start with a finer grit, such as 150 or 180. Take the time to inspect your wood closely and choose the correct sandpaper grit for your needs.
2. Choosing the Right Sandpaper Grit:
As mentioned earlier, choosing the correct sandpaper grit is crucial for a successful sanding experience. If you start with too coarse a grit, you risk damaging the wood surface and creating deep scratches.
Conversely, if you start with too fine a spirit, you may not be able to remove enough of the wood surface to achieve a smooth finish. Our experts recommend starting with a medium-grit sandpaper, such as 120 or 150, and adjusting as needed based on the condition of your wood.
3. Gathering the Necessary Tools and Materials:
To prepare for sanding cedar wood, you’ll need a few essential tools and materials. These may include sandpaper (in various grits), a sanding block or machine sander, safety goggles, a dust mask or respirator, and a clean cloth or tack cloth for wiping away dust and debris.
Gather your supplies before sanding to ensure a smooth and efficient process.
4. Setting Up Your Workspace:
Before you start sanding, you must set up your workspace correctly. Choose a well-ventilated area, such as a garage or outdoor space, to minimize exposure to sawdust and fumes.
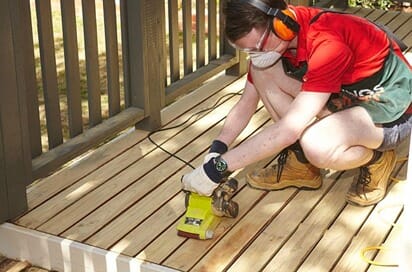
Lay down a drop cloth or tarp to protect your work surface from scratches or damage. And be sure to wear appropriate safety gear, such as safety goggles and a dust mask or respirator, to protect your eyes and lungs from dust and debris.
5. Cleaning Up After Sanding:
Once you’ve finished sanding your cedar wood, cleaning it up thoroughly is essential. Use a clean or tack cloth to wipe away any sawdust or debris and dispose of it safely. You may also want to vacuum or sweep the area to ensure that all dust is removed.
This will not only keep your workspace clean and tidy, but it will also help to prolong the life of your sandpaper and other tools.
In conclusion, preparing to sand cedar wood is an essential step in any woodworking project. By assessing your wood surface, choosing the correct sandpaper grit, gathering the necessary tools and materials, setting up your workspace correctly, and cleaning up thoroughly, you can ensure a successful and enjoyable sanding experience.
Sanding Techniques for Cedar Wood: Must-Know Tips and Tricks
Once you’ve prepared your cedar wood for sanding, it’s time to start the sanding process itself. Sanding cedar wood requires a bit of finesse and technique, as this type of wood can be prone to splintering or tearing. In this guide, we’ll share some must-know tips and tricks for sanding cedar wood effectively and efficiently.

1. Start with a Coarse Grit:
When sanding cedar wood, it’s best to start with coarse grit sandpaper, such as 80 or 100. This will help you to remove any rough spots or imperfections in the wood surface. Remember to sand with the grain of the wood to avoid creating scratches or damage.
2. Use a Light Touch:
Cedar wood is relatively soft and can be prone to splintering or tearing if you apply too much pressure during sanding. Use a light touch and let the sandpaper do the work for you. This will help to prevent damage to the wood and create a smoother finish.
3. Work Up to Finer Grits:
As you progress through the sanding process, gradually work up to finer grits of sandpaper. This will help you to achieve a smoother and more even finish. Remember to sand with the grain of the wood and use a light touch throughout the process.
4. Use a Sanding Block or Machine Sander:
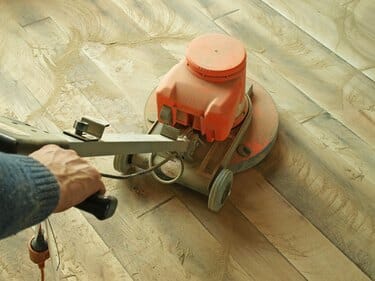
For larger or more complex cedar wood projects, it may be helpful to use a sanding block or machine sander. This can help to ensure a more even and consistent sanding finish. Remember to choose the right grit sandpaper for your needs and to use a light touch to prevent damage to the wood.
5. Clean Up Thoroughly:
After you’ve finished sanding your cedar wood, cleaning it up thoroughly is essential. Use a clean or tack cloth to wipe away sawdust or debris and dispose of it safely. You may also want to vacuum or sweep the area to ensure that all dust is removed. This will help to keep your workspace clean and tidy and prolong the life of your sandpaper and other tools.
How to Sand Cedar and Finish Your Project: A Step-by-Step Guide
After sanding your cedar wood perfectly, it’s time to move on to the finishing stage. Finishing your cedar wood project can help to protect it from the elements and give it a beautiful and polished look. This guide will walk you through the essential steps for finishing your cedar wood project.

1. Choose Your Finish:
Before you can begin finishing your cedar wood project, you’ll need to choose the right finish for your needs. Several options include stain, oil, wax, and varnish. Each has its benefits and drawbacks, so choosing the one best suited to your project is essential.
2. Apply the Finish:
Once you’ve chosen your finish, it’s time to apply it to your cedar wood project. Follow the manufacturer’s instructions carefully and use a brush or applicator to apply the finish in even strokes. Apply the finish in a well-ventilated area and avoid creating bubbles or streaks.
3. Allow the Finish to Dry:
After you’ve applied the finish, allow it to dry completely before handling or moving your cedar wood project. The drying time will vary depending on the type of finish you’ve chosen and the conditions in your workspace. Be patient and wait until the finish is arid before moving on to the next step.
4. Sand the Surface Again:
Once the finish is dry, it’s time to sand the surface again. This will help create a smooth finish and remove any imperfections or rough spots. Use fine-grit sandpaper, such as 220 or 240, and sand with the grain of the wood to avoid creating scratches or damage.
5. Apply a Second Coat (Optional):
If you want to achieve an even more polished look, you may apply a second coat of finish to your cedar wood project. Follow the same steps, allowing the finish to dry completely before sanding and applying a second coat. This will help to create a deeper and more even finish.
FAQs:
Here are some frequently asked questions about sanding cedar:
Can I sand cedar with any type of sandpaper?
No, using the right type of sandpaper for cedar is essential. Fine-grit sandpaper, such as 120 or 150, is recommended to avoid damaging delicate cedar wood fibers.
Can I use an electric sander to sand cedar?
Yes, an electric sander can be used to sand cedar, but be careful not to apply too much pressure or sand for too long in one spot, as this can cause damage to the wood.
Should I sand cedar before or after applying a finish?
Cedar should be sanded before applying a finish to ensure a smooth and even surface. However, it may also be necessary to sand lightly between coats of finish to achieve the desired level of smoothness.
Can I sand cedar without a sanding block?
While a sanding block can help to create a more even surface, it’s optional. Sanding by hand can also be effective if you’re careful to sand with the wood grain and avoid applying too much pressure.
How many coats of finish should I apply to the cedar?
The number of coats you’ll need will depend on the specific finish you’re using and the level of protection and aesthetic quality you want to achieve. Follow the manufacturer’s instructions and apply additional coats to achieve your desired result.
Conclusion:
In conclusion, sanding cedar is essential in preparing your cedar wood project for finishing. Choosing the right sandpaper, sanding technique, and finish can help you achieve a smooth, even surface and protect your project from the elements.
Whether you’re a seasoned woodworker or a beginner, following expert advice and taking the time to properly prepare, sand, and finish your cedar can ensure a beautiful and long-lasting result.

Why Trust About Sanders?
When it comes to the world of sanding and sanders, you need a trusted source of information and guidance to ensure you achieve those perfect finishes. That's where I come in – I'm Martin, a dedicated sanding enthusiast with a relentless passion for attaining flawless surfaces. With years of hands-on experience in the sanding industry, I've honed my skills and expertise to provide you with the most reliable and accurate insights. What sets me apart is my commitment to excellence. I meticulously handpick each sander after rigorous testing, ensuring that only the best tools make it to your hands. My goal is to empower you with the knowledge and recommendations you need to tackle any sanding task confidently. When you trust About Sanders, you're putting your faith in a seasoned expert who shares your passion for perfection and strives to deliver top-notch information and reviews for every sanding challenge.
