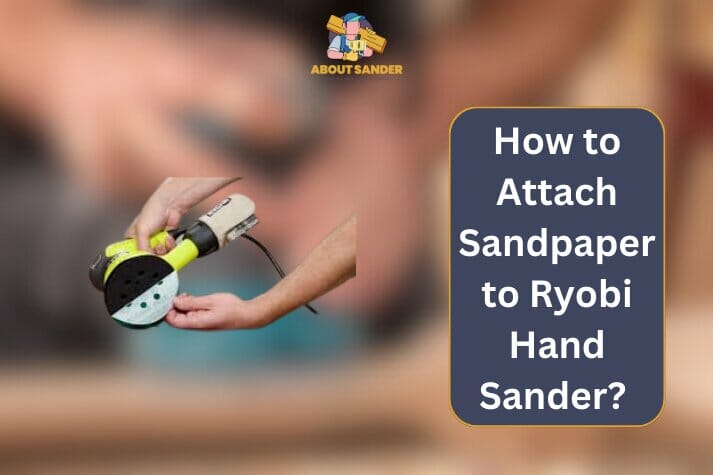
To Attach Sandpaper to Ryobu Hand sander, Secure the sandpaper to the sander’s sanding pad, aligning it properly and ensuring it’s taut, then lock it in place following the sander’s instructions.
So, let’s get started and learn how to attach sandpaper to Ryobi hand sander like a pro!
Key Takeaways:


- Different types of Ryobi hand sanders require other techniques for attaching sandpaper.
- Always wear protective gear, such as goggles and gloves, when using a hand sander.
- Use the appropriate grit of sandpaper for your project.
- Replace your sandpaper regularly to avoid damage to your project or sander.
- Refer to the instruction manual or contact Ryobi customer service for further assistance.
| Sander Types | Techniques to Attach Sandpaper Ryobi hand sander | Safety Measures | Tips | FAQs |
| Random Orbital Sander | Use Hook and Loop System | Wear protective gear | Choose the appropriate grit of sandpaper for your project. | How do I attach sandpaper to my Ryobi hand sander? |
| Sheet Sander | Use Clamps | Keep the sander and sandpaper dry | Replace sandpaper regularly | What grit of sandpaper should I use for my project? |
| Belt Sander | Use Tension Release Lever | Secure the workpiece before sanding | Check sandpaper alignment before tightening clamps | How often should I replace my sandpaper? |
| Palm Sander | Use Adhesive Backed Sandpaper | Use two hands to operate the sander | Test the sander on a small area before starting the project |
Here are methods to attach sandpaper to Ryobi hand sander of different sanders
Yes, the technique that how to attach sandpaper to Ryobi hand sanders can vary depending on the type of sander. Here are some common types of Ryobi hand sanders and the methods required to attach sandpaper to each of them:
Orbital Sanders:
Orbital sanders are versatile hand sanders that use a circular motion to sand wood, metal, and other materials. To attach sandpaper to an orbital sander, you should follow these steps:
- First, ensure the sander is unplugged, and the sanding pad is clean.
- Next, please select the sandpaper for your sander and cut it to the correct size using a sandpaper cutter or scissors.
- Align the sandpaper with the sanding pad, ensuring that it is centered and that the holes in the sandpaper match up with the holes in the pad.
- Once the sandpaper is aligned, press it firmly onto the pad, ensuring it is smooth and free of any wrinkles or bubbles.
- Finally, reattach the sanding pad to the sander, ensuring it is secured tightly and the sandpaper is attached correctly.
Belt Sanders:
Belt sanders are powerful hand sanders that use a continuous sandpaper loop for sanding large surfaces quickly. To attach sandpaper to a belt sander, you should follow these steps:
- First, ensure the sander is unplugged, and the belt is clean.
- Next, select the correct size and type of sandpaper for your sander and cut it to the right size using a sandpaper cutter or scissors.
- Open the belt clamp on the sander and place the sandpaper over the belt, ensuring the grit side faces the belt.
- Pull the sandpaper tight and wrap it around the belt, ensuring it is aligned and centered on the belt.
- Finally, close the belt clamp and turn on the sander to ensure that the sandpaper is attached correctly and that there are no wrinkles or bubbles.
Detail Sanders:
Detail sanders are small, lightweight hand sanders perfect for sanding tight corners and hard-to-reach areas. To attach sandpaper to a detail sander, you should follow these steps:
- First, ensure the sander is unplugged, and the sanding pad is clean.
- Next, select the correct size and type of sandpaper for your sander and cut it to the right size using a sandpaper cutter or scissors.
- Peel off the backing paper from the sandpaper and stick it onto the sanding pad, ensuring it is smooth and free of any wrinkles or bubbles.
- Finally, reattach the sanding pad to the sander, ensuring it is secured tightly and the sandpaper is attached correctly.
While the basic technique of attaching sandpaper to a Ryobi hand sander remains the same, the specific steps may differ depending on the type of sander. Following the instructions above for each type of sander, you can ensure that your sandpaper is attached correctly and ready to tackle any sanding task.
5 DIY tips on attaching sandpaper to Ryobi hand sander
If you want to achieve a smooth and polished finish on your woodworking projects, it’s essential to know how to attach sandpaper to your Ryobi hand sander. While the process may seem daunting initially, it is pretty simple once you know the proper techniques. In this article, we will share five tips on attaching sandpaper to your Ryobi hand sander to help you achieve the perfect finish for your projects.
1: Clean Your Sander:
Before you attach sandpaper to Ryobi hand sander, it’s essential to clean it thoroughly. This will help to ensure that the sandpaper adheres appropriately to the sander and that it won’t come loose during use. Use a soft cloth to remove dust or debris from the sanding pad and the sander body.
2: Choose the Right Sandpaper:
Selecting the correct type of sandpaper is crucial to achieving a smooth and even finish. Different types of sandpaper are designed for other materials, so be sure to choose the appropriate sandpaper for the material you will be sanding. Also, ensure that the sandpaper is the correct size for your sander.
3: Align the Sandpaper Correctly:
Proper alignment of the sandpaper is essential for achieving an even finish. To ensure that the sandpaper is aligned correctly, make sure that it is centered on the sanding pad and that the holes in the sandpaper match up with the holes in the pad. This will help to prevent the sandpaper from tearing or becoming dislodged during use.
4: Apply Even Pressure:
When you attach sandpaper to Ryobi hand sander, it’s important to apply even pressure to ensure it properly adheres to it. Start at one end of the sanding pad and work across, pressing down firmly. This will help ensure the sandpaper is smooth and free of wrinkles or bubbles.
5: Test the Sandpaper:
Before starting your sanding project, it’s a good idea to test the sandpaper to ensure it is correctly attached to the sander. Please turn on the sander and run it over a small test piece of wood or other material. If the sandpaper is connected correctly, it should sand evenly without tears or wrinkles.
Here are a few safety measures for attaching sandpaper to a Ryobi hand sander

While attaching sandpaper to a Ryobi hand sander may seem straightforward, it is essential to take specific safety measures to ensure that you do not injure yourself or damage your sander. In this article, we will share some safety tips on attaching sandpaper to your Ryobi hand sander to help you work safely and effectively.
Wear Protective Gear:
Before attaching sandpaper to your Ryobi hand sander, wearing the appropriate protective gear is essential. This includes safety goggles to protect your eyes from flying debris and a dust mask to prevent inhalation of sawdust and other particles.
Turn off the Sander:
Always turn off your Ryobi hand sander before attaching sandpaper to avoid accidental injury. This will prevent the sanding pad from spinning and causing damage while connecting the sandpaper.
Unplug the Sander:
In addition to turning off your sander, it is also important to unplug it from the power source before attaching sandpaper. This will ensure the sander is not accidentally turned on while attaching the sandpaper.
Use the Right Technique:
When attaching sandpaper to your Ryobi hand sander, it’s essential to use the correct technique to avoid injury. Hold the sandpaper in place with one hand while using the other hand to press down on the sander and secure the sandpaper in place. Be sure to apply even pressure and avoid putting your fingers too close to the spinning sanding pad.
Inspect the Sandpaper:
Before using your Ryobi hand sander, it’s essential to inspect the sandpaper to make sure that it is securely attached to the sander. Check for any tears or wrinkles in the sandpaper, and ensure it is aligned correctly on the sanding pad. Using damaged or improperly attached sandpaper can result in injury or damage to your sander.
FAQs
Attaching sandpaper to your Ryobi hand sander may seem simple, but it can sometimes raise questions and uncertainties. This section will answer frequently asked questions about attaching sandpaper to your Ryobi hand sander.
How do I attach sandpaper to my Ryobi hand sander?
To attach sandpaper to your Ryobi hand sander, start by selecting the appropriate grit and size of sandpaper for your project. Next, loosen the clamps on your sander’s sanding pad and place the sandpaper onto the pillow. Ensure the sandpaper is flat and aligned with the edges of the sanding pad.
What grit of sandpaper should I use for my project?
The grit of sandpaper you should use depends on the project you are working on. Lower grits, such as 60 or 80, are typically used for heavy sanding and removing paint or rough edges. Higher spirits, such as 120 or 220, are used for finer sanding and smoothing surfaces. Choose the appropriate grit for your project to achieve the desired results.
How often should I replace my sandpaper?
The frequency of replacing your sandpaper depends on the type of project you are working on and the condition of the sandpaper. If you notice the sandpaper is starting to wear out, tear or lose its grip on the sanding pad, it is time to replace it. It is important to use fresh sandpaper to avoid damaging your project or your sander.
Conclusion:
Attaching sandpaper to your Ryobi hand sander is important in achieving a smooth and even finish on your project. You can reach the desired results by following the proper techniques and using the appropriate sandpaper grits.If you have any further questions on how to attach sandpaper to your Ryobi hand sander, refer to the instruction manual or contact Ryobi customer service for assistance.

Why Trust About Sanders?
When it comes to the world of sanding and sanders, you need a trusted source of information and guidance to ensure you achieve those perfect finishes. That's where I come in – I'm Martin, a dedicated sanding enthusiast with a relentless passion for attaining flawless surfaces. With years of hands-on experience in the sanding industry, I've honed my skills and expertise to provide you with the most reliable and accurate insights. What sets me apart is my commitment to excellence. I meticulously handpick each sander after rigorous testing, ensuring that only the best tools make it to your hands. My goal is to empower you with the knowledge and recommendations you need to tackle any sanding task confidently. When you trust About Sanders, you're putting your faith in a seasoned expert who shares your passion for perfection and strives to deliver top-notch information and reviews for every sanding challenge.
