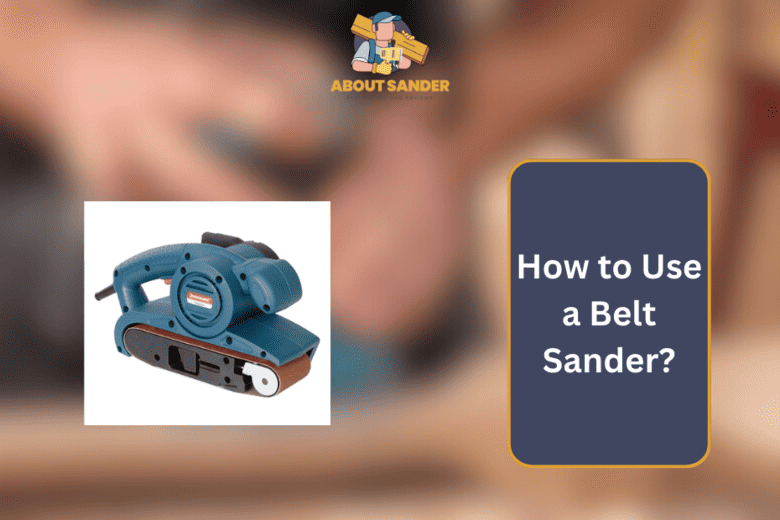
Belt sanders are versatile power tools to transform uneven and rough wood surfaces into smooth and polished ones. Here’s how to use a belt sander to achieve effortless surface smoothing. Understanding the different methods to use a belt sander is essential in selecting the appropriate tool for your project and achieving the desired results efficiently.
Key Takeaways:
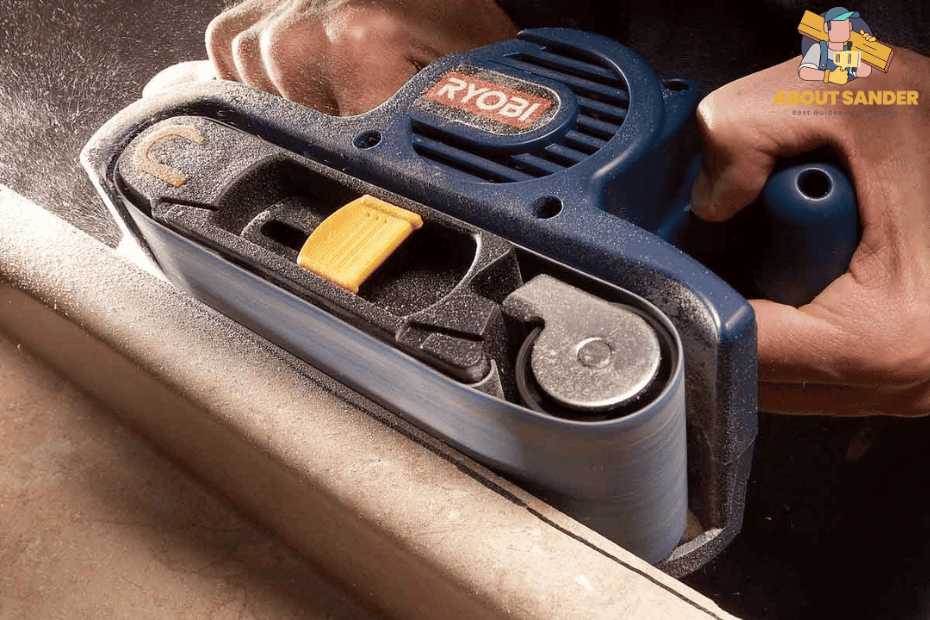

- You can use a belt sander for various projects, from sanding wooden floors to smoothing the edges of the wood.
- Choosing the correct grit for your project is essential to achieve the desired finish.
- Always wear safety gear to use a belt sander to protect yourself from dust and noise.
- Use a belt sander on metal surfaces, but use the appropriate abrasive belt.
- Regular maintenance of your belt sander, including cleaning and lubricating moving parts, is crucial to ensure smooth operation.
- Take breaks frequently to avoid fatigue and strain.
- With the correct technique and knowledge, a belt sander can save you time and effort on your DIY projects.
How to use a Belt Sander for Effortless Surface Smoothing?
Are you tired of spending hours sanding rough surfaces manually? A belt sander is a powerful tool that can make your sanding tasks more efficient and effortless. In this guide, we’ll explore the top uses of a belt sander for surface smoothing.
Refinishing Furniture:
If you’re a furniture restorer, you know how time-consuming it can be to strip old finishes and sand surfaces manually. With a belt sander, you can speed up the process and achieve a smooth, even finish. Whether refinishing a table, chair, or dresser, a belt sander can save you work hours.
Sanding Wooden:
Floors Sanding wooden floors is another task that takes a lot of time and energy. A belt sander can make the process quicker and more efficient. You can remove scratches, dents, and stains from hardwood floors by attaching the appropriate sanding belt. A belt sander can also help you achieve a uniform finish across the surface.
Smoothing Edges:
If you’re working on a project that requires smooth edges, a belt sander can help you achieve the desired result. Whether you’re building a bookshelf, a cutting board, or a picture frame, a belt sander can quickly remove rough edges and give your project a polished look.
Removing Paint:
A belt sander can make the job more manageable if you need to remove paint from a surface. By attaching the appropriate sanding belt, you can quickly strip away layers of paint and reveal the bare surface underneath. A belt sander can help remove paint from large surfaces like walls or doors.
Preparing Surfaces for Finishing:
Before applying a finish to a surface, you must prepare it properly. A belt sander can help you achieve a smooth, even surface ready for finishing. By sanding with progressively finer grits, you can remove imperfections and create a character ready for painting, staining, or varnishing.
Shaping Wood:
If you’re a woodworker, you know that shaping wood can be challenging. A belt sander can make the process easier by quickly removing excess material and shaping the wood to your desired shape. Whether creating an item of curved furniture or shaping a decorative object, a belt sander can save you time and effort.
Removing Rust:
If you have rusty metal surfaces, a belt sander can help you remove the rust and restore the surface to its original condition. By attaching the appropriate sanding belt, you can quickly remove rust and prepare the surface for painting or coating.
Polishing Metal:
A belt sander can also be used for polishing metal surfaces. Attaching a polishing belt, you can achieve a mirror-like finish on metal objects like car parts, tools, or jewellery.
Guide: When and How to Use a belt sander for Smooth Surfaces:
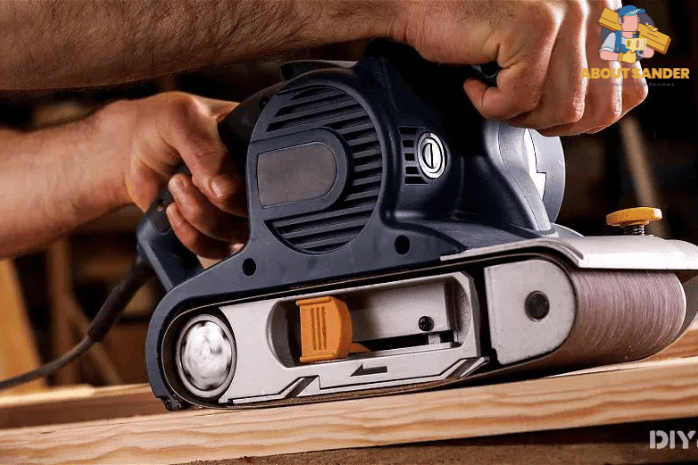
A belt sander can be handy for achieving a smooth surface, but it’s essential to know when and how to use it to get the best results. In this guide, we’ll explore the key factors to consider when using a belt sander for smooth surfaces.
Selecting the Right Grit:
The grit of the sandpaper on a belt sander can vary widely, from coarse to fine. Choosing the correct grit for the job is crucial to achieving a smooth surface. A coarse grit will remove material quickly but may leave scratches, while a fine grit will remove less material but a smoother finish.
Understanding the Material:
Different materials may require different approaches to use a belt sander. For example, sanding hardwood may require a more aggressive approach than sanding softwood. Additionally, some materials may need more or less pressure to achieve the desired result.
Preparing the Surface:
Before trying to use a belt sander, it’s crucial to prepare the surface properly. This may include removing debris or loose material, filling any cracks or holes, and ensuring the consistency is clean and dry.
Using Proper:
The belt sander technique is essential for achieving a smooth surface. This includes using steady, even pressure and keeping the sander moving in a straight line. Pressing the sander slowly is also important, as this can lead to uneven sanding.
Finishing Touches:
Once you’ve achieved a smooth surface with the belt sander, you can finish the surface with a finer grit sandpaper or apply a sealant or finish to protect the surface and enhance its appearance.
Considering these key factors use a belt sander effectively and achieve a smooth surface on various materials.
Tips and Tricks for Smooth Surfaces:

Belt sanding is a powerful technique for achieving a smooth surface on various materials, but it’s essential to use the right approach to get the best results. This guide explores tips and tricks for effectively using a belt sander.
Proper Belt Selection:
Choosing the right belt for the job is critical to achieving a smooth surface with a belt sander. Different grits and types of straps are designed for other materials and applications, so it’s essential to select the right belt for the task at hand.
Ensuring Proper Belt Tension:
A belt sander can only work effectively when adequately tensioned. This means the belt should be tight enough to stay in place but not so tight that it causes excessive wear on the sander or the belt.
Maintaining a Proper:
Technique and the correct belt sanding method are essential for achieving a smooth surface. This includes using steady, even pressure and keeping the sander moving in a straight line. Pressing the sander slowly is also important, as this can lead to uneven sanding.
Sanding Large Surfaces:
When sanding large surfaces with a belt sander, working in sections ensures you get all the spots. A back-and-forth motion can help you cover a larger area more quickly and efficiently.
Finishing and Clean-Up:
Once you’ve achieved a smooth surface with the belt sander, it’s essential to finish it properly to protect it and enhance its appearance. This may include using finer grit sandpaper or applying a finish or sealant. Cleaning up any debris or dust generated during sanding is also essential.
By following these tips and tricks, you can unlock the power of belt sanding and achieve a smooth surface on various materials.
Why is Belt Sander called a Power Tool?
If you’re a DIY enthusiast, a belt sander is a tool you can’t live without. Here are some reasons why every DIY enthusiast needs a belt sander in their toolkit:
Versatility:
A belt sander is a highly versatile power tool that can be used for various applications. Whether you need to remove paint or rust from metal surfaces, smooth rough edges on wooden boards, or prepare a surface for painting or staining, a belt sander can do the job quickly and efficiently.
Efficiency:
Belt sanders are incredibly efficient tools that save time and effort compared to manual sanding. With a powerful motor and a wide sanding belt, a belt sander can quickly cover a large surface area, making it ideal for DIY projects that sand large pieces of material.
Precision:
A belt sander can help you achieve high precision in your sanding work. With adjustable speed settings and a range of different grits of sandpaper, you can tailor your sanding work to achieve the exact finish you need.
Cost-Effective:
Investing in a belt sander can be a cost-effective way to save time and money on your DIY projects. Rather than spending hours sanding by hand or hiring a professional to do the job, a belt sander can help you achieve a professional-level finish at a fraction of the cost.
DIY-friendly:
Belt sanders are easy to use and require minimal training or experience. Even a beginner DIY enthusiast can achieve great results with a belt sander with some practice.
In conclusion, a belt sander is a must-have tool for every DIY enthusiast. With its versatility, efficiency, precision, cost-effectiveness, and DIY-friendliness, a belt sander can help you achieve professional-level results on your DIY projects.
Types of Belt Sanders: A Comprehensive Guide
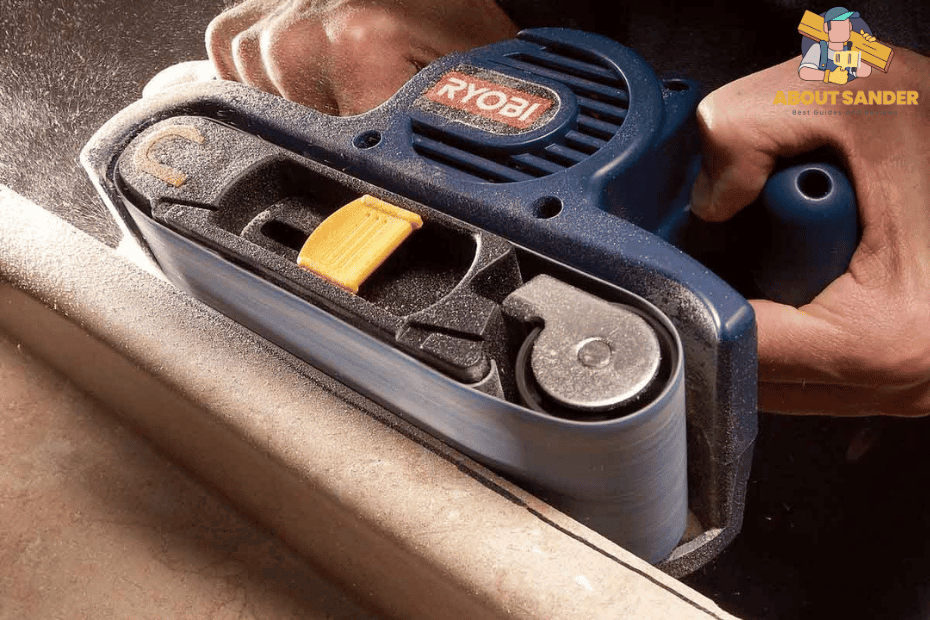
Belt sanders are available in various types, each with unique features and benefits. Here are the most common types of belt sanders:
Stationary Belt Sanders:
Stationary belt sanders are extensive, powerful tools for heavy-duty sanding tasks. They feature a static table that supports the sanded material and a sanding belt that moves around a set of rollers. Stationary belt sanders are ideal for sanding large pieces of fabric or in a fixed location.
Handheld Belt Sanders:
Handheld belt sanders are smaller and more portable than stationary belt sanders. They are designed for sanding smaller pieces of material or in hard-to-reach areas. Handheld belt sanders are lightweight and easy to use, making them ideal for DIY enthusiasts or hobbyists.
Benchtop Belt Sanders:
Benchtop belt sanders are similar to stationary belt sanders but are smaller and designed to be mounted on a workbench. They are ideal for sanding smaller pieces of material or in a fixed location. Benchtop belt sanders are also more affordable than stationary, making them popular among DIY enthusiasts.
Portable Belt Sanders:
Portable belt sanders are similar to handheld belt sanders but are larger and more powerful. They are designed for sanding large pieces of material or in a fixed location. Portable belt sanders are also ideal for sanding rough or uneven surfaces like floors or decks.
Wide Belt Sanders:
Wide belt sanders are industrial-grade sanders for high-volume sanding tasks. They feature a wide sanding belt that can sand large pieces of material quickly and efficiently. Wide belt sanders are typically used in woodworking or manufacturing industries.
| Type | Features and Benefits |
| Stationary Belt | Heavy-duty sanding tasks, ideal for sanding large pieces of material |
| Handheld Belt | Portable, lightweight, easy to use, ideal for sanding smaller pieces of material |
| Benchtop Belt | Smaller and more affordable than stationary belt sanders, easy to mount |
| Portable Belt | Larger and more powerful than handheld belt sanders, ideal for rough surfaces |
| Wide Belt | Industrial-grade, designed for high-volume sanding tasks |
Transforming Wood with a Belt Sander:
A belt sander is a powerful tool that can transform rough and uneven wood surfaces into smooth and polished ones. Here’s how to use a belt sander to achieve the desired results:
Prepare the Wood Surface:
Before going to use a belt sander, ensure the wood surface is free of dirt, debris, or loose material. Sand off any rough spots with a coarse-grit sandpaper to level the surface.
Choose the Right Sandpaper:
Select the appropriate sandpaper grit based on the level of sanding required. A coarse-grit sandpaper, such as 60 or 80 grit, can be used for removing rough spots, while a finer grit, such as 120 or 150 grit, can be used for smoothing and polishing.
Wear Safety Gear:
Wear protective gear, such as safety glasses and a dust mask, to prevent injury from flying debris and dust.
Use the Belt Sander:
Hold the belt sander firmly and turn it on. Move the sander along the wood surface toward the wood grain, applying light pressure. Avoid leaving the sander in one spot too long to prevent uneven sanding.
Sand in Stages:
Begin sanding with coarse-grit sandpaper and gradually switch to a finer grit until the desired smoothness is achieved. Filing in stages helps to avoid damaging the wood surface and ensures a smoother finish.
Finish with Hand Sanding:
Finish the sanding process with hand sanding using fine-grit sandpaper. This helps to achieve a polished finish and remove any visible scratches or marks left by the belt sander.
In conclusion, a belt sander is a versatile tool that can transform rough and uneven wood surfaces into smooth and polished ones. You can achieve a professional-looking finish on your woodworking projects with proper preparation, the correct sandpaper grit, and safe and controlled use of the belt sander.
How Can a Belt Sander Save Your Time and Effort?
Belt sanders are a powerful tool that can help you save time and effort in your DIY or woodworking projects. Here’s how a belt sander can benefit you and your projects:
Quick and Efficient Sanding:
Belt sanders have a sizeable sanding surface area that can cover a larger area quickly and efficiently compared to other sanding tools. This can help you save time and effort in your sanding process.
Versatile:
Use a Belt sanders are versatile tools that can be used for various projects, such as sanding wood, metal, and even plastic. This means you don’t have to invest in multiple sanding tools, which can save you money and storage space.
Uniform and Smooth Finish:
Belt sanders can produce a uniform and smooth finish on wood surfaces, which can be challenging to achieve with other sanding tools. This can give your projects a professional-looking finish, saving you time and effort from manual sanding.
Easy to Control:
To use a Belt sander is easy to control and can be used to remove material quickly or for fine sanding. This level of control can help you achieve the desired results more efficiently.
Dust Collection:
System Many belt sanders come equipped with a dust collection system, which can help keep your workspace clean and reduce the time you spend cleaning up after your sanding projects.
In conclusion, a belt sander can save time and effort in your DIY and woodworking projects by offering quick and efficient sanding, versatility, uniform and smooth finishes, effortless control, and a dust collection system. Incorporating a belt sander into your toolkit can provide numerous benefits, making your projects more accessible, efficient, and of higher quality.
How to Choose the Right Belt Sander for Your Needs?

Choosing the right belt sander for your needs ensures you get the best project results. Here are some factors to consider when selecting the right belt sander:
Type of Project:
Consider the project you will use the belt sander for. If you will be working on smaller, intricate pieces, a handheld belt sander may be more suitable. For larger projects, a stationary belt sander may be a better choice.
Motor Power:
The motor power of the belt sander is an essential factor to consider. The more powerful the motor, the faster the sanding process will be. However, a more powerful engine may also be heavier and more difficult to control, so balance your needs.
Belt Speed:
The belt speed can impact the effectiveness of the sanding process. A higher belt speed can be more effective for removing material quickly, while a slower pace may be more suitable for finer sanding.
Belt Size:
Belt size can vary depending on the type of belt sander. Consider the size of the materials you will be working with and choose a belt size that can accommodate them.
Dust Collection System:
A dust collection system can help keep your workspace clean and prevent dust accumulation, which can harm your health. Consider the type and effectiveness of the dust collection system when selecting a belt sander.
Brand and Price;
Choose a reputable brand with a warranty and good customer support. Consider your budget and select a belt sander that offers the features you need at a price point you can afford.
Considering these factors, you can select the right belt sander for your needs and ensure that your projects are completed effectively and efficiently.
Wooden belt sander:
A wooden belt sander is a type of belt sander that is designed explicitly for woodworking applications. This tool is designed to help woodworkers achieve a smooth and even surface on their wood projects.
Here are some key features of a wooden belt sander:
Belt Size:
Wooden belt sanders typically have a broader belt size than other belt sanders. This wider belt helps to reduce the chances of belt tracking issues and ensures a smoother sanding process.
Motor Power:
A wooden belt sander’s motor power is usually between 1 and 2 horsepower. This provides enough power to sand large pieces of wood quickly and effectively.
Dust Collection System:
Woodworking generates significant dust, which can harm your health if inhaled. A wooden belt sander often comes with a dust collection system to help mitigate this issue and keep your workspace clean.
Table Size and Adjustability:
A wooden belt sander’s table size and adjustability are essential factors to consider. A larger table size can support more significant pieces of wood, while adjustability allows you to customize the angle and height of the table to suit your needs.
Variable Speed:
A wooden belt sander often comes with variable speed control, which allows you to adjust the speed of the belt to suit the type of wood you are working with. This feature is handy when sanding softwoods or hardwoods requiring different sanding rates.
Overall, a wooden belt sander is essential for any serious woodworker. Its wide belt size, powerful motor, dust collection system, and adjustable table can help you achieve a smooth and even surface on your wood projects.
FAQs:
Here are five frequently asked questions (FAQs) on how to use a belt sander:
What types of projects can I use a belt sander for?
A belt sander can be used for various projects, including sanding wooden floors, removing paint or rust from metal surfaces, shaping and smoothing edges of the wood, and restoring old furniture, among other uses.
How do I choose the correct grit for my belt sander?
The grit of a belt sander refers to the coarseness of the sandpaper on the belt. The right spirit to use depends on the project you are working on. A lower grit (60-80) for rough sanding is ideal, while a higher determination (120-220) is recommended for finishing work.
Is it necessary to wear safety gear when using a belt sander?
Yes, wearing safety gear when using a belt sander is essential. This includes safety glasses or goggles, a dust mask, and ear protection. Belt sanders can generate a lot of dust and noise, which can harm your health.
Can I use a belt sander on metal surfaces?
Belt sanders can be used on metal surfaces, but you must use the right abrasive belt type. Use a belt with a higher grit and a harder abrasive material, such as zirconia or ceramic, for metal surfaces.
How do I maintain my belt sander?
To maintain your belt sander, make sure to keep the sanding belt clean and replace it when it becomes worn or damaged. You should also regularly clean the dust collection system and lubricate the moving parts to ensure smooth operation. Also, store your belt sander in a dry, clean area to prevent rust and damage.
Conclusion:
In conclusion, belt sanders are versatile power tools that can make sanding and smoothing surfaces a breeze. With the proper technique and knowledge, they can save you time and effort on your DIY projects. Choosing the right belt sander for your needs is essential; always wear safety gear when using it.

Why Trust About Sanders?
When it comes to the world of sanding and sanders, you need a trusted source of information and guidance to ensure you achieve those perfect finishes. That's where I come in – I'm Martin, a dedicated sanding enthusiast with a relentless passion for attaining flawless surfaces. With years of hands-on experience in the sanding industry, I've honed my skills and expertise to provide you with the most reliable and accurate insights. What sets me apart is my commitment to excellence. I meticulously handpick each sander after rigorous testing, ensuring that only the best tools make it to your hands. My goal is to empower you with the knowledge and recommendations you need to tackle any sanding task confidently. When you trust About Sanders, you're putting your faith in a seasoned expert who shares your passion for perfection and strives to deliver top-notch information and reviews for every sanding challenge.
