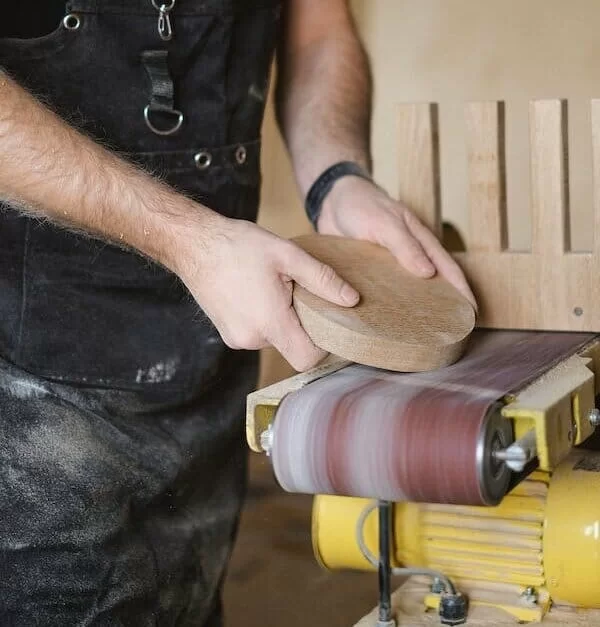
Are you new to the world of woodworking or want to know how to use a Stationary Belt sander is essential to achieve the best results and maximize its capability. In this post, we’ll walk you through how to use a stationary belt sander safely and effectively.
How to Use a Stationary Belt Sander?
Using a stationary belt sander can help you quickly and efficiently sand materials, but knowing how to safely and effectively operate the tool is essential. Here are the steps to follow:
Step 1: Safety First
Working with power tools like stationary belt sanders can be dangerous if proper safety measures are not taken. This section will detail the safety measures you should follow when use a belt sander.
Eye Protection
Wearing eye protection is essential when using a stationary belt sander to protect your eyes from debris. Sandpaper can easily create small airborne particles and cause severe eye damage. Therefore, wearing safety goggles or glasses that fit snugly against your eyes is advisable.
Ear Protection
Since stationary belt sanders can be loud, wearing earplugs or earmuffs to protect your hearing from the noise is also essential. Exposure to loud noise can lead to hearing loss, and prolonged use of a stationary belt sander without ear protection can cause damage to your hearing.
Dust Protection
Sanding will produce dust particles that can harm your lungs if inhaled. To avoid that, you must wear a dust mask/respirator to protect yourself from these particles. A simple dust mask that fits snugly over your mouth and nose is sufficient.
Secure Workpieces
When using a stationary belt sander, ensure the materials are secured to prevent slipping or flying off the sander. Unsecured material can be dangerous and cause injuries or damage to the workpiece. You can connect your material with clamps or grips to prevent it from moving while sanding.
Following these safety measures can prevent accidents and ensure you are safe while using a stationary belt sander.
Step 2: Adjusting the Sander

Adjusting the sander is crucial to ensure the best results from the tool. This section explains the steps to take to change the sander properly.
Loosen the Tension Lever
The first thing you should do is loosen the tension lever that holds the sanding belt in place. This will allow you to adjust the belt’s alignment and tension.
Adjust the Belt Alignment
The next step is to align the sanding belt. Make sure that the strap remains centered on the rollers and tracks straight. To do this, adjust the tilting table and adjust the roller position. Once you’ve made these adjustments, ensure you tighten the tension lever back into place.
Adjust the Sanding Table Height
Most stationary belt sanders have a sanding table that you can adjust up and down to control the height of the material relative to the sanding belt. This adjustment is essential and will depend on the thickness and hardness of the material you’ll be sanding. To adjust the sanding table, loosen the locking lever and move the table up or down to your desired height. Tighten the locking lever back into place once you achieve the desired size.
Properly Align the Workpiece with the Belt
The final step is ensuring the workpiece is appropriately aligned with the belt. The sanding belt will create an uneven surface if the material is not aligned correctly. To align the workpiece, ensure that the surface you want to sand is in contact with the belt. Also, align the belt to work across the material’s grain for the best results.
By adjusting the sander’s different components, you can ensure that you get a clean and even finish on your material.
Step 3: Choosing the Right Belt
Choosing the right belt is essential for achieving the best results using a stationary belt sander.
Consider the Material You’re Sanding
The first thing to consider when choosing a sanding belt for your stationary sander is the material you’ll be sanding. Different materials require different grit counts. If you work with a hard or rough material like lumber or metal, a lower grit count (higher coarseness) will allow you to remove material faster.
At the same time, a higher grit count (finer) will allow you to achieve the desired finish for softer materials or those with smoother surfaces.
Determine the Type of Finish You Want
The next thing to consider when choosing a sanding belt is your desired finish. If you’re looking for a rough finish or removing excess material from your workpiece, use a lower grit count (60-100 grit). Use a higher grit count (120-220 grit) if you’re trying to create a smoother finish. A higher-grit sanding belt will provide a smoother finish by removing less material with each pass of the belt.
Match Grit to the Surface
It’s also essential to match the grit of the sanding belt to the surface of the material you want to sand. For example, if the material’s surface is smooth, use a higher grit count sanding belt to produce a smoother finish. In contrast, if the surface is rougher or porous, use a lower grit count sanding belt to remove enough material to even out the cover.
By considering the type of material you’re working with, the finish you want, and matching the grit to the surface, you can choose the proper sanding belt for your stationary belt sander.
Step 4: Sanding Technique

Proper sanding technique with a stationary belt sander is crucial to getting the best results.
Turn on the Sander
The first step is to turn on the stationary belt sander and let it reach full speed before starting the work. It’s essential to give the belt sander enough time to spin up to speed to ensure you get smooth and even sanding results.
Hold the Workpiece with Both Hands
Next, please pick up the workpiece with both hands and hold it firmly against the sanding belt. Ensure that your hands are holding the workpiece in a way that keeps them away from the sanding area to avoid any injuries.
Move the Workpiece in the Direction of the Belt’s Rotation
Keep the workpiece level and move it toward the direction of the sanding belt’s rotation while maintaining a firm grip. Keep a steady and constant pressure while sanding to avoid uneven surface patches.
Keep the Workpiece Flat and Level
It’s essential to keep the workpiece flat and level against the sanding belt while sanding. Applying extra pressure or force can damage the workpiece or create an uneven surface that might be difficult to fix.
Sand the Edge of the Material
To sand the edges of your material, slightly move it up and down while keeping the edge flat against the sanding belt. This technique helps to create sharp yet smooth edges.
By following these sanding techniques, you can get a smooth and even finish on your workpiece that meets your desired outcomes.
Step 5: Sanding Different Material
Different materials need different sanding techniques to get the best results. Here are some tips for sanding other materials:
For Wood: Use a lower grit belt to remove roughness and then use a higher grit belt for smoothing the surface.
For Metal: Use finer grit belts to avoid leaving marks on metal and to create a smooth surface.
For Plastic: Use a higher grit belt to avoid melting or warping the plastic and to create a smooth and even finish.
Step 6: Maintenance and Cleaning
Maintaining and cleaning the stationary belt sander is essential for the overall lifespan and performance of the tool. Here are the steps to follow:
- Please turn off the sander and unplug it before cleaning.
- Wipe down the surface, sanding belt, and table to remove dust or debris particles.
- Inspect the belt and replace it if it is damaged or worn
- Check the sander’s alignment regularly.
- Keep the machine covered and protected from sunlight or humidity.
Following these steps to use a stationary belt properly sander can help you get the best results from your sanding projects while also ensuring your safety and the tool’s longevity.
6 Tips for Using the Stationary Belt Sander in the Right Way
The stationary belt sander is a versatile tool used by woodworkers, metalworkers, and machinists for various applications. However, improper tool use can lead to accidents and injuries, damaging both the user and the machine. In this post, we’ll look at some tips for using the stationary belt sander correctly, so you can get the most out of it while staying safe.
Choose the Right Belt
The first step in using the stationary belt sander is to choose the right belt for the job. Several types of straps are available, each with its own grit level, material, and size. Choose a belt appropriate for the material you’re working with, and ensure it’s the right size for your machine.
Dress the Belt
Before you start using the stationary belt sander, it’s essential to dress the belt. This means removing any buildup or debris on the belt, which can cause uneven wear and tear. To wrap the strap, run it over a small piece of hardwood or other abrasive material to remove debris.
Use the Right Technique
When using the stationary belt sander, it’s essential to use the proper technique to prevent accidents and injuries. Start by standing to the side of the machine rather than in front of it. This will help prevent your clothing from getting caught in the belt.
Next, use a light touch when guiding the material across the belt. Don’t put too much pressure on the material, which can cause the belt to wear out faster and create unnecessary heat. Let the belt work for you, and guide the material with a light touch.
Maintain Proper Speed
Another important tip for using the stationary belt sander is maintaining the proper speed. You want to use a speed appropriate for your working material. If you’re working with more rigid materials, you may need a slower speed to prevent burnishing.
Keep the Table Flat
The table on the stationary belt sander should always be flat. This will prevent accidents and injuries by keeping the material stable and secure during sanding. If you notice the table is not flat or damaged, it should be repaired or replaced before using the machine.
Use Proper Safety Gear
Finally, it’s essential to use proper safety gear when using the stationary belt sander. This includes safety glasses or goggles to protect your eyes from flying debris and ear protection to protect your hearing from the machine’s noise. You may also want to wear a dust mask or respirator to protect yourself from harmful dust and debris.
| Tips for Using a Stationary Belt Sander |
| Choose the right grit sandpaper for the job |
| Adjust the table for the material being sanded |
| Use proper technique, using light pressure and letting the belt do the work |
| Use both hands to control the material being sanded |
| Allow the sander to reach full speed before using |
| Maintain proper speed, avoiding overheating of the material |
| Use a dust collection system or wear a mask to avoid inhaling harmful dust |
| Allow the sander to cool down before changing the belt |
| Dress the belt before and after use to remove debris |
| Keep the machine clean and well-maintained |
7 Precautionary Measures While Using a Stationary Belt Sander

The stationary belt sander is a powerful tool to help you get professional-grade finishing on your wood or metalworking projects. However, the device can also be dangerous if not used carefully. Following some basic preventive measures is essential to stay safe while using a stationary belt sander. In this post, we’ll look at some of the important actions you should take while using a stationary belt sander.
Use Safety Gear
The first and most important precautionary measure is to use proper safety gear. When using a stationary belt sander, you should always wear safety glasses or goggles to protect your eyes from flying debris or dust. You should also wear ear protection to reduce the machine’s noise and a dust mask or respirator to protect your lungs. Ensure your clothing and hair are tied back to avoid getting caught in the belt.
Keep the Work Area Clear
Another important precautionary measure is to keep your work area clear. It would help if you always worked in a clean, well-lit, and organized workspace free from clutter or other materials that could interfere with the sanding process. This will help you stay safe and make your sanding job more efficient.
Follow a Sanding Plan
Before you start sanding your material, it is essential to have a plan. This means determining the starting and ending point of the material you are working on and the details of the sanding job. Follow a step-by-step sanding plan to ensure that you don’t sand too much or too little in any area and don’t wear out the belt.
Maintain Proper Speed
Maintaining the proper speed when using a stationary belt sander is also essential. Using the wrong rate can cause the material to overheat, leading to unnecessary damage or accidents. Use the lowest possible speed for your material and alternate directions as you sand for a smooth finish.
Watch Your Hands
It is essential to watch your hands when using a stationary belt sander. Keep your hands away from the belt during operation, and use the appropriate jig or clamp to hold the material during sanding. Do not use your hands to guide the material across the belt, which can cause injuries.
Use Both Hands
When sanding, use both hands to grip and control the material. This helps you balance and safely guide the material across the belt. Do not let your fingers get caught in the belt or against the table.
Take Breaks
Finally, taking breaks while using a stationary belt sander is essential. Regular intervals help prevent you from getting overworked and tired, which can lead to accidents. It also enables you to maintain focus and awareness for staying safe.
FAQs
What grit of sandpaper should be used with a stationary belt sander?
It depends on the type of material being sanded. Coarser grits, such as 60-80, are suitable for removing material, while finer grits, such as 120-220, are better for smooth finishing.
How do I change the belt on my stationary belt sander?
First, unplug the machine and loosen the tension on the belt. Then, replace the belt and re-tighten the tension carefully.
Can I use a stationary belt sander on curves?
No. Stationary belt sanders are not designed for curves. Use an oscillating spindle sander or rotary tool.
How do I prevent my stationary belt sander from overheating?
Use the right grit sandpaper, maintain proper speed, don’t apply too much pressure, and avoid sanding for too long in a single spot
Wrapping it up
A stationary belt sander is a versatile tool with a broad application in the woodworking and metalworking industries. When using this tool, it is vital to prioritize safety and to take necessary precautions, such as wearing safety gear, maintaining the proper speed, and avoiding working on curves. I hope by reading our blog post you have got a clear-cut view for how to use a stationary belt sander. Good Luck with your sanding.

Why Trust About Sanders?
When it comes to the world of sanding and sanders, you need a trusted source of information and guidance to ensure you achieve those perfect finishes. That's where I come in – I'm Martin, a dedicated sanding enthusiast with a relentless passion for attaining flawless surfaces. With years of hands-on experience in the sanding industry, I've honed my skills and expertise to provide you with the most reliable and accurate insights. What sets me apart is my commitment to excellence. I meticulously handpick each sander after rigorous testing, ensuring that only the best tools make it to your hands. My goal is to empower you with the knowledge and recommendations you need to tackle any sanding task confidently. When you trust About Sanders, you're putting your faith in a seasoned expert who shares your passion for perfection and strives to deliver top-notch information and reviews for every sanding challenge.
