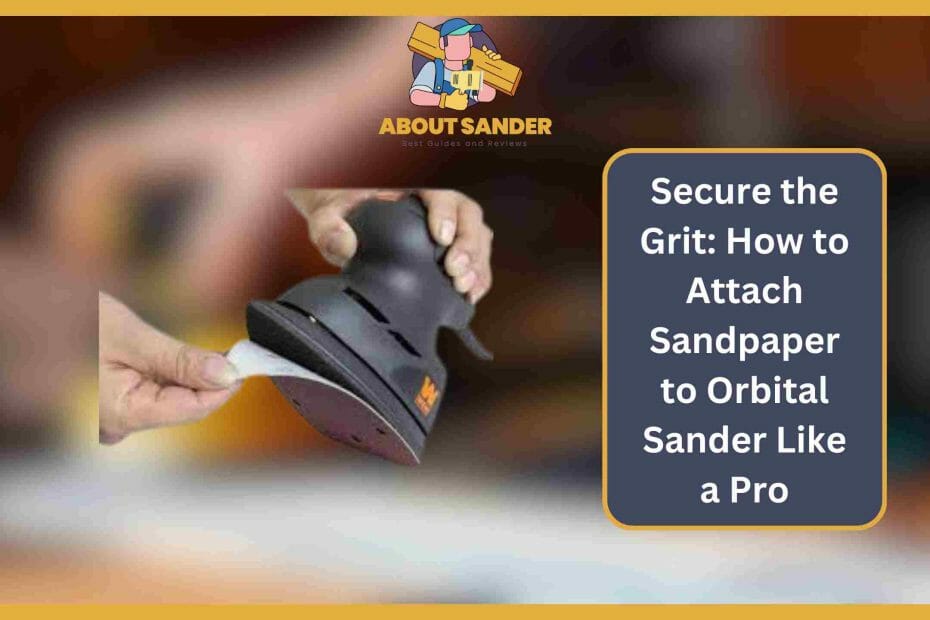
Learn how to properly attach sandpaper to an orbital sander: simply peel adhesive backing, align, and press onto the pad for effective and centred sanding.
Attaching sandpaper to your orbital sander may seem like a simple task, but it’s essential to do it correctly to ensure that the sandpaper stays in place during use.
In this guide, we’ll walk you through the steps you need to follow to attach sandpaper to your orbital sander properly.
Key takeaways:
- Proper attachment of sandpaper is important for smooth and efficient sanding.
- Different types of sandpaper are available for different sanding applications.
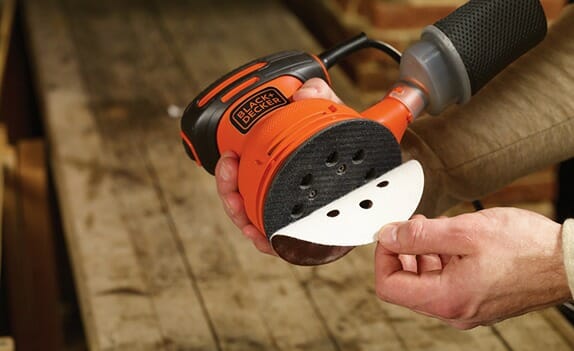
- To ensure proper attachment, align the holes in the sandpaper with the dust collection holes in the sander’s pad and press it evenly onto the pad.
- Use sandpaper that matches the size of your sander’s pad.
- Avoid common mistakes such as using worn-out sandpaper or failing to clean the pad before attaching sandpaper.
- Adhesive-backed sandpaper can also be used with an orbital sander.
- If you encounter problems with sandpaper slipping off, try using higher grit sandpaper or cleaning the pad.
How to attach sandpaper to orbital sander for Smooth Results?
Are you planning to tackle a sanding project and wondering how to attach sandpaper to your orbital sander properly? Don’t worry; we’ve got you covered. Follow these simple steps for smooth and successful results.
6 Steps for Attaching Sandpaper to Orbital Sander
Attaching sandpaper to orbital sander is crucial in achieving a smooth and successful sanding project. Follow these easy steps to ensure proper attachment and get the best results.
1. Determine the Size of the Sandpaper Needed
Before attaching sandpaper to your orbital sander, know the size you need. Most sanders have specific sizes, so choosing the right one for your project is essential.
2. Cut the Sandpaper to Fit the Size of Your Sander
Using a template or tracing the shape of your sander onto the back of the sandpaper will help ensure accuracy when cutting. Make sure to leave enough excess sandpaper to cover the entire surface of your sander’s base.
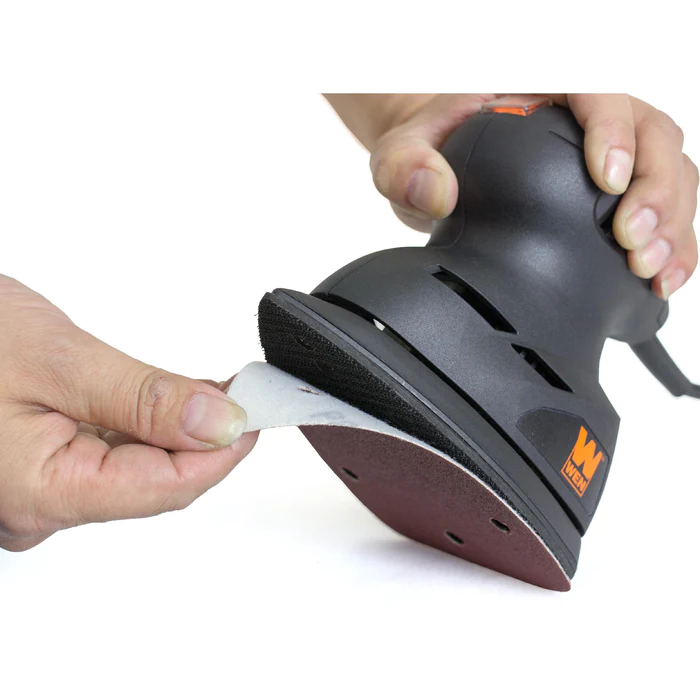
3. Peel off the Adhesive Backing from the Sandpaper
The adhesive backing on the sandpaper will reveal a sticky surface once removed. Be careful when peeling off the backing to avoid tearing the sandpaper.
4. Align the Sandpaper with the Sander’s Base
Carefully align the sandpaper with the sander’s base, ensuring it covers the entire surface. Press down on the sandpaper to ensure it adheres to the base properly.
5. Smooth Out Any Bubbles or Wrinkles
Check for any bubbles or wrinkles in the sandpaper and smooth them out. This will help ensure even sanding and prevent the sandpaper from tearing.
6. Trim Any Excess Sandpaper
Using a utility knife or scissors, trim any excess sandpaper from the edges of the sander. This will prevent the sandpaper from getting caught on anything during use.
Why Properly Attaching Sandpaper to Orbital Sander is Important
Attaching sandpaper to orbital sander may seem minor, but it plays a crucial role in achieving the desired results. Here are some reasons why attaching sandpaper to orbital sander is essential.

Ensures Even Sanding
Properly attaching sandpaper to your orbital sander ensures that the sandpaper is evenly distributed over the base. This even distribution helps prevent uneven sanding, which can cause scratches or gouges on the surface you’re sanding.
Prevents Sandpaper from Slipping.
If the sandpaper isn’t attached properly, it can slip or shift during use. This can cause the sandpaper to tear, damaging your project and rendering the sandpaper useless.
Maximizes Efficiency
When the sandpaper is properly attached to your orbital sander, it allows the sander to work efficiently, removing material evenly and quickly. This can save you time and effort and produce better results.
Promotes Safety
When the sandpaper is not properly attached, it can come loose during use, causing injury or damage to your project. Properly attached sandpaper is less likely to slip, tear or come loose, making it safer.
Saves Money
Using improperly attached sandpaper can cause it to tear, rendering it useless and requiring you to replace it more frequently. Properly attached sandpaper lasts longer, saving you money in the long run.
Types of Sandpaper and Their Uses
Sandpaper comes in various types and grades, each designed for specific uses. Knowing which type to use for your project is essential for achieving the desired results. Here are some of the most common types of sandpaper and their uses:
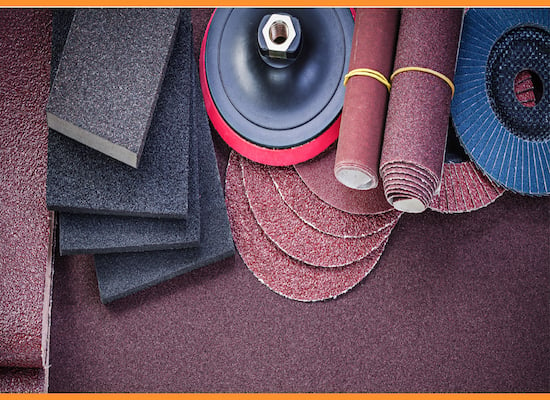
| Type of Sandpaper | Uses |
| Garnet | Woodworking, rough and finish sanding |
| Aluminum Oxide | Metal, painted surfaces, rust and corrosion removal, wood finishing |
| Silicon Carbide | Non-ferrous metals, plastic, fiberglass, glass |
| Ceramic | Stainless steel, hardwood, heavy-duty sanding, smooth finish |
1. Garnet Sandpaper
Garnet sandpaper is a natural abrasive that is great for woodworking. It’s versatile and can be used for both rough and finished sanding. It’s an excellent choice for sanding bare wood, and it produces a smooth finish.
2. Aluminum Oxide Sandpaper
Aluminum oxide sandpaper is a synthetic abrasive that is durable and long-lasting. It’s commonly used for sanding metal and painted surfaces and for removing rust or corrosion. It’s also used for finishing wood and various materials.
3. Silicon Carbide Sandpaper
Silicon carbide sandpaper is a synthetic abrasive that is incredibly sharp and hard. It’s excellent for sanding non-ferrous metals like aluminum, brass, and copper. It’s also great for sanding plastic, fiberglass, and glass.
4. Ceramic Sandpaper
Ceramic sandpaper is a newer type of abrasive that is extremely durable and long-lasting. It’s commonly used for sanding metal, particularly stainless steel, hardwood, and other materials. It’s great for heavy-duty sanding jobs and produces a very smooth finish.
5 Tips for Ensuring Proper Attachment of Sandpaper to Your Orbital Sander
Properly attaching sandpaper to orbital sander is essential for smooth and successful sanding results. Here are some tips to ensure proper attachment of sandpaper to your orbital sander:
1. Clean the Sanding Surface
Before attaching sandpaper to orbital sander, ensure the sanding surface is clean and debris-free. Dust and dirt can affect the adhesive of the sandpaper, causing it to come loose during use.
2. Match the Sandpaper to the Sanding Surface
Make sure to choose the right type of sandpaper for the surface you’re sanding. Using the wrong type of sandpaper can cause damage to your project and lead to uneven sanding results.
3. Cut the Sandpaper to Size
Measure the size of the sanding pad on your orbital sander and cut the sandpaper to fit. This ensures that the sandpaper is evenly distributed and does not overlap the edges of the sanding pad, which can cause it to come loose.
4. Attach the Sandpaper Securely
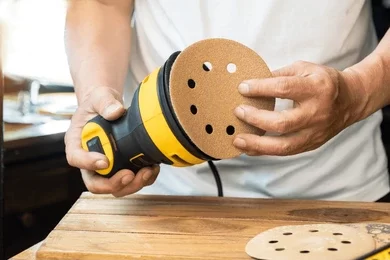
Press the sandpaper onto the sanding pad, ensuring it is aligned correctly. Apply pressure evenly over the entire surface to ensure a secure attachment. Check the sandpaper periodically during use to ensure that it remains securely attached.
5. Remove Sandpaper Carefully
When it’s time to change the sandpaper, remove it carefully to avoid damaging the sanding pad, and gently pull it off, avoiding any sudden or jerky movements that can damage the adhesive.
Common Mistakes to Avoid When Attaching Sandpaper to Orbital Sander
Attaching sandpaper to orbital sander may seem simple, but it’s essential to do it correctly to achieve the desired results. Here are some common mistakes to avoid when attaching sandpaper to orbital sander:
1. Not Cleaning the Sanding Surface
One of the most common mistakes is not cleaning the sanding surface before attaching sandpaper. Dust and debris on the sanding surface can cause the sandpaper to come loose, leading to uneven sanding and damaging the sandpaper.
2. Using the Wrong Type of Sandpaper
Using the wrong type of sandpaper is another common mistake. Matching the sandpaper to the sanding surface is essential to achieve the desired results. Using the wrong type of sandpaper can damage the surface or cause uneven sanding.
3. Overlapping the Sandpaper
Overlapping the sandpaper over the edges of the sanding pad is a common mistake that can cause the sandpaper to come loose during use. Make sure to cut the sandpaper to fit the size of the sanding pad to ensure a secure attachment.
4. Not Applying Even Pressure
Not applying even pressure when attaching the sandpaper is another common mistake. Applying pressure unevenly can cause the sandpaper to come loose or lead to uneven sanding results.
5. Rushing the Attachment Process
Rushing the attachment process is a common mistake resulting in poorly attached sandpaper. Take your time and ensure the sandpaper is correctly aligned and securely attached to the sanding pad.
Orbital Sander Sheets: Everything You Need to Know
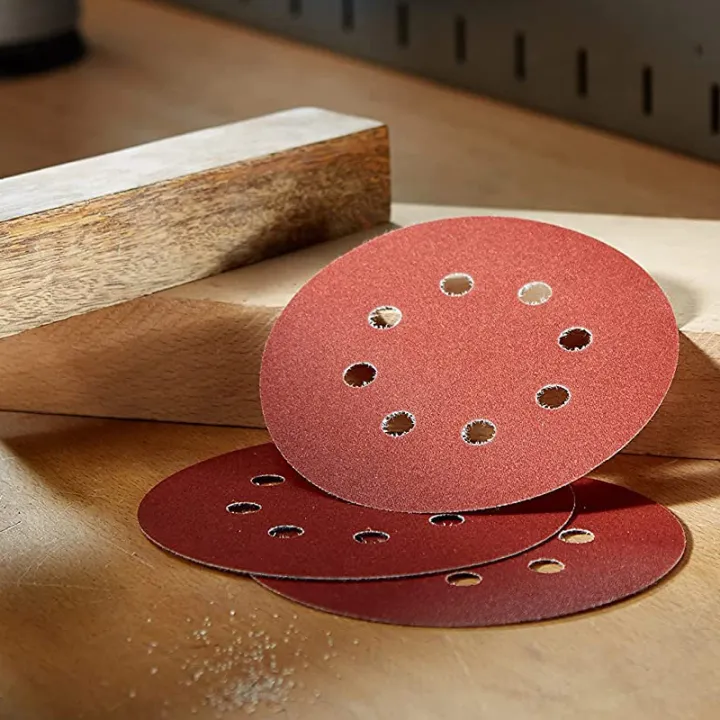
Orbital sander sheets, also known as sandpaper, are essential for achieving smooth and even sanding results. Here’s everything you need to know about orbital sander sheets:
1. Types of Orbital Sander Sheets
Various types of orbital sander sheets are available, including aluminum oxide, ceramic, and zirconia. Each type of sandpaper has different properties and is suitable for specific applications. Choosing the right type of sandpaper for your project is essential to achieve the desired results.
2. Grit Size
Orbital sander sheets are available in different grit sizes, ranging from coarse to fine. Coarse grits are ideal for removing paint and rough surfaces, while fine grits are suitable for finishing and polishing surfaces. Choosing the right grit size for your project is essential to achieve the desired sanding results.
3. Backing Material
The backing material of orbital sander sheets is another important factor to consider. The backing material is the paper or fabric that supports the abrasive particles. Choosing the right backing material for your project is essential to ensure that the sandpaper is compatible with your orbital sander.
4. Proper Storage
Proper storage of orbital sander sheets is essential to maintain their quality and effectiveness. Store sandpaper in a cool and dry place to prevent moisture damage, and keep them organized by grit size and type. This will help you easily find the right sandpaper for your project and ensure they are in good condition.
FAQs on how to attach sandpaper to orbital sander
Here are five frequently asked questions (FAQs) on how to attach sandpaper to orbital sander:
What is the proper way to attach sandpaper to an orbital sander?
The proper way to attach sandpaper to an orbital sander is to align the holes in the sandpaper with the dust collection holes in the sander’s pad. Press the sandpaper onto the pad, ensuring it is evenly aligned and securely attached.
How do I know what sandpaper size to use with my orbital sander?
The sandpaper size you should use with your orbital sander depends on the size of the sander’s pad. Typically, orbital sanders have 5 or 6-inch diameter pads and sandpaper sheets are available in these sizes. Choose sandpaper that matches the size of your sander’s pad.
Can I reuse sandpaper on my orbital sander?
It’s not recommended to reuse sandpaper on your orbital sander. Sandpaper becomes worn and less effective, so replacing it with a new sheet once worn or damaged is best.
What should I do if the sandpaper on my orbital sander keeps slipping off?
If the sandpaper on your orbital sander keeps slipping off, ensure the pad is clean and debris-free. You can also use higher grit sandpaper, which may provide better adhesion to the pad.
Can I use adhesive-backed sandpaper with my orbital sander?
Yes, adhesive-backed sandpaper can be used with an orbital sander. Peel off the backing paper and stick the sandpaper onto the sander’s pad, ensuring it is evenly aligned and securely attached.
How do you attach sandpaper to an orbital sander?
To attach sandpaper to an orbital sander, simply peel off the adhesive backing of the sandpaper, align it with the sander’s pad, and press it down firmly. Ensure the sandpaper is centred and taut for effective sanding.
Why won’t my sandpaper stick to my orbital sander?
If your sandpaper isn’t sticking to your orbital sander, it could be due to a dirty or greasy pad. Clean the pad thoroughly before attaching the sandpaper. Also, ensure you’re using the correct size of sandpaper for your sander.
How do you attach sandpaper to an oscillating sander?
Attach sandpaper to an oscillating sander using either adhesive-backed sandpaper or clamping mechanisms. Adhesive sandpaper can be peeled and pressed onto the pad while clamping mechanisms hold the sandpaper in place using tension.
What are two ways sanding discs are attached to random orbital sanders?
Sanding discs can be attached to random orbital sanders using two common methods: “hook and loop” (Velcro) attachment, where the disc sticks to a Velcro-backed pad, and adhesive attachment, where the sanding disc is stuck onto the pad using adhesive backing.
How are the sanding discs attached?
Sanding discs are typically attached to the sander’s pad using adhesive backing or a hook-and-loop (Velcro) system. Adhesive-backed discs stick directly to the pad, while hook and loop discs attach to the Velcro surface of the pad.
Why do orbital sanding discs have holes?
Orbital sanding discs have holes to serve two main purposes: First, the holes help with dust collection by allowing the sander’s dust collection system to more effectively suck up debris. Second, the holes also prevent the sanding surface from overheating by improving air circulation and cooling during sanding.
Conclusion:
In conclusion, attaching sandpaper to the orbital sander is essential in achieving a smooth and efficient sanding job. Different types of sandpaper are available, each suited for different sanding applications. Proper attachment is critical, and it involves aligning the sandpaper’s holes with the sander’s pad holes and pressing the sandpaper evenly onto the pad.
Avoiding common mistakes and replacing worn-out sandpaper with new sheets for optimal results is important. Adhesive-backed sandpaper can also be used with an orbital sander. By following these tips, you can achieve a successful sanding job with your orbital sander.

Why Trust About Sanders?
When it comes to the world of sanding and sanders, you need a trusted source of information and guidance to ensure you achieve those perfect finishes. That's where I come in – I'm Martin, a dedicated sanding enthusiast with a relentless passion for attaining flawless surfaces. With years of hands-on experience in the sanding industry, I've honed my skills and expertise to provide you with the most reliable and accurate insights. What sets me apart is my commitment to excellence. I meticulously handpick each sander after rigorous testing, ensuring that only the best tools make it to your hands. My goal is to empower you with the knowledge and recommendations you need to tackle any sanding task confidently. When you trust About Sanders, you're putting your faith in a seasoned expert who shares your passion for perfection and strives to deliver top-notch information and reviews for every sanding challenge.
