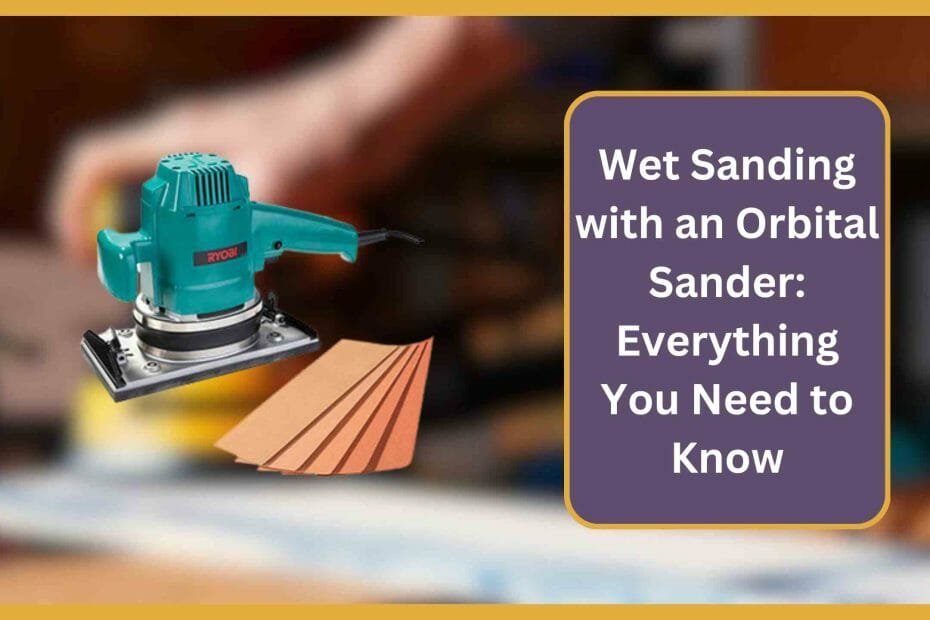
Elevate your woodworking with wet sanding with an an orbital sander. Explore the benefits and how-to, ensuring flawless finishes. Discover the power of wet sanding today!
Wet sanding is a technique used to refine and smooth surfaces by applying water or a lubricating liquid to the sandpaper while sanding. This method helps to reduce friction, prevent heat buildup, and effectively remove material, resulting in a smoother and finer finish on various surfaces, such as wood, paint, metal, or automotive finishes. Wet sanding is commonly used in woodworking, auto body repair, and other industries where achieving a polished and flawless surface is crucial.
Yes, wet sanding with an orbital sander is indeed possible and can yield excellent results. An orbital sander, known for its circular sanding motion, can be effectively used in conjunction with the wet sanding technique to achieve smooth and refined surfaces.
When utilizing an orbital sander for wet sanding, it’s crucial to ensure that the sander is compatible with wet applications. Some orbital sanders are specifically designed to handle wet conditions, while others might require additional precautions to protect the motor and internal components from moisture.
5 Steps Process For Wet Sanding With An Orbital Sander.
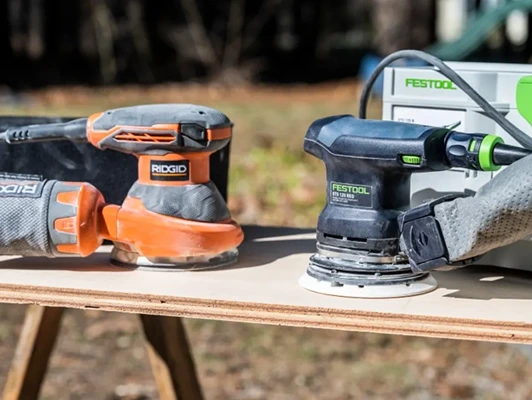
Here’s everything you need to know about wet Sanding with an orbital sander.
1) Choose the right material:
Some materials are too delicate for an orbital sander, so use caution when selecting what type of material you’re working with. Also, ensure that the sandpaper grit is appropriate for the task. For example, if you’re sanding wood, use 80-grit paper, while if you’re working on metal or glass, use 150-grit paper.
2) Gather your tools:
Make sure you have all the necessary tools before beginning any work. In addition to an orbital sander, other essential items include masking tape, rags, rubber gloves, protective eyewear (if applicable), a water bucket, safety goggles (if applicable), an abrasive cleaner/wax remover (depending on the material), and adhesive backed abrasive sheets.
3) Protect your work area:
Cover surrounding areas with old newspapers or other protective covering to avoid damaging furniture or flooring during this process.
4) Prepare your work surface:
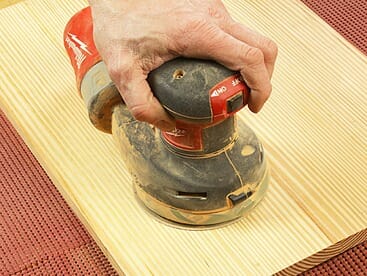
Use masking tape to protect areas around where you’ll be working. Then wipe down the surface you’ll be sanding with water from a bucket until it’s completely dampened. Allow this layer of water to dry before continuing to the next step to prevent splattering later.
5) Position the sandpaper:
Place your sheet of sandpaper faces up on top of the rotating disk pad. If you’re working with multiple sheets, cut them into strips and place them side by side.
6) Connect to the electrical source:
Plug in your sander and turn it on; then adjust speed accordingly depending on what kind of material you’re working with. Hold onto both handles while moving them back and forth over your work surface as quickly as possible without exerting too much pressure. Continue wet Sanding until the desired effect is achieved.
You can also check out our other related article Best Orbital Sander For Wet Sanding:
The Orbital Sander is a Wet Sanding Power Tool.
By using these guidelines, you can easily use an electric sander for wet sanding. This technique can enhance the efficiency of your sanding process and result in smoother and finer finishes, making it a valuable skill for woodworking, refinishing, and various other applications.

An orbital sander is a powerful tool that uses abrasive pads to sand down wood, metal, or other materials. Wet Sanding is often used to achieve a smooth, flawless finish on surfaces. The use of water in the process is what separates it from dry Sanding. The water lubricates the surface and helps remove small material particles for a smoother surface. It also helps prevents crazing (small cracks) from forming in the paint because it removes dust particles before they have time to settle on the surface and cause this problem.
Wet Sanding Metal Surfaces: Expert Guide
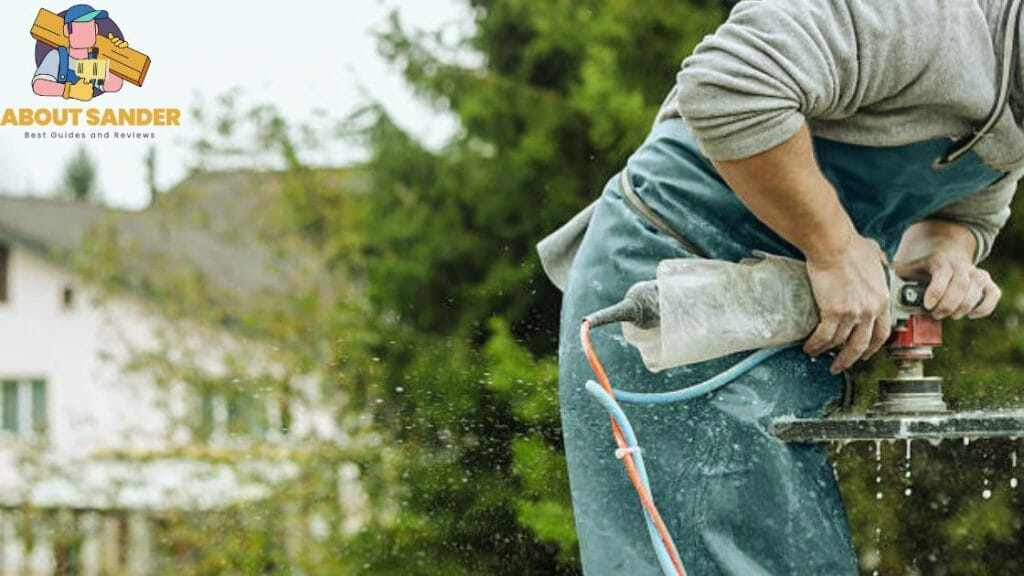
Wet sanding is a valuable technique that can transform the finish of metal surfaces, whether you’re working on a car, motorcycle, or any metal component. As an expert, I’m here to walk you through the process of wet sanding metal surfaces, ensuring you achieve a flawless result.
Materials You’ll Need
- Water or Lubricating Liquid: This is essential for the wet sanding process.
- Wet Sandpaper: Choose the appropriate grit for your project, typically ranging from 400 to 2000 grit.
- Sanding Block or Tool: Provides consistent pressure and even sanding.
- Safety Gear: Eye protection, gloves, and a dust mask to ensure your safety.
Step-by-Step Guide
1. Preparation
Start by thoroughly cleaning the metal surface to remove any dirt, grease, or contaminants. This ensures a clean and smooth surface for the wet sanding process.
2. Select the Right Grit
Choose the appropriate wet sandpaper grit based on the condition of the metal surface. Coarser grits like 400 or 600 are ideal for removing imperfections, while finer grits like 1000 to 2000 are used for polishing and achieving a smooth finish.
3. Wet the Surface
Dampen the metal surface with water or a lubricating liquid. This helps prevent scratches and keeps the sandpaper from clogging with debris.
4. Attach Sandpaper to Sanding Block
Secure the wet sandpaper onto a sanding block or tool. This ensures even pressure and consistent sanding across the surface.
5. Begin Sanding
Hold the sanding block at a slight angle and use gentle, even pressure. Move the sandpaper in a circular or back-and-forth motion. Keep the surface wet at all times to maintain lubrication and prevent overheating.
6. Inspect Your Progress
Periodically stop and wipe away the slurry that forms as you sand. Check your progress to ensure you’re achieving the desired level of smoothness.
7. Gradually Increase Grit
As you progress, switch to finer grits. Rinse the surface and the sandpaper between grit changes to remove any debris. This step-by-step approach ensures a gradual and controlled transition to a polished finish.
8. Final Polishing
Once you’ve reached your desired level of smoothness, you can proceed to a very fine grit, such as 1500 or 2000, for the final polishing. This will give your metal surface an exceptional shine.
9. Cleaning Up
After wet sanding, thoroughly clean the metal surface to remove any residue or slurry. Dry the surface and inspect it to ensure you’ve achieved the desired result.
Expert Tips
- Take Your Time: Wet sanding requires patience and precision. Rushing through the process can lead to uneven results.
- Consistent Pressure: Maintain consistent pressure while sanding to avoid creating uneven surfaces.
- Inspect Lighting: Use good lighting to inspect your work as you progress, helping you identify any imperfections.
By following this expert guide on wet sanding metal surfaces, you’ll be able to transform the finish of your metal projects, achieving a smooth and polished result that’s sure to impress.
Wet Sanding Wood: Expert Techniques for a Smoother Finish
Wet sanding with an orbital sander is a skill that can elevate your woodworking projects to a whole new level. As an expert in the field, I’m here to guide you through the process of wet sanding wood, ensuring you achieve a flawless and professional finish.
Materials You’ll Need
- Water or Lubricating Liquid: This is essential for lubricating the sandpaper and preventing clogging.
- Wet Sandpaper: Choose the appropriate grit, usually ranging from 320 to 2000 grit, depending on the level of smoothness you want to achieve.
- Sanding Block or Tool: Provides stability and uniform pressure during sanding.
- Safety Gear: Eye protection, gloves, and a dust mask to ensure your safety.
Step-by-Step Guide
1. Prepare the Wood Surface
Start by ensuring your wood surface is clean and free of any dust or debris. This provides a clean canvas for the wet sanding process.
2. Select the Right Grit
Choose the appropriate wet sandpaper grit based on the condition of the wood and the level of smoothness you desire. Coarser grits are suitable for initial sanding, while finer grits are used for polishing.
3. Dampen the Surface
Wet the wood surface with water or a lubricating liquid. This not only prevents friction and heat buildup but also helps carry away sanding debris.
4. Attach Sandpaper to Sanding Block
Secure the wet sandpaper onto a sanding block or tool. This ensures even pressure and consistent sanding across the wood surface.
5. Begin Sanding
Hold the sanding block at a slight angle and apply gentle, even pressure. Move the sandpaper in the direction of the wood grain, using either a circular or back-and-forth motion. Keep the surface wet at all times to maintain lubrication.
6. Monitor Progress
Regularly wipe away the slurry that forms as you sand. This will help you assess your progress and ensure you’re achieving the desired smoothness.
7. Gradually Increase Grit
As you move forward, switch to finer grits. Rinse both the wood surface and the sandpaper between grit changes to prevent buildup.
8. Final Polishing
For a truly refined finish, use a very fine grit like 1500 or 2000. This will give your wood surface a glossy and smooth appearance.
9. Cleaning Up
After wet sanding, clean the wood surface thoroughly to remove any residue or slurry. Dry the wood and inspect it closely to ensure you’ve achieved the desired outcome.
Expert Tips
- Patience Pays Off: Wet sanding requires a patient approach. Take your time to ensure a flawless finish.
- Follow the Grain: Always sand in the direction of the wood grain to prevent scratches and achieve a seamless look.
- Evaluate Lighting: Adequate lighting will help you spot imperfections as you work.
By following this expert guide on wet sanding wood, you’ll be able to achieve a smooth, refined finish that showcases the beauty of the wood grain. Whether you’re working on furniture, cabinetry, or any wood project, wet sanding is a technique that can take your craftsmanship to the next level.
Can I Wet Sand With An Electric Sander?

Yes, you can definitely wet sand with an electric sander. Wet sanding can be effectively carried out using various types of electric sanders, including orbital sanders, random orbital sanders, and detail sanders. However, there are a few important considerations to keep in mind when using an electric sander for wet sanding.
- Sander Compatibility: Before proceeding with wet sanding, ensure that your electric sander is designed to handle wet applications. Some sanders come with waterproof features or sealed components that can withstand exposure to water or liquid solutions.
- Protection and Safety: If your electric sander isn’t explicitly designed for wet sanding, take precautions to prevent moisture from reaching the motor and internal components. Using a damp cloth or plastic sheet to cover the sander can help safeguard it during the process.
- Appropriate Sandpaper: Choose sandpaper designed for wet applications. Wet sandpaper is constructed with materials that resist deterioration when exposed to water or other liquids. Using regular dry sandpaper for wet sanding can lead to premature wear and decreased effectiveness.
- Lubrication: The use of water or a lubricating liquid is essential during wet sanding to reduce friction, prevent overheating, and carry away debris. Keep the surface and sandpaper wet while sanding to ensure smooth and effective material removal.
- Cleaning and Maintenance: After wet sanding, it’s important to thoroughly clean and dry your electric sander. Moisture can lead to rust or damage if not properly addressed. Disassemble the sander if possible and clean any crevices or hard-to-reach areas.
Accessories For Wet Sanding
When wet Sanding, you’ll need a few things besides your orbital sander. Wet/dry sandpaper is best for this purpose, as it can be used both wet and dry.
Bucket or another container:
You’ll need a bucket or other container to hold your water and sandpaper to wet sand. Wet Sanding is typically done with a coarser grit paper than dry Sanding, so you’ll want to ensure you have plenty of water on hand to keep the paper from clogging. When you’re ready to start, dip your paper in the water and then move the sander in small circles over the surface, you’re working on.
Sponge or other soft material:

When wet Sanding, you’ll need a sponge or other soft material to soak up water and prevent it from damaging the surface you’re sanding. Wet Sanding is also known as lubricated Sanding because the water prevents the abrasive paper from clogging. To wet sand, you’ll need an orbital sander and lubricant, like water or oil. Test the lubricant on a small area first to ensure it won’t damage the finish.
Wet/dry sandpaper:
If you’re going to be wet Sanding, you’ll need the proper type of sandpaper. Wet/dry sandpaper is designed to be wet or dry and can be used on various surfaces. Choose the right grit for the job at hand. For example, if sanding a rough surface, you’ll want to use lower-grit sandpaper. Conversely, if you’re working on a delicate surface, you’ll want to use higher grit sandpaper.
Safety Concerns
Wet Sanding is a great way to get a smooth finish on your projects, but it’s important to take some safety precautions.
1: Make sure you’re using the right type of sander.
When it comes to Sanding, there are a few different types of sanders you could use. But for wet Sanding, you’ll want to make sure you’re using an orbital sander. This type of sander is designed specifically for wet Sanding and will make the process much easier. Plus, it’s more gentle on your surfaces, so you won’t have to worry about damaging them.
2: Wear eye protection and a dust mask.
Wet Sanding is a great way to remove old paint or varnish, but it’s important to take some safety precautions first. Wear eye protection and a dust mask when using an orbital sander, and keep the sander moving to avoid damaging the wood. Start with coarse-grit sandpaper and move to a finer grit until you’re happy with the results.
3: Be sure to keep the sander moving to avoid damaging the surface.
Wet Sanding is the process of using sandpaper and water to smooth out imperfections on a surface. It’s often used on car paint jobs, woodworking projects, and drywall work. An orbital sander is a tool that makes wet Sanding easier by doing most of the work for you. Plus, it’s less likely to damage the surface you’re working on than other types of sanders.
4: Work in small sections, so the area doesn’t get too wet.
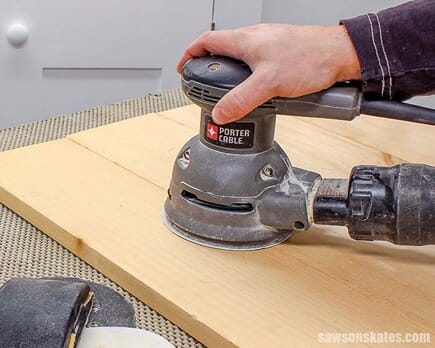
When wet Sanding, you’ll want to work in small sections, so the area doesn’t get too wet. This will help prevent the sandpaper from gumming up and make it easier to control the sander. Start by sanding along the wood grain, then move on to sanding in a circular motion. Keep the sander moving, so you don’t create any deep scratches.
5 Benefits of Wet Sanding with an Orbital Sander: A Closer Look from an Expert Perspective
Wet sanding is a versatile and effective technique that has found its place in various industries, from woodworking and automotive to painting and metalwork. As an expert in the field, I’m here to shed light on the five key benefits of wet sanding that make it a preferred choice for achieving impeccable finishes.
1. Enhanced Surface Smoothness
One of the primary advantages of wet sanding lies in its ability to deliver exceptionally smooth surfaces. The introduction of water or a lubricating liquid reduces friction, heat buildup, and the risk of scratches. This results in a consistent material removal process, allowing you to achieve a mirror-like finish that’s simply hard to match with dry sanding methods.
2. Reduced Risk of Dust and Debris
Wet sanding isn’t just about creating a polished surface; it’s also about maintaining a cleaner and healthier work environment. The liquid medium helps carry away dust and debris generated during the sanding process, preventing particles from clogging the sandpaper. This, in turn, prolongs the lifespan of the sandpaper and ensures more efficient sanding sessions.
3. Minimized Heat Generation
Heat buildup can lead to a range of issues, including damage to the workpiece, premature wear of sandpaper, and even burning in extreme cases. Wet sanding effectively counters this problem by cooling down the surface through the constant presence of water or liquid. This cooling effect not only protects the material being worked on but also extends the life of the sandpaper, allowing for longer and more consistent use.
4. Precise Material Removal
Wet sanding is a controlled and precise process, enabling you to achieve accurate material removal. Whether you’re refinishing paint, shaping wood, or smoothing metal, the combination of wetness and the right grit sandpaper ensures even and controlled removal. This level of precision can be particularly beneficial when working on intricate details or delicate surfaces.
5. Versatile Application
Wet sanding isn’t limited to a specific material or application. It can be effectively employed on various surfaces, including wood, metal, paint, and automotive finishes. This versatility makes it an essential technique for a wide range of projects, from restoring the shine of an old car to creating flawlessly smooth woodwork.
In conclusion, wet sanding is much more than a mere alternative to traditional sanding methods. It’s a technique that offers a range of tangible benefits, from achieving superior smoothness and precision to maintaining a cleaner work environment. By harnessing the power of water or a lubricating liquid, professionals and enthusiasts alike can elevate the quality of their finishes and produce results that truly stand out.
FAQs
Get the answer to your questions.
Q: Can I wet sand with an electric sander?
Yes, you can wet sand with an electric sander. Wet Sanding uses a dampened piece of sandpaper or a damp cloth to lubricate the surface and prevent clogging.
Q: What is the best orbital sander for wet Sanding?
The best orbital sander for wet Sanding is the DA sander.
Q: What are the benefits of wet Sanding?
The main benefit of wet Sanding is that it reduces the need for later refinishing, which saves time and money. It also results in a smoother finish. Wet Sanding also allows for more accurate finishing because it is easier to see when your work is complete when there’s still some paint on the floor instead of just bare wood.
Q: What grit is best for wet sanding?
The best grit for wet sanding depends on the desired outcome and surface condition. Coarser grits like 400 or 600 are suitable for heavy material removal, while finer grits like 1000 or 2000 are used for smoothing and polishing.
Q: Can you wet sand with a Dewalt sander?
Yes, you can wet sand with a Dewalt sander. Dewalt sanders are versatile tools that can be used for both dry and wet sanding applications.
Q: Can you wet sand with a mouse sander?
Yes, you can wet sand with a mouse sander. Mouse sanders, also known as detail sanders, can be used for wet sanding tasks with proper precautions and suitable sandpaper.
Q: Is wet sanding the best way to sand your pieces?
Wet sanding can be an effective way to sand pieces, especially when working with automotive finishes or delicate surfaces, as it helps reduce dust and provides a smoother finish. However, the best sanding method depends on the specific project and desired results.
Q: What liquid is used for wet sanding?
Water is commonly used as a liquid for wet sanding. It helps lubricate the sandpaper, reduce friction, and carry away debris for a cleaner sanding process.
Q: Can you wet sand with 1000 grit?
Yes, you can wet sand with 1000 grit. 1000-grit sandpaper is often used for fine sanding and smoothing surfaces during wet sanding applications.
Q: Can I wet sand with 220 grit?
Yes, you can wet sand with 220 grit. 220-grit sandpaper is commonly used for initial sanding and surface preparation during wet sanding.
Q: Will 2000 grit take off a clear coat?
2000-grit sandpaper can remove a clear coat, but it is primarily used for refining the surface and achieving a smoother finish rather than heavy material removal.
Conclusion
In conclusion, wet Sanding with an orbital sander is a great way to get a smooth, even finish on your project. Just be sure to use the proper safety and take your time. With a little practice, you’ll be a pro in no time! Be careful of hot paint, and don’t forget to wear goggles or glasses to protect your eyes from flying debris. A good finishing sander will have a rubber pad that can be turned off when not needed.

Why Trust About Sanders?
When it comes to the world of sanding and sanders, you need a trusted source of information and guidance to ensure you achieve those perfect finishes. That's where I come in – I'm Martin, a dedicated sanding enthusiast with a relentless passion for attaining flawless surfaces. With years of hands-on experience in the sanding industry, I've honed my skills and expertise to provide you with the most reliable and accurate insights. What sets me apart is my commitment to excellence. I meticulously handpick each sander after rigorous testing, ensuring that only the best tools make it to your hands. My goal is to empower you with the knowledge and recommendations you need to tackle any sanding task confidently. When you trust About Sanders, you're putting your faith in a seasoned expert who shares your passion for perfection and strives to deliver top-notch information and reviews for every sanding challenge.
