Sanding skirting boards is important in achieving a polished and professional finish for your interior space. Skirting boards, or baseboards, are typically installed along the bottom of walls to cover the gap between the floor and the wall. Over time, skirting boards can become scuffed or damaged, and sanding is an effective way to smooth out imperfections and prepare them for painting or staining.
Key Takeaways:


- Start with a coarse grit when sanding skirting boards and move on to a finer grit for a smoother finish.
- Use a sanding block to achieve an even sanding surface and sand with the grain in a circular motion.
- Clean the surface before sanding, and protect adjacent surfaces with painter’s tape.
- Use a dust mask and safety glasses to protect yourself from harmful dust and debris.
- Sand tight spaces with a sanding sponge and finish with fine grit for a smooth and polished finish.
- Use a vacuum cleaner with the HEPA filter to clean up any dust and debris.
Why is need for Sanding Skirting Boards?
Sanding skirting boards is crucial in ensuring your interior space looks polished and professional. Skirting boards, or baseboards, are typically installed along the bottom of walls to cover the gap between the floor and the wall.
Sanding skirting boards is an effective way to smooth out imperfections and prepare them for painting or staining, resulting in a flawless finish. In this article, we will dive into why sanding skirting boards is necessary for your home.
1: Smooth Out Imperfections:
One of the primary reasons for sanding skirting boards is to smooth out any imperfections. Skirting boards can become scratched, scuffed, or dented over time, resulting in uneven surfaces. You can remove rough or uneven areas by sanding the skirting boards, making a smooth surface ready for painting or staining.
2: Prepare Skirting Boards for Painting or Staining:
Another important reason for sanding skirting boards is to prepare them for painting or staining. With sanding, the surface of the skirting board may be smooth, which can result in an uneven or patchy finish. Sanding the skirting boards allows the paint or stain to adhere evenly, producing a uniform, professional-looking finish.
3: Restore Skirting Boards to Their Former Glory:
Sanding skirting boards is also an effective way to restore old, worn-out skirting boards to their former glory. Over time, skirting boards can become discolored or damaged, detracting from the overall aesthetic of your home. Sanding can help remove any old paint or varnish, revealing the natural beauty of the wood underneath.
| Sandpaper Grit | Best Use | Description |
| 40-60 grit | Coarse sanding | Used for stripping paint, smoothing rough surfaces, and removing scratches or dents. |
| 80-120 grit | Medium sanding | Used for removing rough spots, preparing the surface for painting or staining, and smoothing out imperfections. |
| 150-220 grit | Fine sanding | Used for sanding between coats of paint or finish, and for creating a smooth and polished finish. |
| 320-400 grit | Very fine sanding | Used for final sanding before applying a top coat, or for sanding delicate surfaces like veneer or thin molding. |
| 600-800 grit | Ultra-fine sanding | Used for sanding between coats of varnish, shellac, or lacquer, and for achieving a mirror-like finish. |
Here are 8 steps to Sanding Skirting Boards

Sanding skirting boards is important in achieving a polished and professional finish for your interior space. Skirting boards, or baseboards, are typically installed along the bottom of walls to cover the gap between the floor and the wall. In this article, we’ll provide a step-by-step guide to sanding skirting boards so that you can achieve a flawless finish.
Step 1: Prepare the Room
Before you start sanding your skirting boards, you should prepare the room by removing any furniture or objects that may get in the way. Cover any nearby table with a drop cloth to protect it from dust and debris. It would help if you also opened windows and doors for ventilation.
Step 2: Choose the Right Sandpaper Grit
The next step is to choose the correct sandpaper grit. Fine-grit sandpaper between 120 and 220 is recommended for skirting boards. This grit is perfect for smoothing imperfections and creating a smooth surface for painting or staining.
Step 3: Sand the Skirting Boards
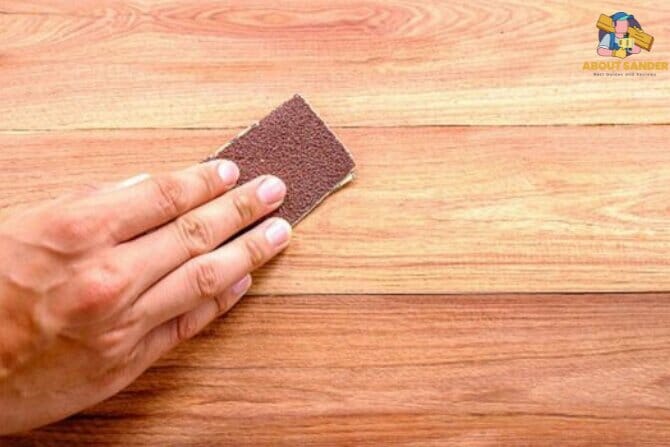
Using your sandpaper, apply light pressure, and sand the skirting boards in a circular motion. Be sure to sand in the direction of the wood grain to avoid creating scratches. Focus on the areas that have imperfections, such as scratches or dents.
Step 4: Check Your Progress
After a few passes, check your progress by running your hand over the surface of the skirting board. If there are still imperfections, continue sanding until the surface is smooth.
Step 5: Switch to a Finer Grit Sandpaper
Once you’ve sanded the skirting boards with coarse sandpaper, switch to finer grit sandpaper, such as 220. This will help remove any remaining imperfections and create a smooth surface for painting or staining.
Step 6: Sand the Edges
When sanding the skirting boards, be sure also to file the edges. This will ensure that the edges are smooth and even, enhancing the skirting boards’ overall appearance.
Step 7: Remove Dust and Debris
After sanding the skirting boards, removing any dust and debris is essential. Use a vacuum cleaner or a damp cloth to wipe down the surface of the skirting boards and surrounding areas.
Step 8: Finish the Skirting Boards
Now that you’ve sanded the skirting boards, you can finish them with paint or stain. Follow the manufacturer’s instructions and apply a coat of primer before painting or staining to ensure a smooth and even finish.
8 tools needed for Sanding Skirting Boards
Sanding skirting boards is essential in achieving a polished and professional finish for your interior space. In this article, we’ll list eight tools you’ll need for sanding skirting boards. With these tools, you’ll be able to complete the task efficiently and achieve a flawless finish.
Sandpaper
The most important tool for sanding skirting boards is sandpaper. You’ll need a variety of grits to achieve the best results. We recommend starting with a coarse grit, such as 120, and moving on to a finer grit, such as 220, for a smooth finish.
Sanding Block
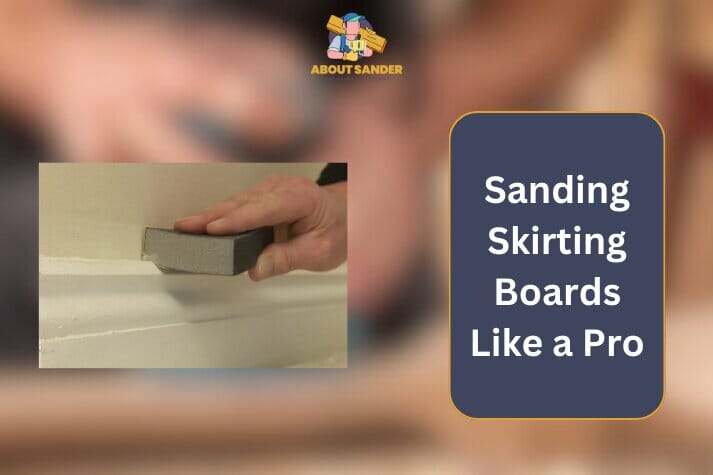
A sanding block is a handheld tool that holds the sandpaper in place while you sand. It helps ensure even pressure and prevent uneven sanding. Sanding blocks come in various sizes and shapes, but a rectangular block is recommended for skirting boards.
Sanding Sponge
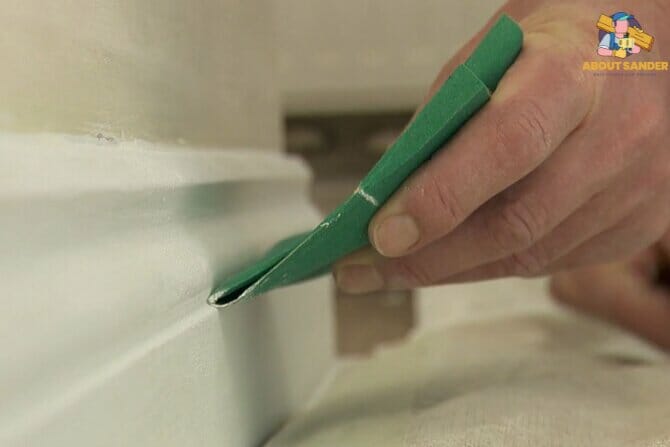
A sanding sponge is another tool used to hold sandpaper in place. It’s a versatile tool that can be used to sand tight or hard-to-reach areas. Sanding sponges are available in various grits and sizes.
Dust Mask
Sanding skirting boards creates a lot of dust, which can be harmful if inhaled. That’s why a dust mask is essential for protecting your lungs. Choose a cover that fits snugly over your nose and mouth and is rated for fine dust.
Safety Glasses
In addition to a dust mask, safety glasses protect your eyes from flying debris. They should fit snugly and have impact-resistant lenses.
Vacuum Cleaner
After sanding, it’s essential to remove all the dust and debris. A vacuum cleaner with a HEPA filter can help capture fine dust particles and prevent them from circulating in the air.
Drop Cloth
A drop cloth protects the surrounding areas from dust and debris. Place the cloth under the skirting board to catch any sanding residue.
Painter’s Tape
Painter’s tape helps protect adjacent surfaces you don’t want to sand. Apply tape to door frames and window sills to prevent accidental sanding.
Sanding skirting boards requires several tools to achieve the best results. From sandpaper to safety glasses, having the right tools can make the task more accessible and efficient. Be sure to use a variety of grits for sanding, including a coarse grit for initial sanding and a finer grit for finishing.
10 Top tips for Sanding Skirting Boards

Sanding skirting boards is essential in achieving a professional-looking finish for your interior space. However, it can be time-consuming and tedious, especially if you need to familiarize yourself with the process. To help you get the best results, we’ve compiled a list of 10 tips for sanding skirting boards. By following these tips, you’ll be able to complete the task efficiently and achieve a flawless finish.
Start with a Coarse Grit.
When sanding skirting boards, it’s essential to start with a coarse grit, such as 120. This will remove any roughness or unevenness on the surface of the skirting board. Once you’ve sanded with a coarse grit, move on to a finer grit, such as 220, for a smoother finish.
Use a Sanding Block
Using a sanding block can help you achieve an even sanding surface. It provides a flat surface for the sandpaper and prevents uneven pressure while sanding. Hold the sanding block firmly and use even strokes while sanding.
Sand with the Grain
When sanding skirting boards, filing with the grain is important. Sanding against the grain can result in scratches and unevenness on the surface of the skirting board. Follow the natural direction of the wood grain for the best results.
Sand in a Circular Motion
or the best results, sand in a circular motion. This will ensure the surface is sanded evenly and any roughness or unevenness is removed. Use light pressure and avoid sanding in one area for too long.
Clean the Surface
Before Sanding Before sanding, ensure the skirting board’s surface is clean and free from any dust or debris. Use a damp cloth to wipe down the surface and remove dirt or grime.
Protect Adjacent Surfaces
To prevent accidental sanding, protect adjacent surfaces such as door frames and window sills with painter’s tape. This will prevent the sandpaper from scratching or damaging these surfaces.
Use a Dust Mask and Safety Glasses
Sanding skirting boards can create a lot of dust and debris, which can be harmful if inhaled. Protect yourself with a dust mask and safety glasses. The dust mask will prevent you from inhaling fine particles, while safety glasses protect your eyes from flying debris.
Sand Tight
Spaces with a Sanding Sponge Sanding tight or hard-to-reach areas can be challenging with a sanding block. Use a sanding sponge for these areas. It’s a versatile tool that can be shaped and molded to fit into tight spaces.
Use a Vacuum Cleaner.
After sanding, use a vacuum cleaner with a HEPA filter to clean up dust and debris. This will prevent the dust from circulating in the air and settling on surfaces.
Finish with a Fine Grit
Once you’ve sanded with a coarse and finer grit, finish off with an even finer grit, such as 320. This will give the skirting board a smooth and polished finish. Wipe down the surface with a clean cloth to remove dust or debris.
Sanding skirting boards can be time-consuming and tedious, but by following these 10 tips, you can complete the task efficiently and achieve a flawless finish. Use a sanding block and sand with the grain in a circular motion. Protect adjacent surfaces with painter’s tape and use a dust mask and safety glasses to protect yourself.
FAQs
Sanding skirting boards is an important step in preparing them for painting or staining. However, many people may have questions about the process, such as what tools they need or what grit sandpaper to use. Here are some frequently asked questions about sanding skirting boards:
1: What tools do I need for sanding skirting boards?
You will need several tools to sand skirting boards, including sandpaper, a sanding block, a vacuum cleaner with a HEPA filter, painter’s tape, and safety gear like a dust mask and safety glasses. A sanding sponge or Dremel tool may also come in handy for hard-to-reach areas.
2: What grit sandpaper should I use for sanding skirting boards?
If the surface is rough or has old paint or varnish, start with a coarse grit, like 40 or 60. If the surface is relatively smooth and needs light sanding, you can start with a finer grit, like 120 or 150. Always work your way up to a finer grit for a smoother finish.
3: How do I prepare my skirting boards for sanding?
Before sanding, make sure to clean the surface of the skirting boards. Remove any dirt, debris, or loose paint using a scraper or sandpaper. Protect any adjacent surfaces you don’t want to be sanded or painted by covering them with painter’s tape. It’s also recommended to wear a dust mask and safety glasses to protect yourself from dust and debris.
Conclusion
In conclusion, sanding skirting boards is an important step in preparing them for painting or staining. By following the right steps and using the proper tools, you can achieve a smooth and polished finish that will enhance the overall appearance of your room. Always remember to start with a coarse grit and work your way up to a finer grit for the best results.

Why Trust About Sanders?
When it comes to the world of sanding and sanders, you need a trusted source of information and guidance to ensure you achieve those perfect finishes. That's where I come in – I'm Martin, a dedicated sanding enthusiast with a relentless passion for attaining flawless surfaces. With years of hands-on experience in the sanding industry, I've honed my skills and expertise to provide you with the most reliable and accurate insights. What sets me apart is my commitment to excellence. I meticulously handpick each sander after rigorous testing, ensuring that only the best tools make it to your hands. My goal is to empower you with the knowledge and recommendations you need to tackle any sanding task confidently. When you trust About Sanders, you're putting your faith in a seasoned expert who shares your passion for perfection and strives to deliver top-notch information and reviews for every sanding challenge.
