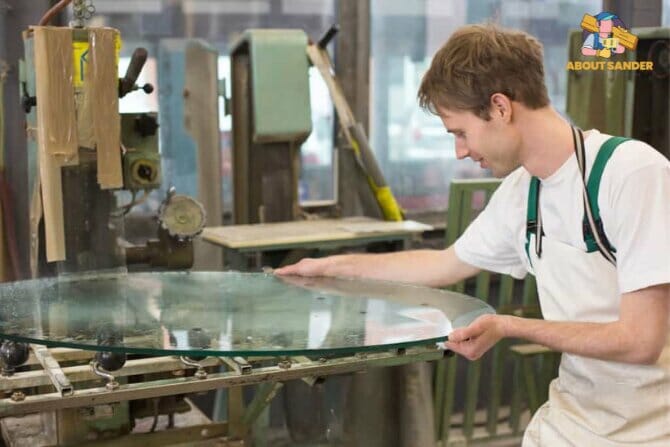
Frost Glass with Sandpaper can be a great way to add privacy or decoration to your windows, shower doors, or other glass surfaces.
While there are several ways to frost glass, one of the easiest and most cost-effective methods is to use sandpaper. This blog post will walk you through the step-by-step process of frosting glass with sandpaper.
How To Frost Glass With Sandpaper: Frosting of Glass
Frosting glass with sandpaper is the process of making a glass surface opaque, which creates a frosted effect. This technique adds privacy and decoration to glass surfaces, such as windows, shower doors, and cabinets. Frosting glass can be achieved through various methods, including acid etching, sandblasting, and sandpapering.
Frosting glass with acid etching:
It involves using hydrofluoric acid, a highly corrosive substance that can dissolve glass. The acid is applied to the glass surface, creating a frosted effect by etching away the top layer of the glass. This method requires proper safety gear and is not recommended for DIY enthusiasts due to the high risk of injury.
Sandblasting:
It is another method of frosting glass that blasts a high-pressure stream of sand or other abrasive material at the glass surface. The abrasive material chips away at the glass surface, creating a frosted effect. Sandblasting requires specialized equipment and should only be performed by trained professionals.
Frost glass with sandpaper:
It is a cost-effective and safe method that DIY enthusiasts can perform. It involves using sandpaper to sand away the top layer of the glass surface, creating a frosted effect. This customizable method allows various designs and patterns on the glass surface.
How To Frost Glass With Sandpaper: Step-by-step Process

Frost glass with sandpaper can be a great way to add privacy or decoration to your windows, shower doors, or other glass surfaces. While there are several ways to frost glass, one of the easiest and most cost-effective methods is to use sandpaper. This blog post will walk you through the step-by-step process of frosting glass with sandpaper.
Step 1: Gather Your Supplies
The first step to frosting glass with sandpaper is to gather all the necessary supplies. You will need the following:
- Sandpaper (we recommend using 120-grit or 220-grit sandpaper)
- Glass cleaner
- Masking tape
- A spray bottle filled with water
- A squeegee or a soft cloth
Step 2: Clean the Glass Surface
The next step is to clean the glass surface thoroughly. Use a glass cleaner to remove any dirt, grime, or fingerprints from the glass. Dry the glass surface entirely before moving on to the next step.
Step 3: Apply Masking Tape
Now, apply masking tape to the areas of the glass surface that you don’t want to be frosted. This could include any design or pattern you want to create or any areas you wish to keep transparent. Make sure to apply the masking tape evenly and securely to avoid any gaps or leaks.
Step 4: Sand the Glass Surface
Take the sandpaper and start sanding the glass surface you want to frost. Use circular or back-and-forth motions, depending on the design or pattern you want to create. Be gentle but firm, and apply even pressure throughout the sanding process.
If you use 120-grit sandpaper, you must sand for longer than 220-grit sandpaper. The goal is to create a frosted effect by creating minor scratches on the glass surface. Check the glass surface regularly to see if you have achieved the desired level of frosted effect.
Step 5: Spray Water
Once you have achieved the desired level of frosted effect, spray water on the glass surface to remove any glass particles or dust. Use a spray bottle filled with water and spray the glass surface evenly. Make sure to remove all the glass particles or dust from the surface.
Step 6: Clean the Glass Surface Again
After spraying water on the glass surface, clean the glass surface again with a glass cleaner. This will remove any remaining glass particles or dust from the surface.
Step 7: Remove the Masking Tape
Remove the masking tape carefully once the glass surface is clean and dry. Pull the masking tape away from the frosted area slowly and gently. This will prevent any damage to the frosted area.
Step 8: Finish the Glass Surface
After removing the masking tape, you can finish the glass surface using a squeegee or a soft cloth to remove any remaining water or glass particles. This will ensure that the glass surface is clean and residue-free.
Benefits of frost glass with sandpaper:

Frosting glass is a popular technique to add privacy, texture, and decoration to glass surfaces. Several methods are available for frosting glass, including etching, acid etching, and sandblasting. This section will discuss the benefits of frosting glass with sandpaper over other methods.
Cost-Effective
Frosting glass with sandpaper is a cost-effective method of achieving a frosted effect on glass surfaces. Compared to other methods, such as acid etching or sandblasting, sandpaper is affordable and requires minimal equipment and materials.
This makes it an ideal option for DIY enthusiasts who want to achieve a frosted effect on glass surfaces without breaking the bank.
Customizable
Frosting glass with sandpaper is a highly customizable method that allows you to create unique and exciting frosted effects. You can create a custom frosted effect that suits your style and preferences by varying the sanding motions and pressure.
Using masking tape to create different patterns or structures on the glass surface, you can experiment with different designs and patterns.
Safe and Easy to Use
Frosting glass with sandpaper is a safe and easy-to-use method that does not require any special skills or equipment. Unlike acid etching or sandblasting, sandpaper requires no harsh chemicals or special equipment.
You only need sandpaper, water, a spray bottle, safety gear such as goggles, and a mask. This makes it an ideal option for DIY enthusiasts who want to achieve a frosted effect on glass surfaces without risks.
Achieves a Natural and Organic Look
Frosting glass with sandpaper achieves a natural and organic look that cannot be achieved with other methods, such as acid etching or sandblasting. The frosted effect of sandpaper has a softer and more natural look that blends with the surrounding environment.
This makes it an ideal option for those who want to achieve a frosted effect on glass surfaces while maintaining a natural and organic look.
Provides a Non-Permanent Solution
Frosting glass with sandpaper provides a non-permanent solution that can be easily removed or changed. Unlike acid etching or sandblasting, which creates a permanent frosted effect, sandpaper can be easily removed by polishing or buffing the glass surface.
This makes it an ideal option for those who want a frosted effect on glass surfaces but do not want a permanent solution.
FAQs
Can any glass be frosted with sandpaper?
Yes, any glass can be frosted with sandpaper as long as it is not tempered or laminated glass. Tempered and laminated glass are specially treated and cannot be altered by sandpapering.
What type of sandpaper should I use to frost glass?
Fine-grit sandpaper, such as 120 or 220 grit, is recommended for frosting glass. Avoid using coarse-grit sandpaper, which can scratch and damage the glass surface.
Do I need any special equipment to frost glass with sandpaper?
No, special equipment is not required to frost glass with sandpaper. You only need sandpaper, water, a spray bottle, safety gear such as goggles, and a mask.
How do I clean the glass surface before sandpapering?
Before sandpapering the glass surface, clean it with a glass cleaner or a mixture of water and vinegar. This will remove any dirt, dust, or oils interfering with sandpapering.
How do I create designs or patterns on the frosted glass surface?
To create designs or patterns on the frosted glass surface:
Use masking tape to create the desired pattern or design.
Apply the sandpaper in a circular or back-and-forth motion, depending on the desired effect.
Remove the masking tape after sandpapering to reveal the arrangement or pattern.
Wrapping it up
Frosting glass with sandpaper is a cost-effective and safe method that DIY enthusiasts can use. It provides a customizable and versatile way of achieving a frosted effect on glass surfaces. Following proper safety guidelines and procedures, anyone can create beautiful designs and patterns on glass surfaces, decorating their homes and offices.

Why Trust About Sanders?
When it comes to the world of sanding and sanders, you need a trusted source of information and guidance to ensure you achieve those perfect finishes. That's where I come in – I'm Martin, a dedicated sanding enthusiast with a relentless passion for attaining flawless surfaces. With years of hands-on experience in the sanding industry, I've honed my skills and expertise to provide you with the most reliable and accurate insights. What sets me apart is my commitment to excellence. I meticulously handpick each sander after rigorous testing, ensuring that only the best tools make it to your hands. My goal is to empower you with the knowledge and recommendations you need to tackle any sanding task confidently. When you trust About Sanders, you're putting your faith in a seasoned expert who shares your passion for perfection and strives to deliver top-notch information and reviews for every sanding challenge.
