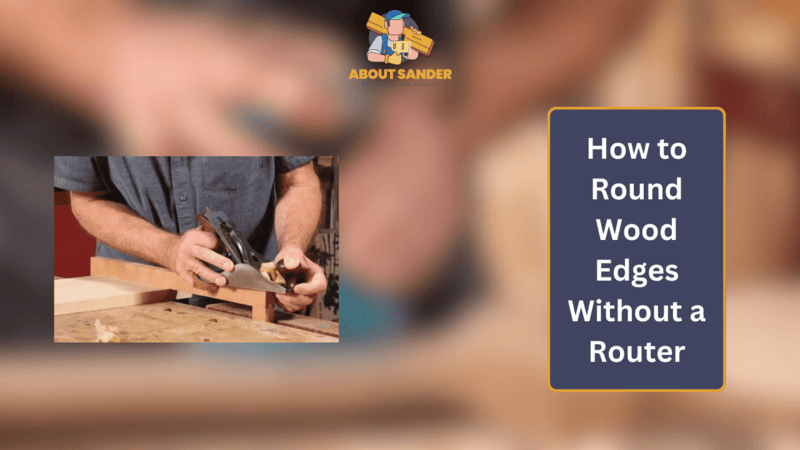
Are you looking to round wood edges without a router?
You can round wood edges without a router by using sandpaper, wood files, chisels, hand planers, sander, and a jigsaw.
Fortunately, various alternative methods and tools can help you successfully round wood edges by hand. We’ll explore how to round wood edges without a router, provide step-by-step instructions for each method, and recommend the best tools for wood edge rounding.
6 Methods to Round wood edges without a router
Let’s discuss the several methods to round wood edges without a router.
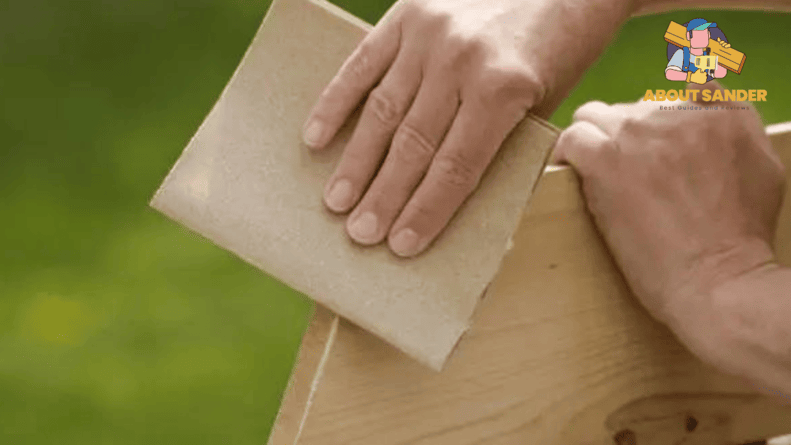
1: Sandpaper Method
The sandpaper method is simple and effective to round wood edges without a router. This method involves using sandpaper of a suitable grit and wrapping it around a sanding block or another object that can be held comfortably in hand. The wood is then held securely in one hand while the sanding block is used to rub the sandpaper over the edge of the wood in a circular motion. A smooth and polished edge can be achieved by continuing to sand and switching to finer grits of sandpaper. It’s a simple alternative to round wood edges without a router.
Materials Needed:
You will need a few basic materials to use the sandpaper method to round wood edges without a router.
- Sanding blocks or sandpaper should have a grit of around 120 or 150, depending on how smooth you want the final result.
- pair of gloves to protect your hands,
- Goggles for eye protection to prevent dust and debris from getting into your eyes.
Step-by-Step Instructions:
Here are some important instructions
1: Prepare the wood:
Before sanding, ensure the wood is clean and free from debris or dust. You can use a cloth or brush to remove dirt or dust.
2: Hold the sandpaper:
Wrap your sandpaper around a sanding block or another suitable object that can be held comfortably in your hand. Make sure the sandpaper is secured tightly around the block.
3: Sand the edge:
Hold the wood securely in one hand, and use the sanding block to rub the sandpaper over the wood’s edge in a circular motion. Keep the block moving back and forth along the edge until you have rounded it to your desired shape.
4: Switch to finer grits:
As you sand, you may find that the edges become smoother, and the surface of the wood becomes more polished. Switch to a finer grit sandpaper and repeat the process to achieve a smoother finish. This will gradually remove any remaining roughness and create a shiny surface.
5: Finish up:
Once satisfied with the rounded edge, wipe away any dust or debris and inspect the wood to ensure it is smooth and rounded evenly. You can also apply a finish or sealer to protect the wood and enhance its appearance or you can follow tips to remove sandpaper scratches from wood.
| Pros | Cons |
| A simple and inexpensive method | Can be time-consuming, spatially for larger pieces of wood |
| Requires minimal tools and equipment | May require more physical effort than other methods |
| Can produce a smooth and polished finish | May not be suitable for achieving very precise or complex shapes |
| Can be done by hand, making it accessible to woodworkers of all skill levels | Sandpaper may need to be replaced frequently, especially when working with harder woods |
| Can be a good option for small or detailed projects | May not be suitable for larger or more complex woodworking projects |
| Can be easily combined with other techniques to achieve different effects | May generate a lot of dust and debris, requiring proper ventilation and protective gear |
2: Hand planer method:
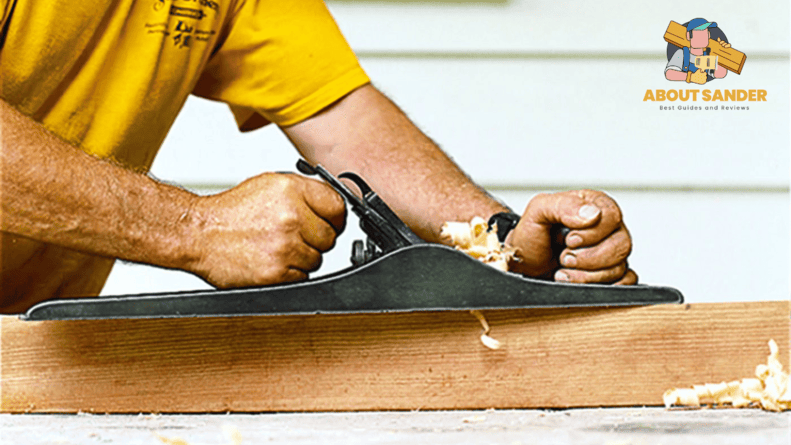
The Hand Planer Method is another effective technique to round wood edges without a router. This method involves using a hand planer, a tool that can shave off thin layers of wood, to create a rounded shape. The wood is secured firmly in place, and the hand planer is used to shave off the edges of the wood in smooth, even strokes. This method can be more challenging than sandpaper as it requires more precision and control, but it can be a good option for achieving more complex shapes and removing more significant amounts of wood. The Hand Planer Method can produce professional-looking results with practice and attention to detail.
Materials Needed:
To use the Hand Planer Method to round wood edges without a router, you will need,
- A hand planer, which is a tool that can shave off thin layers of wood
- a pair of gloves to protect your hands
- Eye protection prevents dust and debris from getting into your eyes.
Step-by-Step Instructions:
Here are some important instructions:
1: Prepare the wood:
Before using the hand planer, ensure the wood is clean and free from debris or dust. You can use a cloth or brush to remove dirt or dust.
2: Adjust the blade:
Adjust the edge of the hand planer to the desired depth, depending on how much wood you want to remove. It’s best to start with a shallow depth and make multiple passes to avoid removing too much wood at once.
3: Secure the wood:
Hold it securely in one hand or clamp it to a workbench or other suitable surface.
4: Use the hand planer:
Hold the hand planer with both hands and start shaving off the wood’s edge with the blade. Use smooth and even strokes, working from one end of the wood to the other. Be careful not to apply excessive pressure, which can cause the blade to dig into the wood.
5: Check the progress:
After each pass, check the wood’s edge to see if it has been rounded to your desired shape. If not, adjust the depth of the blade and make another pass.
6: Finish up:
Once satisfied with the rounded edge, wipe away any dust or debris and inspect the wood to ensure it is smooth and rounded evenly. You can also apply a finish or sealer to protect the wood and enhance its appearance. This method can be used to round wood edges without a router.
| Pros | Cons |
| It can remove larger amounts of wood compared to the sandpaper method | Requires a hand planer, which may be more expensive than sandpaper |
| Can achieve more complex shapes and angles | It requires more precision and control, which can be challenging for beginners |
| It can produce a smooth and polished finish | It may require more physical effort than other methods |
| It can be a good option for larger or more complex woodworking projects | It can be more challenging to achieve consistent results |
| It can be easily combined with other techniques to achieve different effects | It may generate a lot of dust and debris, requiring proper ventilation and protective gear |
| It can be a good option for shaping edges quickly and efficiently | It may leave behind marks or scratches on the wood if not used correctly |
3: Chisel method:

The Chisel Method is another way to round wood edges without a router. This method involves using a chisel, a cutting tool with a flat or bevelled edge, to remove thin layers of wood and create a rounded shape. The chisel is held against the wood at the marked area, and a mallet is used to tap the chisel gently to remove the wood. This method requires more manual dexterity and skill than sandpaper or a hand planer, but it can be a good option for achieving specific shapes or angles. The Chisel Method can produce beautiful and professional-looking results with practice and patience.
Materials Needed:
To use the Chisel Method for rounding wood edges, you will need,
- A chisel, is a cutting tool with a flat or bevelled edge
- A mallet
- A Pair of gloves to protect your hands and eye protection to prevent dust and debris from getting into your eyes.
Step-by-Step Instructions:
Here are some instructions to follow.
1: Prepare the wood:
Before using the chisel, ensure the wood is clean and free from debris or dust. You can use a cloth or brush to remove dirt or dust.
2: Mark the wood:
Use a pencil or other marking tool to mark the wood’s edge where you want to create the rounded shape.
3: Secure the wood:
Hold it securely in one hand or clamp it to a workbench or other suitable surface.
4: Use the chisel:
Hold the chisel with both hands and place the beveled edge against the wood at the marked area. Use the mallet to tap the chisel gently, moving it along the edge of the wood to remove thin layers of wood and create a rounded shape. Chisel can be used to round wood edges without a router.
5: Check the progress:
After each pass, check the wood’s edge to see if it has been rounded to your desired shape. If not, continue tapping with the chisel until you achieve the desired shape.
6: Finish up:
Once satisfied with the rounded edge, wipe away any dust or debris and inspect the wood to ensure it is smooth and rounded evenly. You can also apply a finish or sealer to protect the wood and enhance its appearance.
The Chisel Method can be more challenging than sandpaper or a hand planer, requiring more manual talent and skill. However, it can be a good option for achieving particular shapes or angles and can be combined with other techniques to create different effects. The Chisel Method can produce beautiful and professional-looking results with practice and patience.
| Pros | Cons |
| Can achieve particular shapes and angles | Requires more manual dexterity and skill than other methods |
| It does not require any expensive or specialized equipment | It can be time-consuming, especially for larger or more complex projects |
| It can be combined with other techniques to achieve different effects | It may generate a lot of dust and debris, requiring proper ventilation and protective gear |
| It can produce a smooth and polished finish | It may leave behind marks or scratches on the wood if not used correctly |
| It can be a good option for shaping edges quickly and efficiently | It may require more frequent sharpening of the chisel |
| It can be a good option for smaller or more intricate woodworking projects | It may not be suitable for larger or thicker pieces of wood |
| It can be a more affordable option for those who already have a chisel and mallet |
4: Wood file method:
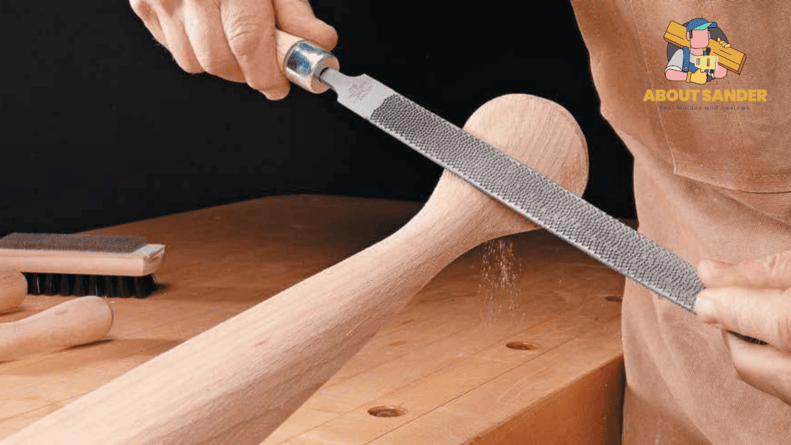
The Woodfile Method is another way to round wood edges without a router. It involves using a wood file, a tool with abrasive teeth for shaping and smoothing wood, to create a rounded shape on its edge. The wood piece is secured in a workbench or clamps, and the woodpile is held against the edge of the wood at a 45-degree angle while applying even pressure and long strokes to remove thin layers of wood. The process requires some practice and patience but can be a good option for achieving precise and smooth curved edges. The Woodfile Method can be used with flat and round files, depending on the desired curvature, and can be combined with sandpaper for a smoother finish.
Materials needed:
- Wood file (flat or round)
- Workbench or clamp
- Safety goggles or glasses
- Sandpaper (optional)
Step-by-step instructions:
Here are some guidelines:
1: Prepare the wood:
Secure the wood piece in a workbench or clamps to keep it steady and stable during the filing process.
2: Wear safety glasses:
Put on safety glasses to protect your eyes from wood shavings and dust.
3: Select a woodpile:
Select a woodpile that matches the curvature you want to create on the wood’s edge. Flat files are suitable for creating straight or chamfered edges, while round files are better for creating curves or contours.
4: Start the process:
Hold the wood file firmly against the wood edge at a 45-degree angle and begin filing. Use even pressure and long strokes to remove thin layers of wood at a time.
5: Check the edges:
Check your progress frequently by running your fingers over the wood’s edge to feel for any rough spots or inconsistencies. Continue filling and checking until you have achieved the desired curvature on the wood edge.
6: Smooth the edges with sandpaper:
Once you have rounded the edge with the wood file, you can smooth it out further with sandpaper if desired. The Woodfile Method can be a good option for those who prefer more control over the shaping process and want to achieve a precise curvature on their wood edges. However, it can also be time-consuming and requires some practice to master the technique.
| Pros | Cons |
| Can achieve precise and consistent curves on the edge of the wood | It can be time-consuming and requires some practice to master the technique |
| Provides more control over the shaping process compared to other methods | It may generate a lot of dust and debris, requiring proper ventilation and protective gear |
| It does not require any expensive or specialized equipment | It may not be suitable for larger or thicker pieces of wood |
| It can be used with both flat and round files to create different shapes and angles | It may leave behind marks or scratches on the wood if not used correctly |
| It can be combined with sandpaper for a smoother finish | It may require more frequent replacement or sharpening of the wood file |
| It can produce a smooth and polished finish on the edge of the wood |
5: Jigsaw method:
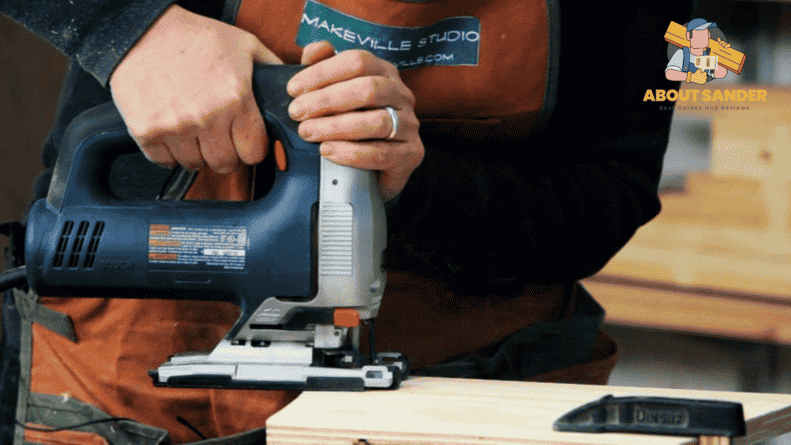
The Jigsaw Method is another technique to round wood edges without a router. It involves using a jigsaw, a handheld power tool with a reciprocating blade, to cut the wood into the desired shape. The wood piece is secured in a workbench or clamps, and the jigsaw blade is guided along the marked line while moving the tool slowly and steadily. Once the cut is complete, sandpaper can smooth and round the wood’s edge. The Jigsaw Method can be a good option for those who have a jigsaw and want to round wood edges without a router quickly and easily, but it may need to be more precise and smoother than other methods and may require more sanding to achieve the desired finish.
Materials needed:
- Jigsaw
- Sandpaper
- Workbench or clamps
- Safety goggles or glasses
Step-by-step instructions:
1. Secure the wood piece in a workbench or clamps to keep it steady and stable during cutting.
2. Wear glasses to protect your eyes from wood shavings and dust.
3. Install a jigsaw blade suitable for cutting wood with a fine or medium tooth count.
4. Mark the area to be cut on the wood piece with a pencil or chalk.
5. Turn on the jigsaw and carefully guide the blade along the marked line while moving the jigsaw slowly and steadily. Be sure to keep the jigsaw blade perpendicular to the surface of the wood to ensure a smooth cut.
6. Once the cut is complete, use sandpaper to smooth and round the wood’s edge as desired.
The Jigsaw Method can be a good option for those who have a jigsaw and want to achieve a rounded shape on the edge of their wood quickly and easily. However, it may not be suitable for smaller or more intricate pieces of wood, as the jigsaw blade can be difficult to maneuver in tight spaces. Additionally, the cut may not be as precise or smooth as other methods and may require more sanding to achieve the desired finish.
6: Using a Sander
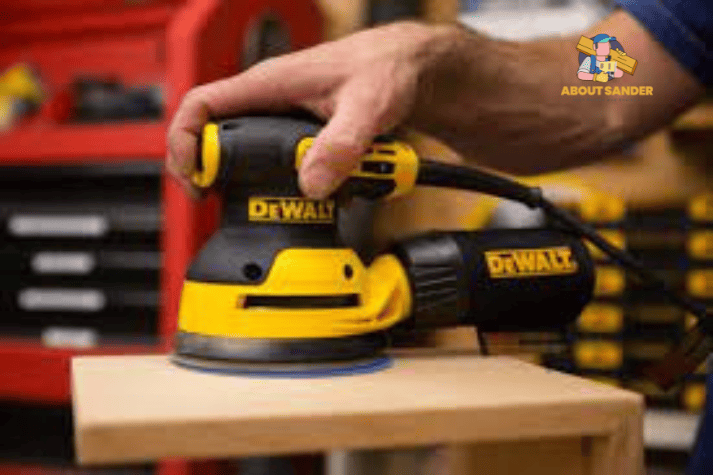
Rounding the edges of wood adds a touch of elegance and safety to your woodworking projects. While routers are commonly used for this purpose, not everyone has access to one. Fortunately, you can achieve beautifully rounded wood edges using a sander. In this guide, we’ll walk you through the process step by step, along with the materials you’ll need. We’ll also discuss the pros and cons of using a sander for this technique.
Materials Needed
- Wooden Piece: The wood you want to round the edges of.
- Sander: A random orbital sander or a detail sander will work well.
- Sandpaper: Choose a grit appropriate for the initial sanding and finer grits for smoother finishing.
- Safety Gear: Safety glasses, dust mask, and hearing protection.
Step-by-Step Instructions
Step 1: Prepare Your Workspace
Set up your work area in a well-ventilated space. Place the wooden piece securely on a workbench or a stable surface.
Step 2: Choose the Right Sandpaper
Start with a coarser grit sandpaper (around 80-120 grit) to remove any rough edges or imperfections. As you progress, switch to finer grits (200-400 grit) for a smoother finish.
Step 3: Sand the Edges
Hold the sander firmly and lightly run it along the edges of the wood. Move in a steady back-and-forth motion, keeping the sander flat against the wood surface. Make sure to round the edges uniformly to achieve a symmetrical look.
Step 4: Monitor Your Progress
Frequently check the edges to ensure you’re achieving the desired roundness. Avoid applying excessive pressure, as this can result in uneven edges.
Step 5: Transition to Finer Grits
Switch to a finer grit sandpaper as you approach the desired level of smoothness. Repeat the sanding process, gradually refining the edges.
Step 6: Hand Sanding (Optional)
For an even smoother finish, you can do some light hand sanding using the finest grit sandpaper. This step is particularly useful if you’re working on a project that requires an impeccable surface.
Step 7: Finish and Clean Up
Inspect the rounded edges to make sure they’re smooth and evenly shaped. Once satisfied, clean up the workspace and remove any dust or debris.
Pros and Cons of Using a Sander to Round Wood Edges
Pros:
- Accessibility: Sanders are more commonly available in workshops and households compared to routers, making them a practical choice for DIY enthusiasts.
- Affordability: Sanders are generally more budget-friendly than routers, making them a cost-effective option for hobbyists and beginners.
- Ease of Use: Using a sander requires less skill and experience compared to a router, making it suitable for woodworking novices.
- Safe: Sanders are generally safer to use, with less risk of accidental cuts or injuries compared to routers.
Cons:
- Limited Profile Variety: While sanders can round edges, they may not offer the same versatility in creating intricate edge profiles as routers do.
- Time-Consuming: Sanding edges manually can be time-consuming, especially if you’re striving for a high level of smoothness.
- Less Precision: Achieving precise rounded edges with a sander can be challenging, particularly for detailed work.
In conclusion, if you’re looking to round wood edges without a router, a sander can be a practical alternative. While it may require more time and effort, the accessibility, affordability, and safety aspects make it an appealing option, especially for those new to woodworking. With careful attention to detail and patience, you can achieve beautifully rounded wood edges using a sander.
Why do you need to round the edges of the wood?
Rounding the edges of wood can serve various purposes, from aesthetic to functional. Here are some reasons why you might want to round the edges of wood:
1: Safety:
Sharp wood edges can be dangerous, mainly if the wood is handled frequently or installed in a high-traffic area. By rounding the edges, you can reduce the risk of injury and make the wood safer to drive.
2: Aesthetics
Rounding the edges of wood can give it a softer, more polished appearance. This can be particularly important for wood pieces used in visible areas, such as furniture or decorative items. Rounded edges can also create a more cohesive and unified look for wood pieces that are being joined together.
3: Comfort:
If the wood is handled frequently or used in areas where people will be sitting or leaning against it, rounding the edges can make it more comfortable to touch. This can be particularly important for chairs, benches, or armrests.
4: Durability:
Rounding the edges of wood can help to prevent chipping or splitting over time, particularly if the wood will be subjected to wear and tear. By smoothing out the edges, you can help to protect the timber and prolong its lifespan.
FAQS:
Do I need a router to round wood edges?
Several methods for rounding wood edges don’t require a router. These include using sandpaper, a hand planer, a chisel, a wood file, or a jigsaw.
What grit sandpaper should I use to round wood edges?
The grit of sandpaper you use will depend on the type of wood you’re working with and the smoothness you want to achieve. Starting with a coarse grit (80 or 120) and working up to a finer grit (220 or 320) can help you achieve a smooth, rounded edge.
How do I prevent chipping when rounding wood edges?
Ensure your tools are sharp and in good condition to prevent chipping when rounding wood edges. Go slowly and take small, light passes rather than trying to remove much material simultaneously. It can also be helpful to use a piece of scrap wood to back up the area you’re working on, which can help prevent splintering.
Can I round the edges of already-assembled furniture?
Yes, you can round the edges of already-assembled furniture using various methods, such as sandpaper, a hand planer, or a chisel. However, depending on the piece of furniture and the tools you’re using, this may require careful maneuvering and patience.
Is it necessary to round the edges of every piece of wood I work with?
It’s necessary to round the edges of every piece of wood you work with. However, rounding edges can provide several benefits, such as improved safety, comfort, durability, and a more polished appearance. Consider the specific needs of your project and the potential benefits of rounding the edges when deciding whether or not to do so.
Conclusion:
Several methods to round wood edges without a router have been discussed, including using sandpaper, a hand planer, a chisel, a wood file, or a jigsaw. Each method has pros and cons, so it’s essential to consider your needs and resources when deciding which form to use. By rounding the edges of your wood, you can improve safety, comfort, durability, and appearance in your woodworking projects. You can learn to round wood edges by hand and achieve professional-looking results with practice.

Why Trust About Sanders?
When it comes to the world of sanding and sanders, you need a trusted source of information and guidance to ensure you achieve those perfect finishes. That's where I come in – I'm Martin, a dedicated sanding enthusiast with a relentless passion for attaining flawless surfaces. With years of hands-on experience in the sanding industry, I've honed my skills and expertise to provide you with the most reliable and accurate insights. What sets me apart is my commitment to excellence. I meticulously handpick each sander after rigorous testing, ensuring that only the best tools make it to your hands. My goal is to empower you with the knowledge and recommendations you need to tackle any sanding task confidently. When you trust About Sanders, you're putting your faith in a seasoned expert who shares your passion for perfection and strives to deliver top-notch information and reviews for every sanding challenge.
