If you want to know how to sand your garage floor, Sanding your garage floor helps smooth out rough spots and level out uneven areas, creating a more even surface for various uses.
Knowing how to sand your garage floor can be straightforward with the right tools and equipment. Whether you’re preparing your garage floor for an epoxy coating or simply looking to improve its appearance, this guide will provide you with the steps you need to take to achieve a smooth, even finish.
How to Sand Your Garage Floor? Tips and Tricks.
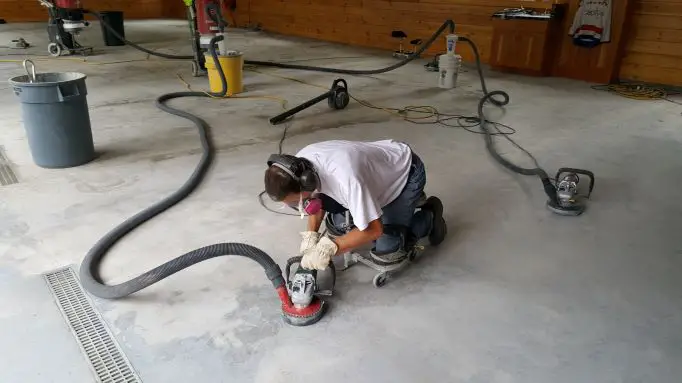
First, you must prepare the surface by clearing any debris and dirt from the garage floor. Then, you’ll need to use a concrete grinder or diamond grinder to grind the garage floor’s surface, smoothing out any rough spots or uneven areas.
After grinding, use a vacuum to clean the floor and sand the garage floor with a floor sander and appropriate sandpaper. Start with coarse grit and work up to fine grit to achieve a smooth finish.
Be sure to wear protective gear and follow all safety precautions when sanding. With these steps, you’ll know how to sand your garage floor and achieve a polished, even surface.
Here we need some steps to know How to Sand Your Garage Floor?
Preparing Your Garage Floor for Sanding:
Before you start sanding your garage floor, preparing the surface properly is important. This will ensure that the sanding process is effective and that you achieve the best results possible. Here are some subheadings to explain in detail the steps for preparing the garage floor for sanding:
1. Clearing the Garage Floor:
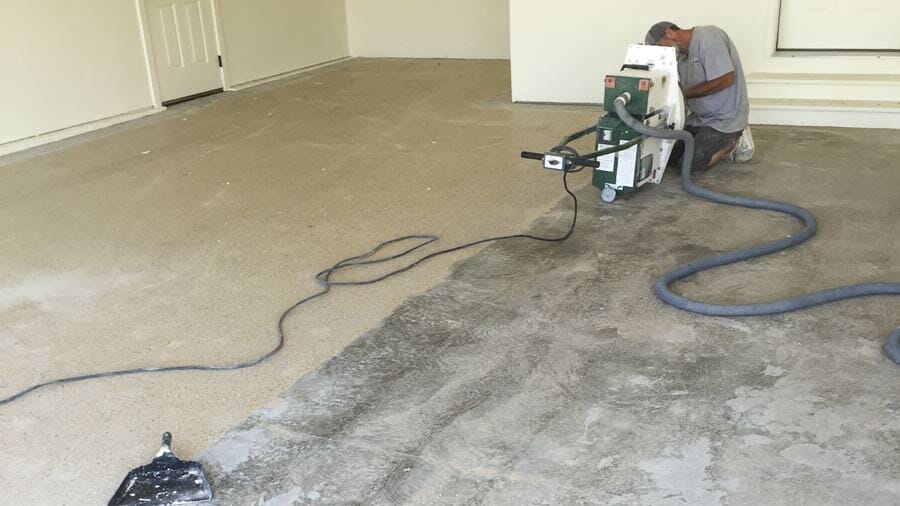
When preparing your garage floor for sanding, the first step is to clear the floor of any debris or objects. This will help ensure that you have a clean and safe working area.
2. Sweeping and Vacuuming:
First, you’ll want to sweep the entire floor, starting at one end and working toward the other. This will help remove any loose dirt, dust, or debris. Once you’ve swept the floor, vacuum it to pick up any remaining dirt or dust. If you don’t have a vacuum, use a broom and dustpan instead.
3. Removing Oil Stains and Spills:
If there are any oil stains or spills on the garage floor, you’ll need to remove them before sanding. Oil can create a slippery surface and make it difficult for the sandpaper to grip the surface. You can use a degreaser to remove the oil. Apply the degreaser to the stain or spill, let it sit for a few minutes, and then scrub the area with a stiff brush. Rinse the area with water and let it dry completely before sanding.
4. Patching Cracks and Holes:
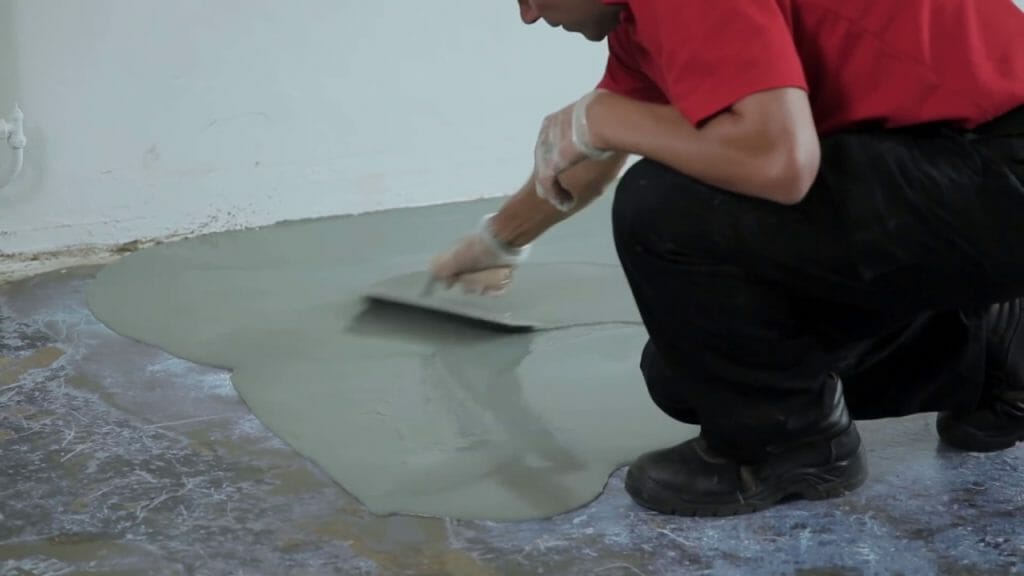
If there are any cracks or holes in the garage floor, you’ll need to patch them to create a smooth and level surface for sanding. A concrete patching compound can fill in the cracks and holes. Follow the manufacturer’s instructions for mixing and applying the compound. Once the compound has dried, you can sand the surface to create an even finish.
By following these steps to clear your garage floor before sanding, you’ll create a clean and safe working area that will make the sanding process easier and more effective.
Tools and Equipment Needed for Sanding:
When it comes to sanding your garage floor, there are a few tools and equipment you will need to have on hand to ensure that the job is done effectively and efficiently. Here are some of the key tools and equipment you will need:

1. Concrete or Diamond Grinder:
A grinder is essential for smoothing rough spots or uneven areas on your garage floor. You can use a concrete grinder or a diamond grinder for this purpose.
2. Floor Sander:
After using a grinder, you’ll need to sand the surface of your garage floor to create a smooth and even finish. A floor sander is the best tool for this job.
3. Sandpaper and Grits:
You’ll need different grits of sandpaper for different stages of the sanding process. Coarse grit sandpaper is used for the initial sanding, while fine grit sandpaper is used for finishing.
4. Protective Gear:
Sanding your garage floor can create a lot of dust and debris, so it’s important to wear protective gear such as gloves, goggles, and a respirator to protect your eyes, lungs, and skin.
It’s important to ensure you have all the necessary tools and equipment before you begin sanding your garage floor. This will help ensure that the job is done properly and safely.
Safety Precautions to Take Before Sanding:
Before you begin sanding your garage floor, you should take several safety precautions to protect yourself and others. Here are some important safety tips to keep in mind:

1. Wear Protective Gear:
Sanding can create a lot of dust and debris, so it’s important to wear protective gear such as gloves, goggles, and a respirator to protect your eyes, lungs, and skin.
2. Clear the Area:
Make sure that the area around your garage floor is clear of any objects or debris that could trip you or obstruct your work.
3. Turn off Power Sources:
If you have any power tools or equipment nearby, turn them off and unplug them before you begin sanding. This will help prevent any accidents or injuries.
4. Ventilate the Area:
Sanding can create a lot of dust, so it’s important to ventilate the area to prevent the inhalation of dust particles—open windows and doors from allowing for proper airflow.
5. Use Caution with Electrical Outlets:
When sanding your garage floor, caution is important around electrical outlets. Keep the outlets covered and dry to prevent any electrical shocks.
6. Follow Instructions Carefully:
Before you begin sanding, read and follow the manufacturer’s instructions for any tools or equipment you’ll be using.
Taking these safety precautions will help ensure the sanding process is done safely and effectively and minimize the risk of accidents or injuries.
You can also check out our other related article How to Sand a Concrete Floor: tools and tips for sanding concrete:
Garage Floor Grinding and Diamond Grinding:
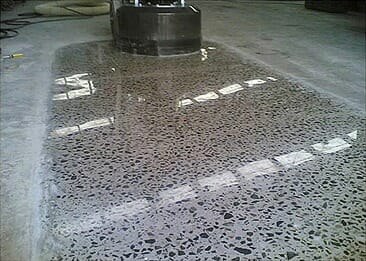
Garage floor grinding and diamond grinding are two processes that are commonly used to prepare a garage floor for further treatment or finishing. Both methods involve using a machine with abrasive discs or diamond-tipped discs to remove surface imperfections, such as cracks, chips, or uneven spots, and create a smooth, even surface.
Garage floor grinding is often used for residential floors, while diamond grinding is more commonly used for commercial or industrial floors requiring high precision and accuracy. This guide will look at these two methods and provide tips and guidelines for preparing your garage floor using these techniques.
What is garage floor grinding?
Garage floor grinding uses a concrete grinder to remove surface imperfections and prepare the surface for further treatment, such as epoxy coating or staining. It involves using a machine with abrasive discs to grind down the garage floor’s surface to create a smooth, even finish.
What is diamond grinding?
Diamond grinding is a more advanced form of garage floor grinding that uses diamond-tipped grinding discs to remove surface imperfections and prepare the surface for further treatment. Diamond grinding is often used on concrete surfaces requiring high precision and accuracy, such as industrial or commercial floors.
Grinding your garage floor before sanding is important because it helps remove any surface imperfections, such as cracks, chips, or uneven spots, that can interfere with the sanding process. It also helps create a smooth, even surface that is easier to sand and allows for better adhesion of any coating or finish you apply.
Steps to grinding your garage floor:
The steps to grinding your garage floor will depend on the specific tools and equipment you’re using and the condition of your garage floor. However, some general steps include the following:
1. Clear the area:
Remove any items from your garage floor and sweep the area thoroughly to remove any debris or loose dirt.
2. Prepare the equipment:
Set up your concrete grinder or diamond grinder and ensure it’s properly calibrated and ready to use.
3. Begin grinding:
Start grinding the garage floor’s surface, moving the machine in a back-and-forth motion to create a smooth, even surface. Work in sections, and overlap each pass to ensure even coverage.
4. Check the surface:
Once you’ve finished grinding the entire garage floor surface, check for any remaining imperfections that need to be addressed before moving on to the sanding process.
Reviving Your Concrete Floors: A Guide to Concrete Floor Grinding:
Concrete floor grinding is a process that involves using a specialized machine with abrasive discs to remove surface imperfections and create a smooth, even surface. This technique is often used to prepare concrete floors for further treatment, such as polishing or coating, or to repair damaged or uneven surfaces.
Concrete floor grinding can be time-consuming and labor-intensive, but it’s essential for achieving the desired results. In this guide, we’ll look closer at the benefits of concrete floor grinding, the tools and equipment needed for the job, and the steps involved in the process. Here are some subheadings to help organize the information:
- Benefits of Concrete Floor Grinding
- Safety Precautions for Concrete Floor Grinding
- Steps for Concrete Floor Grinding
- Tips for Achieving the Best Results
1. Benefits of Concrete Floor Grinding:
Concrete floor grinding offers a number of benefits for both residential and commercial properties. Here are some of the key advantages of this technique:
Improves Surface Appearance:
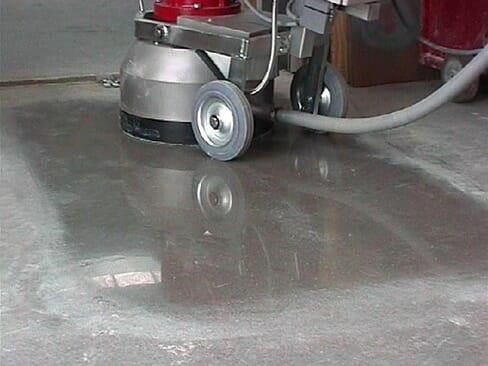
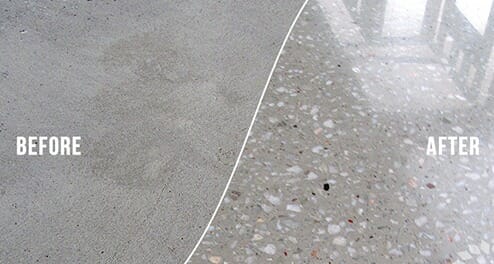
One of the most obvious benefits of concrete floor grinding is that it can improve the appearance of a concrete surface. Concrete floor grinding can make floors look new again by removing surface imperfections and smoothing out uneven areas.
Enhances Safety:
Concrete floor grinding can also enhance space safety by reducing the risk of slips, trips, and falls. Grinding can help remove surface imperfections that create hazards, such as cracks or uneven surfaces.
Prepares for Further Treatment:
If you plan on adding a coating or polish to your concrete floor, grinding is essential to prepare the surface. Grinding can help ensure that the coating or polish adheres properly by removing any imperfections or contaminants.
Increases Durability:
Another benefit of concrete floor grinding is that it can increase the durability and longevity of your floors. By smoothing out the surface and removing imperfections, grinding can help reduce wear and tear on your floors over time.
Saves Money:
Finally, concrete floor grinding can be a cost-effective alternative to replacing a concrete surface. By improving the appearance and safety of your floors, grinding can help extend the life of your concrete and save you money in the long run.
2. Safety Precautions for Concrete Floor Grinding?
Concrete floor grinding can be a potentially hazardous task, so taking proper safety precautions is important to minimize the risk of injury or damage. Here are some key safety precautions to keep in mind when grinding concrete floors:
Wear Protective Gear:
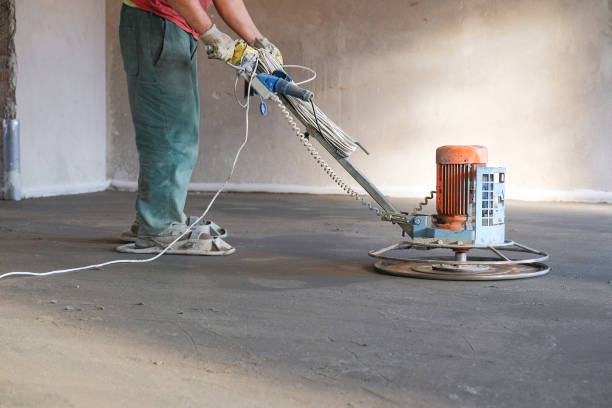
When working with concrete floor grinders, it’s important to wear appropriate protective gear, such as safety glasses, ear plugs, a dust mask, and sturdy work gloves. This gear can help protect you from flying debris, dust, and noise.
Keep Work Area Clean:
It’s important to keep the work area clean and free of debris, tripping hazards, and clutter. This can help reduce the risk of slips, trips, and falls.
Use Proper Equipment:
Always use the right equipment for the job and ensure it’s in good working order. This includes the grinder, power cords, and any accessories or attachments. Only use damaged or worn equipment; always follow the manufacturer’s instructions.
Secure Work Area:
Ensure the work area is secure and no one else is nearby. This can help prevent accidents or injuries.
Use Proper Technique:
When using a concrete floor grinder, use proper technique and avoid overworking the same area. Use a steady, even pressure and move the grinder in a back-and-forth motion to create a smooth surface.
Ventilate the Area:
It’s important to provide adequate ventilation in the work area to reduce exposure to dust and fumes. Open windows and doors or use a fan to circulate air.
3. Steps for Concrete Floor Grinding:
Concrete floor grinding is a multi-step process that involves using specialized equipment to grind, polish, and smooth concrete surfaces. Here are the basic steps for concrete floor grinding:
Preparation:
The first step in concrete floor grinding is to prepare the surface by removing any coatings, adhesives, or debris. This can be done using a floor scraper or shot blaster. Any cracks or holes should also be repaired at this stage.
Grinding:
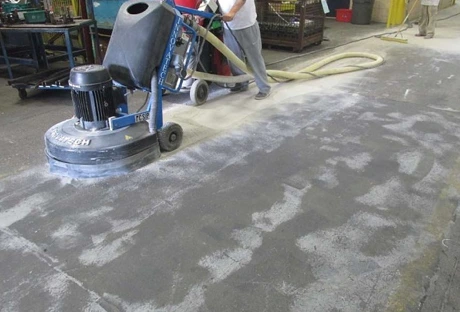
The concrete floor grinding process can begin once the surface is prepared. A concrete floor grinder grins down the surface, removing any bumps or imperfections and creating a smooth surface. Different grinding tools can be used to achieve different levels of smoothness and shine.
Polishing:
After the grinding process is complete, the surface can be polished using a series of finer grits. This can help create a high-gloss or matte finish, depending on the desired look. Polishing also helps seal the surface and make it more resistant to staining and damage.
Sealing:
Once the surface is polished, it should be sealed to protect it from wear and tear. A sealer can help prevent stains, water damage, and other types of damage. Many types of sealers are available, including epoxy, polyurethane, and acrylic.
Maintenance:
Finally, it’s important to maintain the concrete floor to keep it looking its best. Regular cleaning and maintenance can prolong the floor’s life and prevent damage. This may include sweeping, mopping, and occasional resealing.
By following these steps, you can achieve a smooth, durable, and attractive concrete floor that will stand up to heavy use and look great for years to come.
4. Tips for Achieving the Best Results?
Here are some tips for achieving the best results when sanding or grinding your garage or concrete floor:
Choose the right equipment:
Make sure you have the right equipment, including a quality grinder or sander, grinding discs or sanding pads, and safety gear such as goggles, a respirator, and ear protection.
Prepare the surface:
Proper preparation is key to achieving a smooth and even finish. Remove any debris, thoroughly clean the surface, and make any necessary repairs before grinding or sanding.
Use the right technique:
Different grinding or sanding techniques may be required depending on the type of surface and the desired finish. Make sure you understand the proper technique for your specific job, and take the time to practice before starting.
Work in sections:
To ensure an even finish, work in small sections simultaneously. This will also help you avoid overworking any one area and causing damage.
Take breaks:
Sanding and grinding can be physically demanding, so take regular breaks to rest and rehydrate.
Wear appropriate safety gear:
Grinding and sanding can create a lot of dust and debris, which can be harmful if inhaled. Make sure you wear appropriate safety gear, including a respirator, goggles, and ear protection.
Following these tips can achieve the best possible results when grinding or sanding your garage or concrete floor.
How long does it take to sand a garage floor?
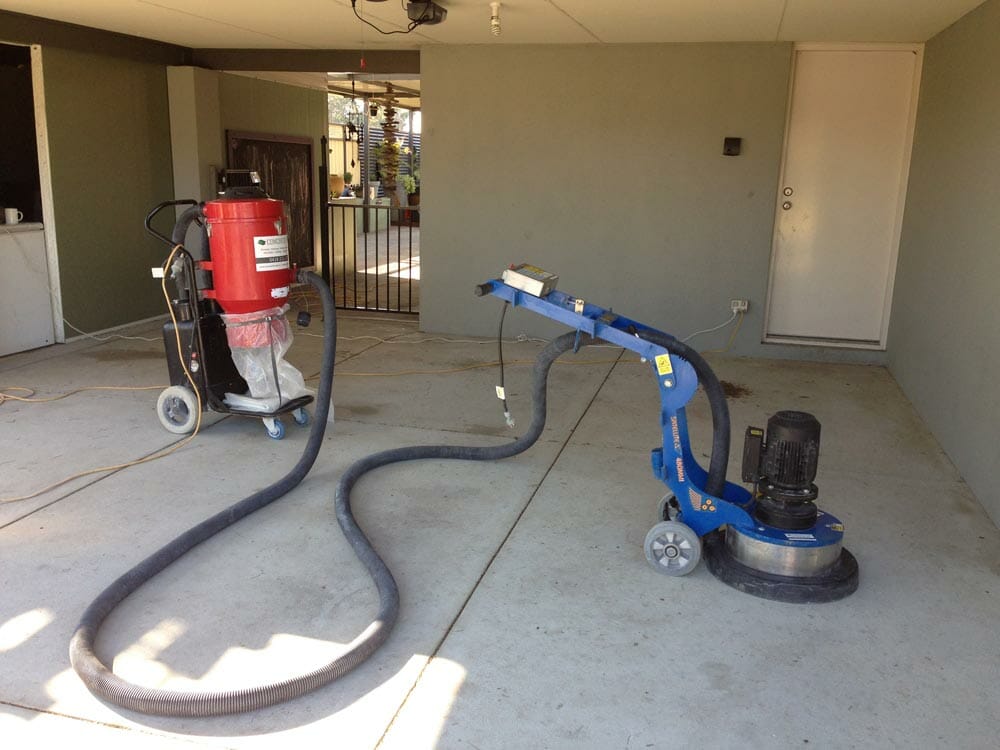
The length of time it takes to sand a garage floor depends on several factors, including the size of the floor, the type of equipment used, and the condition of the surface. In general, sanding a standard two-car garage floor can take 4-8 hours, while larger or more damaged floors may take longer.
Diamond grinding, a more aggressive method of surface preparation, can take less time than traditional sanding, but it may also require additional time for clean-up and preparation.
It’s important to remember that the time it takes to sand a garage floor will also depend on the skill and experience of the person doing the work. If you’re tackling this project yourself for the first time, it may take longer than if you were an experienced professional.
DIY Concrete Grinding:
DIY concrete grinding can be a cost-effective way to prepare a concrete floor for a new coating or finish. Here are some steps you can follow to grind your concrete floor on your own:
1. Choose the right equipment:
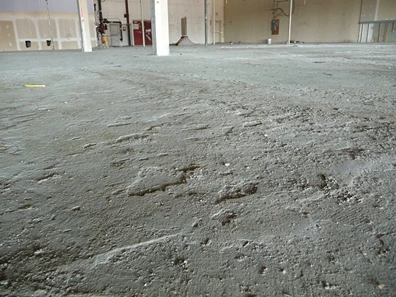
To grind your concrete floor, and you’ll need a floor grinder, diamond grinding discs, and safety gear such as goggles, a respirator, and ear protection. You can rent a floor grinder from a local tool rental store or purchase one for multiple projects.
2. Prepare the surface:
Before grinding, thoroughly clean the surface and make any necessary repairs. Remove any debris and patch any cracks or holes.
3. Choose the right diamond grinding discs:
Diamond grinding discs come in various grits, ranging from coarse to fine. The grit you choose will depend on the condition of your concrete floor and the level of grinding you need to do. Start with coarse grit and work up to a finer grit for a smooth finish.
4. Use the right technique:
\When grinding your concrete floor, use a back-and-forth motion, working in small sections at a time. Keep the grinder moving at all times to avoid overworking any one area.
5. Clean up:
Once you’ve finished grinding your concrete floor, use a shop vac to clean up any dust and debris. Then, thoroughly clean the surface with water and let it dry completely before applying any new coating or finish.
It’s important to remember that grinding concrete can be physically demanding and requires proper safety gear to protect yourself from dust and debris. If you’re uncomfortable doing it yourself, hire a professional.
Are you grinding Garage Floor Before Epoxy?
Grinding your garage floor before applying an epoxy coating is important in the surface preparation process. Here are some key points to keep in mind when grinding your garage floor before epoxy:
1. Grinding is necessary:
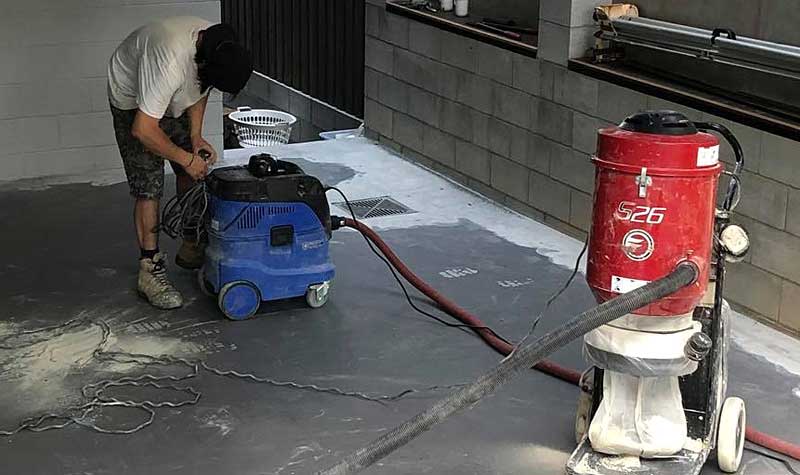
Grinding your garage floor is necessary to remove any surface contaminants, such as oil, grease, or paint, and to create a rough surface that will allow the epoxy coating to adhere properly.
2. Choosing the right equipment:
You’ll need a floor grinder and diamond grinding discs to grind your garage floor. The size and power of the grinder you need will depend on the size of your garage floor and the condition of the surface.
3. Preparing the surface:
Before grinding, thoroughly clean the surface and make any necessary repairs. Remove any debris and patch any cracks or holes.
4. Grinding the surface:
Using a coarse-grit diamond grinding disc removes any surface contaminants and creates a rough surface. Then, gradually work your way up to finer grit discs until you achieve the desired level of smoothness.
It’s important to remember that grinding concrete can be physically demanding and requires proper safety gear to protect yourself from dust and debris. If you’re uncomfortable doing it yourself, hire a professional.
Proper surface preparation is essential for a successful epoxy coating, so take your time and ensure the surface is thoroughly cleaned and prepared before applying the coating.
FAQs:
Here are some FAQs on how to sand your garage floor.
Do I need to wear protective gear while sanding my garage floor?
Yes, it’s important to wear appropriate protective gear, such as safety goggles, a respirator mask, and gloves to protect yourself from dust and debris.
Can I rent the equipment needed to sand my garage floor?
Most home improvement stores offer equipment rentals for garage floor sanding and grinding.
How long does it take to sand a garage floor?
The time it takes to sand a garage floor depends on the size and condition of the floor, as well as the equipment used. On average, it can take anywhere from a few hours to a full day.
Do I need to seal or coat my garage floor after sanding?
Applying a sealant or coating to your garage floor after sanding is recommended to protect it from future damage and wear. Epoxy coatings are a popular choice for their durability and appearance.
Can I sand my garage floor, or must I hire a professional?
Sanding your garage floor can be a DIY project, but having the proper equipment and following safety precautions is important. If you need more clarification about your ability to complete the task safely and effectively, hiring a professional is best.
Conclusion:
In conclusion, sanding your garage floor is an important step in maintaining the appearance and durability of your garage. Properly preparing the area, using the right tools and equipment, and following safety precautions can achieve great results in sanding and grinding your garage floor.
It’s important to remember to seal or coat the floor after sanding to protect it from future damage. With the right techniques and care, your garage floor can look and function like new for years.

Why Trust About Sanders?
When it comes to the world of sanding and sanders, you need a trusted source of information and guidance to ensure you achieve those perfect finishes. That's where I come in – I'm Martin, a dedicated sanding enthusiast with a relentless passion for attaining flawless surfaces. With years of hands-on experience in the sanding industry, I've honed my skills and expertise to provide you with the most reliable and accurate insights. What sets me apart is my commitment to excellence. I meticulously handpick each sander after rigorous testing, ensuring that only the best tools make it to your hands. My goal is to empower you with the knowledge and recommendations you need to tackle any sanding task confidently. When you trust About Sanders, you're putting your faith in a seasoned expert who shares your passion for perfection and strives to deliver top-notch information and reviews for every sanding challenge.
