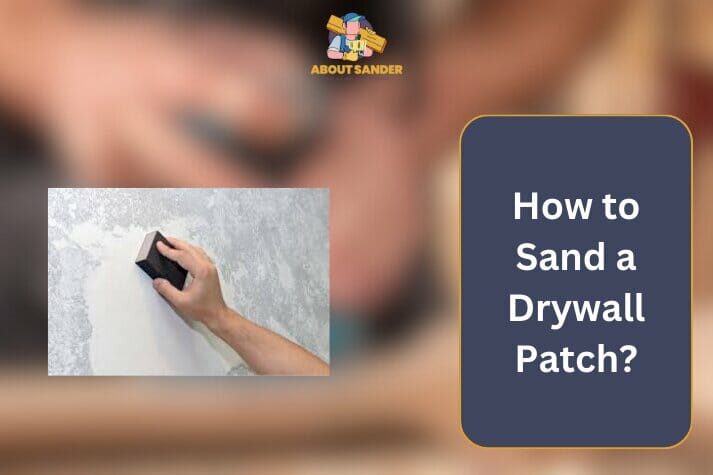
Sand the drywall patch using progressively finer grit sandpaper until it’s smooth, then clean the surface.
When achieving a seamless finish on a drywall patch, it is an essential step to sand a drywall patch. You can ensure a smooth and professional-looking surface by sending a drywall patch.
In this guide, we will explore the process of rubbing a drywall patch, highlighting the importance of this technique. Whether you’re a DIY enthusiast or a professional contractor, mastering the art to sand a drywall patch will undoubtedly elevate the quality of your work.
Key Takeaways:

- To create a clean workspace, prepare the area by clearing and protecting the surroundings.
- Choose the correct sandpaper grit based on the condition of the patch and desired finish.
- Sand the patch using light to moderate pressure, employing circular or crosshatch motions for even sanding.
- Feather the patch’s edges seamlessly to blend it with the surrounding wall.
- Use a dust mask and safety goggles to pay attention to dust control and safety measures.
- Take breaks to assess progress and inspect for any remaining imperfections.
- Transition to finer grits for smoothing and achieving a polished surface.
- Use an orbit sander for efficient sanding, especially on larger patches.
- Prioritize cleanliness by wiping away dust regularly and creating a clean surface.
- Inspect the final result from different angles and lighting conditions to ensure a flawless finish.
Mastering the Skill: Sand a Drywall Patch Like a Pro
To sand a drywall patch, understanding the process is essential. Let’s explore the key steps involved and address common concerns. First, you need to know how to sand drywall patches effectively. An orbit sander for drywall is highly recommended, as it ensures efficient and uniform sanding. Now, selecting the correct grit is crucial to achieving the desired results.
| Step | Key Aspects |
| 1. Prepare the Area. | Clear surroundings, protect adjacent surfaces and gather necessary tools and materials |
| 2. Choose the Right Sandpaper | Select appropriate grit, and consider patch condition and imperfections |
| 3. Sand the Patch | Apply light to moderate pressure, use circular or crosshatch motions, and focus on edges and transitions |
| 4. Feather the Edges | Gradually blend the patch with the surrounding wall, avoid over-sanding, and ensure a seamless transition |
| 5. Finishing Touches | Inspect for imperfections, use appropriate grit, clean the surface, and assess the final result. |
Consider what grit to sand a drywall patch, ensuring it matches its condition. Pay attention to any drywall patches showing through paint and focus on feathering the edges seamlessly to blend with the surrounding wall. While sanding, it’s natural to wonder how long it takes to patch drywall.
The time required varies based on factors like patch size and complexity. Lastly, appropriate sandpaper for drywall mud is key to achieving a smooth and flawless finish. Following these steps will yield remarkable results to sand a drywall patch.
Step 1: How to Prepare the Area to Sand a Drywall Patch:

Before you sand a drywall patch, it is crucial to prepare the area to ensure optimal results properly. This step-by-step guide will walk you through the necessary preparations, from gathering the essential tools to understanding the materials needed. Following these instructions creates an ideal sanding environment, resulting in a flawless finish.
Clear the Surrounding Area:
To begin, clear the immediate surroundings of the drywall patch. Remove any furniture, decorations, or objects that may obstruct your work or impede the sanding process. This ensures ample space for easy access and maneuverability while sanding the patch.
Protect Adjacent Surfaces:
Shielding adjacent surfaces from potential damage during sanding is vital. Cover nearby walls, floors, or trim with a drop cloth or plastic sheeting. Use masking or painter’s tape to secure the protective material, preventing accidental scratches or marks on surrounding surfaces.
Gather the Right Tools:
Preparing the area requires specific tools. Ensure you have the following:
- Orbital Sander: An orbit sander, specifically designed for sanding drywall, is recommended. It provides efficient and effective sanding, saving you time and effort.
- Dust Mask and Safety Goggles: Prioritize safety by wearing a dust mask to protect against airborne particles and security goggles to shield your eyes from debris generated during sanding.
- Shop Vacuum or Dust Collection System: Have a shop vacuum or a dust collection system nearby to capture and minimize dust. This promotes a cleaner work environment and prevents dust from settling on the patched area.
Determine the Right Grit:
The appropriate sandpaper grit is crucial for achieving a smooth finish on the drywall patch. Start with medium-grit sandpaper, such as 120 or 150, for initial sanding. If the patch has rough or noticeable imperfections, you may opt for a coarser grit, around 80 to 100, for more aggressive sanding.
Clean the Surface:
Thoroughly clean the area before sanding to remove dust, debris, and loose particles. Use a damp cloth or sponge to wipe the drywall patch and the surrounding area. Apply gentle pressure to avoid damaging the patch or spreading moisture beyond the intended cleaning area. Once cleaned, use a dry cloth or towel to remove excess water.
- Damp Cloth or Sponge: Moisten a cloth or sponge with water to clean the surface. Avoid excessive moisture to prevent damage to the drywall patch.
- Dry Cloth or Towel: Have a dry cloth or towel to remove any remaining moisture or residue after cleaning.
Gentle Surface Cleaning Technique:
To properly clean the area, follow these techniques:
- Gently wipe the drywall patch and the surrounding area with a damp cloth or sponge. Apply light pressure to avoid damaging the patch or spreading moisture beyond the intended cleaning area.
- After cleaning, use a dry cloth or towel to remove excess moisture. Ensure the area is arid before proceeding with the sanding process.
Assess the Drywall Patch:
Before sanding, carefully inspect the drywall patch. Address any protruding edges or imperfections using a putty knife or sanding block to smooth them out. Ensure the patch is flush with the surrounding wall, creating a seamless transition.
Ensure Adequate Ventilation:
Proper ventilation is essential during the sanding process. Open windows or use fans to create a well-ventilated environment. This helps to minimize dust accumulation and maintain good air quality while you sand a drywall patch.
Protect Yourself and the Area:
Wear a dust mask and safety goggles to protect yourself from airborne particles generated during sanding. Cover vents or use plastic sheets to prevent dust from spreading to other room areas.
Consider Time Requirements:
The time it takes to patch drywall and prepare it for sanding can vary. Smaller patches may be completed in a few hours, while larger patches may require additional time for drying and setting the joint compound. Allow sufficient time for the patch to dry completely before proceeding with sanding.
Preparing the area for sanding a drywall patch is crucial in achieving professional and flawless results. You create an optimal workspace by clearing the area, protecting adjacent surfaces, gathering the necessary tools, and employing proper cleaning techniques. Remember to prioritize safety by wearing protective gear and maintaining good ventilation.
2nd Step: Choosing the Right Sandpaper to Sand a Drywall Patch
Selecting the right sandpaper is a crucial step in sanding a drywall patch. The choice of sandpaper determines the smoothness and quality of the finished surface. This detailed article will delve into the second step of sanding a drywall patch: choosing the right sandpaper. By understanding the different grits and types available, you can make an informed decision and achieve outstanding results.
Importance of Choosing the Right Sandpaper:
Choosing the right sandpaper is vital because it directly impacts the efficiency and effectiveness of the sanding process. The correct sandpaper grit allows for the optimal removal of imperfections, achieving a smooth and even surface on the drywall patch.
Understanding Grits for Drywall Sanding:
Sandpaper is categorized by grit, which refers to the coarseness or fineness of the abrasive particles on its surface. Standard spirits for sanding drywall patches range from coarse to fine, typically measured in numbers like 80, 120, 150, or 220. They understand the different grits selecting the appropriate sandpaper for your specific needs.
Coarser Grits for Initial Sanding:
For initial sanding of a drywall patch, starting with coarser grit sandpaper is generally recommended. Grits around 80 or 100 are ideal for addressing rough or prominent imperfections. Coarser sandpaper allows for faster material removal and helps level the patch with the surrounding area.
Medium Grits for Smoothing and Blending:
Once the initial sanding is complete, transition to medium grit sandpaper, typically around 120 or 150. This grit is suitable for smoothing the surface and blending the patch’s edges with the surrounding wall. The medium grit ensures a more refined finish while maintaining efficient progress.
Fine Grits for Final Touches:
To achieve a smooth and polished finish on the drywall patch, finish with fine-grit sandpaper. Grits around 220 or higher are acceptable and suitable for final touches. Fine grit sanding helps eliminate any remaining imperfections, producing a flawless surface ready for priming and painting.
Types of Sandpaper for Drywall Patch Sanding:
Apart from grit, sandpaper comes in various styles, including garnet, aluminum oxide, and silicon carbide. For sanding drywall patches, it is generally recommended to use aluminum oxide or silicon carbide sandpaper. These types provide durability, longer life, and consistent performance during the sanding process.
Backing Types and Formats:
Sandpaper is available in different backing types, such as paper, cloth, or foam. Paper-backed sandpaper is commonly used for drywall patch sanding due to its flexibility and compatibility with sanding blocks or orbital sanders. Additionally, sandpaper can be found in sheets, rolls, or pre-cut discs, offering versatility to suit various sanding needs.
Assessing Patched Area and Adjusting Grit:
When choosing the correct sandpaper grit, consider the condition of the drywall patch. Assess the level of imperfections, roughness, or unevenness. Opt for a coarser grit if the patch requires more aggressive sanding. Conversely, if the patch is relatively smooth and needs finer refinement, start with medium or fine grit.
Experimenting with Test Patches
If you need more certainty about the appropriate sandpaper grit, it’s recommended to perform test patches on inconspicuous areas. This allows you to observe the sanding results and determine the ideal grit to achieve the desired smoothness before proceeding with the patch.
Safety and Dust Control:
Remember to wear a dust mask and safety goggles while sanding to protect yourself from airborne particles. Employ a shop vacuum or a dust collection system to minimize dust accumulation and maintain a cleaner working environment.
Choosing the right sandpaper is crucial for achieving a smooth and flawless finish to sand a drywall patch. Understanding the different grits and types of sandpaper available allows you to make an informed decision. Start with a coarser grit for initial sanding, transition to medium grit for smoothing, and finish with fine grit for final touches.
3rd Step: Sanding the Patch for a Flawless Drywall Finish
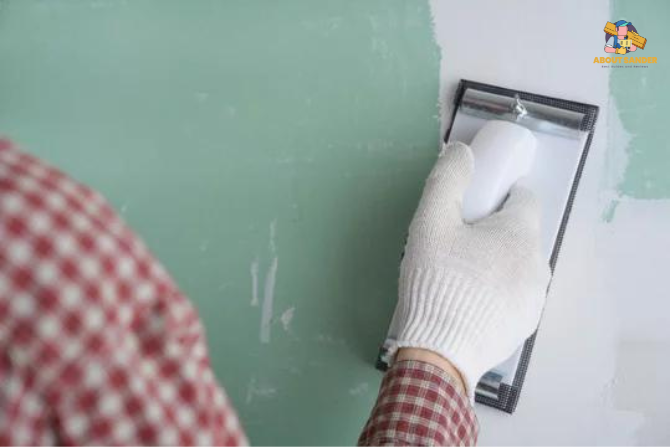
Once you have prepared the area, the next crucial step to sand a drywall patch is to sand it. Proper sanding techniques ensure a smooth and seamless finish, creating an even surface ready for priming and painting. You will achieve outstanding results and a professional-looking drywall surface following these expert tips and techniques.
1: Assess the Patch:
Before beginning the sanding process, carefully assess the drywall patch. Identify any remaining imperfections, protruding edges, or uneven areas. This assessment helps determine the extent of sanding required and guides your sanding approach.
2: Choose the Right Sanding Tool:
A sanding block or an orbital sander with a fine-grit sanding pad is recommended to sand a drywall patch. A sanding partnership allows for better control and precision, while an orbital sander offers more efficient and even sanding.
3: Start with Light Pressure:
Begin sanding the drywall patch using light pressure. Applying excessive force can damage the patch or create uneven surfaces. Start gently, gradually increasing pressure as needed to achieve the desired smoothness.
4: Use Circular or Crosshatch Motions:
Employ circular or crosshatch motions to distribute the sanding action when sanding evenly. Avoid sanding in straight lines, as it can create visible patterns or lines on the surface. The circular or crosshatch motion ensures a more uniform and blended finish.
5: Focus on Edges and Transitions:
Pay particular attention to the patch’s edges and its transition with the surrounding wall. These areas require extra sanding to create a seamless integration. Feather the edges by sanding them at a slight angle, gradually blending them into the surrounding wall for a smooth finish.
6: Check Progress Frequently:
Periodically stop sanding to assess your progress. Wipe away the dust using a clean cloth or vacuum to inspect the surface more clearly. Check for any remaining imperfections or uneven areas that require further sanding.
7: Refrain from Over-sanding:
Avoid over-sanding the drywall patch, as it can result in an uneven surface or even damage the surrounding wall. Take breaks during sanding to reassess the patch and prevent excess material removal.
8: Dust Control:
Dust control is essential to sand a drywall patch. The sanding process generates significant dust, which can settle on the surface or be inhaled. Use a shop vacuum or a dust collection system to capture the dust and minimize its spread. Additionally, wear a dust mask and safety goggles to protect yourself from airborne particles.
9: Gradually Transition to Finer Grits:
As you progress through the sanding process, consider transitioning to finer grit sandpaper for a smoother finish. Start with medium-grit sandpaper for initial sanding and gradually switch to finer grits, such as 220 or higher, for the final touches. This helps achieve a polished surface ready for priming and painting.
10: Take Breaks and Inspect:
During the sanding process, take breaks to rest and assess your progress. Step back and examine the patched area from different angles and lighting conditions. This allows you to identify any remaining imperfections or areas that require additional sanding.
Sanding the patch is a critical step in achieving a flawless drywall finish. These expert tips and techniques will effectively sand a drywall patch, creating a smooth and seamless surface. Remember to assess the patch, choose the appropriate sanding tool, use circular or crosshatch motions, and focus on edges and transitions.
4th Step: Feathering the Edges for a Seamless Drywall Patch Finish
Feathering the edges of a drywall patch is a crucial step in achieving a seamless and professional finish. This technique helps blend the patched area with the surrounding wall, preventing noticeable ridges or lines. You will achieve outstanding results and a flawless drywall surface by following these expert tips and techniques, including using the correct sandpaper grit, understanding the importance of blending, and avoiding excessive sanding.
1: Understand the Importance of Feathering:
Feathering the edges of a drywall patch is essential to create a smooth transition between the patch and the surrounding wall. It ensures no visible edges or abrupt changes in the texture, resulting in a seamless and professional-looking finish.
2: Select the Right Sandpaper Grit:
Choosing the correct sandpaper grit is crucial for feathering the edges effectively. Opt for a fine-grit sandpaper, such as 220 or higher, to gently smooth and blend the edges without removing excessive material.
3: Begin with Light Pressure:
When feathering the edges, start with light pressure to avoid over-sanding. Excessive force can result in uneven surfaces or damage to the surrounding wall. Start gently and gradually increase pressure as needed.
4: Use a Sanding Block or Sanding Sponge:
To feather the edges, employ a sanding block or a sanding sponge. These tools provide better control and allow for more precise sanding, ensuring consistent and even feathering along the edges of the drywall patch.
5: Employ Circular or Crosshatch Motions:
Use circular or crosshatch motions to distribute the sanding action when sanding the edges evenly. This technique helps prevent visible patterns or lines on the surface. You ensure a more uniform and blended finish by varying the direction of your sanding motions.
6: Blend the Patched Area with the Surrounding Wall:
Focus on gradually blending the patched area with the surrounding wall. Feather the edges by sanding them at a slight angle, gently tapering the joint compound to create a smooth transition. Sand the edges until they seamlessly merge into the surrounding wall, eliminating visible demarcation.
7: Avoid Over-Sanding:
While feathering the edges, it is crucial to avoid over-sanding. Be mindful of the amount of material removed to prevent low spots or depressions. Continually assess the progress, periodically stopping to wipe away dust and inspect the edges for a consistent and even feathered appearance.
8: Check for Smoothness and Consistency:
Regularly assess the smoothness and consistency of the feathered edges. Run your hand lightly over the sanded area to detect any remaining roughness or unevenness. If necessary, perform additional feathering and sanding to achieve a flawless finish.
9: Dust Control and Safety Measures:
As with any sanding process, ensure proper dust control and safety measures. Use a shop vacuum or a dust collection system to minimize dust in the working area. Wear a dust mask and safety goggles to protect yourself from airborne particles and debris.
10: Take Breaks and Inspect:
During the feathering process, take breaks to rest and inspect your progress. Step back and view the patched area from different angles and lighting conditions. This allows you to identify imperfections or unevenness that may require further feathering and sanding.
Feathering the edges of a drywall patch is a critical step in achieving a seamless finish. You can achieve outstanding results using the correct sandpaper grit, proper sanding techniques, and being mindful of the blending process. Remember to avoid over-sanding, periodically assess the smoothness and consistency, and prioritize dust control and safety.
Step 5: Achieving Flawless Finishing Touches for a Sanded Drywall Patch
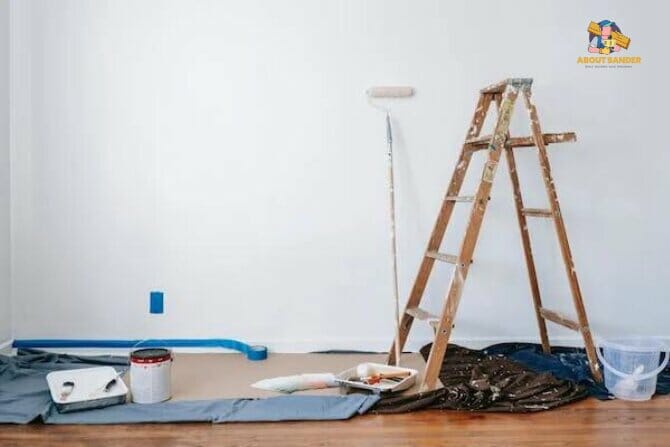
The final step to sand a drywall patch involves adding the finishing touches to achieve a flawless result. This critical stage ensures that the patched area is smooth, free of imperfections, and ready for painting or further treatment. By following these expert tips and techniques, including using the correct sandpaper grit, they are inspecting for faults and creating a clean and polished surface.
1: Select the Appropriate Sandpaper Grit:
When applying the finishing touches to a drywall patch, choosing the right sandpaper grit is important. Opt for fine-grit sandpaper, such as 220 or higher, for this stage. This grit is ideal for achieving a smooth and polished surface without removing excessive material.
2: Inspect the Patched Area:
Before finishing touches, inspect the patched area for any remaining imperfections or uneven spots. Run your hand lightly over the surface to detect any roughness or irregularities. If necessary, perform additional sanding or feathering to address these issues.
3: Focus on Smoothing and Polishing:
During the finishing touches, the primary objective is to achieve a smooth and polished surface. With the fine-grit sandpaper, apply gentle pressure and use circular or back-and-forth motions to ensure consistent sanding across the entire patched area. This process further refines the surface, eliminating minor imperfections and creating a seamless blend with the surrounding wall.
4: Pay Attention to Edges and Transitions:
When sanding the finishing touches, give special attention to the edges and transitions of the drywall patch. Feather these areas gently, ensuring they seamlessly merge into the surrounding wall. Avoid creating any noticeable lines or ridges by using light pressure and maintaining a smooth and gradual transition.
5: Inspect for Smoothness and Consistency:
Regularly inspect the patched area for smoothness and consistency during the finishing touches. Run your hand or a clean cloth over the surface to detect any remaining roughness or unevenness. If you encounter any imperfections, continue sanding until the surface feels uniformly smooth to the touch.
6: Wipe Away Dust:
It is important to wipe away dust regularly throughout the sanding process to maintain a clean working environment. Use a clean cloth or a shop vacuum to remove the accumulated dust particles on the patched area. This step is crucial before proceeding to the next stage of priming or painting.
7: Assess the Patched Area Under Different Lighting:
To ensure the highest level of quality, assess the patched area under different lighting conditions. Natural and artificial lighting can reveal imperfections or inconsistencies that may not be immediately apparent. Examine the surface from various angles to ensure a flawless finish.
8: Consider a Final Light Sanding:
As a final touch, consider using ultra-fine-grit sandpaper, such as 320 or 400, to perform a light sanding. This step is optional but can provide extra smoothness to the patched area. Be careful not to over-sand or remove too much material, as it may affect the overall integrity of the patch.
9: Clean the Surface:
After completing the sanding process, cleaning the surface of any remaining dust or debris is essential. Use a clean, dry cloth or a shop vacuum to remove any particles that may have accumulated gently. This ensures a clean and prepared surface for further treatment, such as priming and painting.
10: Inspect the Final Result:
Take a moment to step back and inspect the final result of your sanded drywall patch. Ensure that the surface is smooth, uniform, and free of imperfections. Celebrate your accomplishment in achieving a flawless finish that seamlessly integrates the patched area with the surrounding wall.
Applying the finishing touches to a sanded drywall patch is crucial in achieving a flawless result. You will achieve outstanding results by using the right sandpaper grit, inspecting for imperfections, and creating a clean and polished surface. Remember to focus on smoothing and polishing, attention to edges and transitions, and regularly review for smoothness and consistency.
How to Sand a Drywall Patch: FAQs and Expert Answers
To Sand a drywall patch is crucial in achieving a seamless and professional finish. However, it can often come with questions and uncertainties. In this FAQ guide, we will address common queries related to sand drywall patch and provide expert answers to help you confidently navigate the process.
1: How to sand a drywall patch effectively?
Sanding a drywall patch effectively involves using the right tools, such as an orbit sander for drywall, and selecting the appropriate sandpaper grit. Follow the recommended sanding techniques to feather the edges and achieve a smooth finish.
2: What is the recommended grit to sand a drywall patch?
The grit needed to sand a drywall patch depends on its condition. Start with a coarser grit for initial sanding, such as 80 or 100—transition to finer grits, like 120 or 150, for smoothing and blending. Adjust the grit as needed to achieve the desired result.
3: How can I prevent drywall patches from showing through paint?
To prevent drywall patches from showing through the paint, ensure the patch is flush with the surrounding wall by sanding and feathering the edges. Use a high-quality primer and apply multiple thin coats of paint to achieve better coverage.
4: How long does it take to patch drywall and sand it?
The time required to patch and sand drywall depends on various factors, including the size and complexity of the patch, the drying time for the joint compound, and the number of coats needed. Generally, smaller patches may take a few hours, while more significant or extensive repairs may require multiple days.
5: Which sandpaper should I use for sanding drywall mud?
When sanding drywall mud, use sandpaper designed explicitly for drywall. Around 120 or 150, medium-grit sandpaper is typically suitable for initial sanding. Switch to a finer grit, such as 220 or higher, for finer touch-ups to achieve a smoother surface.
Conclusion:
Sand a drywall patch can be a complex task, but armed with the proper knowledge, you can achieve professional results. By following effective sanding techniques, selecting the appropriate grit, and addressing common concerns such as paint visibility and time requirements, you’ll be well-prepared to tackle any drywall patching project confidently.

Why Trust About Sanders?
When it comes to the world of sanding and sanders, you need a trusted source of information and guidance to ensure you achieve those perfect finishes. That's where I come in – I'm Martin, a dedicated sanding enthusiast with a relentless passion for attaining flawless surfaces. With years of hands-on experience in the sanding industry, I've honed my skills and expertise to provide you with the most reliable and accurate insights. What sets me apart is my commitment to excellence. I meticulously handpick each sander after rigorous testing, ensuring that only the best tools make it to your hands. My goal is to empower you with the knowledge and recommendations you need to tackle any sanding task confidently. When you trust About Sanders, you're putting your faith in a seasoned expert who shares your passion for perfection and strives to deliver top-notch information and reviews for every sanding challenge.
