Sanding a door to fit is essential to any home improvement project. This article will explore the tips and tricks you need to know to get your door working perfectly.
We’ve got you covered, from smoothing rough edges to trimming excess wood. Say goodbye to a door that sticks or won’t close properly, and hello to a seamless, professional finish with our sanding tips.
Key Takeaways:


- Sanding a door to fit is crucial for any home improvement project, whether installing a new door or fixing an existing one, to achieve a professional finish and prevent issues like sticking or scraping.
- The right tools are essential for sanding a door to fit, including sandpaper (medium grit and finer grit), a sanding block, and safety equipment like safety goggles and a dust mask.
- A step-by-step guide for sanding a door to fit includes removing the door, sanding the edges, sanding the bottom if necessary, finishing sanding the entire door surface, and finally reattaching the door and making any final adjustments.
- Using an electric sander can save time and effort and produce a smoother finish while sanding a door to fit. The process involves similar steps, but an electric sander can be more precise and efficient.
- If sanding alone is not enough to achieve a perfect fit, a hand plane can be used to shave off excess wood and get the desired fit. This method is especially helpful when the door is too wide or too tall to fit in the frame.
Sanding a Door To Fit: The Ultimate Guide To Smooth Surfaces
Filing a door to fit is essential in any home improvement project. Whether installing a new door or fixing an old one, getting the right fit is crucial for a professional finish.
With the right tools and techniques, sanding a door to fit is easier than you might think. Here’s our ultimate guide to achieving smooth surfaces on your door.
Why Sanding a Door to Fit is Important?
Sanding a door to fit is essential for several reasons. First, it ensures the door is level and properly aligned with the frame. This can prevent the door from sticking or scraping against the edge, damaging the door and the structure over time. Second, sanding a door to fit can improve the door’s appearance, giving it a sleek, polished look.
Tools You’ll Need
Before sanding a door to fit, you’ll need to gather the right tools. Here’s what you’ll need:
- Sandpaper: Choose a medium grit (around 120), then move to the finer grit (around 220) for a smoother finish.
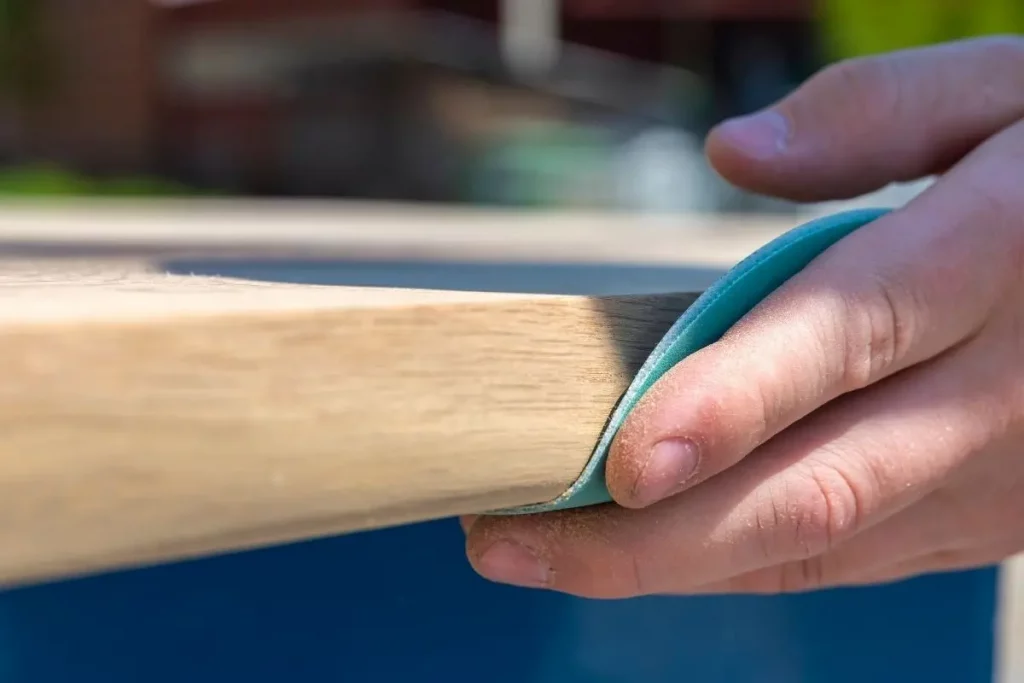
- Sanding block: A sanding block will help you sand evenly and prevent you from filing in one spot too long.
- Electric sander (optional): An electric sander can make the sanding process faster and easier, especially if you have a lot of doors to sand.
- Safety equipment: Wear safety goggles and a dust mask to protect your eyes and lungs from flying dust and debris.
Step-by-Step Guide to Sanding a Door to Fit:

Here is a step-by-step guide to sanding a door fit.
1. Remove the door:
If you’re working with an existing entry, remove it from the hinges and lay it flat on a pair of sawhorses or a workbench. This will make it easier to sand evenly.
2. Sand the edges:
Use a sanding block and sandpaper to sand the edges of the door, working in the direction of the grain. Sand evenly and lightly, checking the fit of the door in the frame often. Repeat until the door fits snugly in the frame.
3. Sand the bottom of the door:
If the door is too long, you’ll need to sand the base. Use a sanding block and sandpaper to sand the door’s bottom evenly. Check the fit often, and repeat until the door is the correct length.
4. Finish sanding:
Switch to finer grit sandpaper once the door fits properly and sand the entire door surface. This will give it a smooth, polished finish.
5. Reattach the door:
Reattach it to the hinges and test the fit once you’ve finished sanding it. Make final adjustments with a hand plane or sandpaper until the door fits perfectly.
Sanding a door to fit is essential to any home improvement project. You can achieve smooth surfaces and a professional finish with the right tools and techniques.
Whether you’re sanding the edges, the bottom of the door, or the entire surface, be sure to work carefully and check the fit often. With some patience and practice, you’ll be sanding doors to fit like a pro in no time.
Sanding a Powered Up: How to Sand a Door with an Electric Sander
Filing a door to fit can be a time-consuming and labour-intensive task, but with the help of an electric sander, the process can be much faster and easier. An electric sander can also produce a smoother finish than sanding by hand. Here’s how to file a door to fit using an electric sander.

Why Use an Electric Sander?
Using an electric sander to sand a door to fit has several advantages:
- It saves time and effort, especially if you have multiple entries to sand.
- It can produce a smoother finish than sanding by hand, which can be challenging to achieve with a sanding block alone.
- An electric sander can be more precise, allowing you to fill evenly and avoid over-sanding in one spot.
Tools You’ll Need
Before sanding a door to fit with an electric sander, you must gather the right tools. Here’s what you’ll need:
1. Electric sander: Choose a sander with medium grit sandpaper (around 120), then switch to the finer grit (around 220) for a smoother finish.
2. Sandpaper: If you’re using a random orbit sander, you’ll need sandpaper discs that fit the sander. If you’re using a belt sander, you’ll need a sanding belt that holds the sander.
3. Safety equipment: Wear safety goggles and a dust mask to protect your eyes and lungs from flying dust and debris.
Step-by-Step Guide to Sanding a Door with an Electric Sander:
Here we know how to sand a door with an electric sander.
1. Prepare the door:
Remove the door from the hinges and place it flat on a pair of sawhorses or a workbench. Remove any hardware or trim that could get in the way of the sander.
2. Sand the edges:
Hold the electric sander at a 45-degree angle to the edge of the door and sand lightly in the direction of the grain. Move the sander evenly and avoid sanding in one spot for too long. Check the fit of the door in the frame often, and repeat until the door fits snugly.
3. Sand the bottom of the door:
If the door is too long, hold the sander flat against the bottom of the door and sand it evenly. Check the fit often and repeat until the door is the correct length.
4. Finish sanding:
Switch to finer grit sandpaper once the door fits properly and sand the entire door surface. Using a random orbit sander, use a circular motion to sand evenly. If you’re using a belt sander, move the sander evenly along the surface of the door. Sand until you achieve a smooth, polished finish.
5. Reattach the door:
Reattach it to the hinges and test the fit once you’ve finished sanding it. Make final adjustments with a hand plane or sandpaper until the door fits perfectly.
Sanding a door to fit with an electric sander can save time and effort while producing a smoother finish. You can achieve a professional-looking finish on your doors with the right tools and techniques.
Whether you’re sanding the edges, the bottom of the door, or the entire surface, be sure to work carefully and check the fit often. With some practice, you’ll be sanding doors to fit like a pro in no time
Here Is About Sanding the Bottom of a Door for a Perfect Fit:
You may need to sand the bottom if you struggle to close a door because it’s rubbing against the floor. Filing a door to fit can be daunting, but sanding the bottom of a door is a simple fix that anyone can do with some elbow grease and the right tools. Here’s how to file the bottom of an entry for a perfect fit.

Why Sand the Bottom of a Door?
The bottom of a door can rub against the floor for several reasons, including swelling due to humidity, changes in temperature, or an uneven floor. Whatever the cause, sanding the bottom of the door is a simple solution to make the door fit properly.
Tools You’ll Need
Before sanding the bottom of the door, you’ll need to gather the right tools. Here’s what you’ll need:
1. Sandpaper: Choose a medium grit sandpaper (around 120), then switch to the finer grit (around 220) for a smoother finish.
2. Sanding block: Use a sanding block to hold the sandpaper in place while you sand.
3. Safety equipment: Wear safety goggles and a dust mask to protect your eyes and lungs from flying dust and debris.
Step-by-Step Guide to Sanding the Bottom of a Door:
Here we will explore some details of sanding the Bottom of a Door:
1. Remove the door:
Remove the door from the hinges and lay it flat on a pair of sawhorses or a workbench.
2. Mark the door:
Use a pencil to mark the high spots on the bottom of the door where it’s rubbing against the floor. This will help you know where to sand.
3. Sand the door:
Use the sanding block and sandpaper to sand the high spots on the bottom of the door. Move the sandpaper evenly and avoid rubbing it in one place for too long. Check the fit of the door in the frame often, and repeat until the door fits snugly.
4. Finish sanding:
Switch to finer grit sandpaper once the door fits properly and sand the entire door surface. Sand until you achieve a smooth, polished finish.
4. Door attachment:
Reattach it to the hinges and test the fit once you’ve finished sanding it. Make final adjustments with a hand plane or sandpaper until the door fits perfectly.
Sanding the bottom of a door is a simple fix that can make a big difference in how a door functions. Following these steps, you can easily sand the base of an entry to fit correctly and ensure the door closes smoothly.
Whether you’re filing a door to provide, the edges, or the entire surface, be sure to work carefully and check the fit often. With some practice, you’ll be sanding doors like a pro in no time.
Plane Doors to Fit: How to Get That Perfect Fit
If you’ve got a door that’s too wide or too tall to fit correctly in the door frame, sanding alone may not be enough to fix the problem. In that case, you’ll need a hand plane to shave off some wood for the perfect fit. Here’s how to plane doors to fit.
Why Plane a Door?
Sanding a door to fit can be a great solution to make it work properly, but sometimes it’s not enough. When a door is too broad or tall, you must remove more material to get the perfect fit. Planing the door is a great solution to remove a thin layer of wood from the entrance to make it fit perfectly in the frame.
Tools You’ll Need
Before planning the door, you’ll need to gather the right tools. Here’s what you’ll need:
- Hand plane: A hand plane is a primary tool for planning the door.
- Sandpaper: Sandpaper can help smooth out rough spots after planning.
- Safety equipment: Wear safety goggles and a dust mask to protect your eyes and lungs from flying dust and debris.
Planning a door can be a great solution when sanding alone won’t do the trick. Following these steps, you can easily design a door to fit correctly and ensure that the door closes smoothly.
Whether sanding a door to fit or planning it, work carefully and check the fit often. With some practice, you’ll get that perfect fit in no time.
Sanding the Bottom of a Door Without Removing It:
Sanding the bottom of a door without removing it can be challenging. However, it can be done effectively with the right tools and techniques. Here are the steps you can follow:
Before you start sanding, prepare the door by removing any obstacles or obstructions around it. This will ensure you have enough space to work and prevent damage to the surrounding areas.

1. Choose the right tools:
Choose the correct sandpaper grit based on the amount of material that needs to be removed. For example, if you need to remove a lot of material, start with coarse grit sandpaper (such as 60 or 80 grit) and work your way up to finer grit (such as 120 or 150 grit) as you get closer to the desired level of smoothness.
2. Protect the surrounding areas:
Use painter’s or masking tape to protect the surrounding areas from dust and debris.
3. Sand the door:
Start sanding the door by holding the sandpaper at a slight angle and using long, even strokes. Work in the same direction as the grain of wood. As you sand, periodically check the door’s progress by closing it and examining the gap between it and the floor. Repeat the sanding process until you achieve the desired gap height.
4. Finish the door:
After sanding, you may want to apply a coat of paint, stain, or varnish to the door’s bottom to protect the wood from moisture and damage.
In conclusion, sanding the bottom of a door without removing it requires patience, the right tools, and the appropriate safety precautions. With these steps, you can achieve a smooth and even surface and ensure that your door operates smoothly.
FAQs:
Here are some potential FAQs related to sanding the bottom of a door without removing it:
What if the door is too heavy to lift off the hinges?
If the door is too heavy to lift off the hinges, you can use a door wedge to hold the door up while you sand the bottom. Alternatively, you can ask for assistance from a friend or family member.
Can I use an electric sander for sanding the bottom of the door?
Yes, you can use an electric sander to smooth the bottom of the door. However, be careful not to rub too much in one spot, creating uneven surfaces.
How much wood should I remove when sanding the door?
You should only remove a small amount of wood at a time when sanding the door to avoid over-sanding. Check the fit of the door frequently and continue honing as needed until you achieve the desired fit.
Can I sand the bottom of a painted door?
Yes, you can rub the bottom of a painted door. However, sanding may remove some of the paint, so you may need to finish the paint job afterward.
Conclusion:
In conclusion, sanding a door to fit is essential in home improvement projects. Filing the bottom of a door without removing it can be a convenient and effective way to achieve a proper fit without the need to remove the door from its hinges. By using the right tools and sandpaper grits, and being careful not to over-sand in one spot, you can achieve a smooth and even surface that fits perfectly.

Why Trust About Sanders?
When it comes to the world of sanding and sanders, you need a trusted source of information and guidance to ensure you achieve those perfect finishes. That's where I come in – I'm Martin, a dedicated sanding enthusiast with a relentless passion for attaining flawless surfaces. With years of hands-on experience in the sanding industry, I've honed my skills and expertise to provide you with the most reliable and accurate insights. What sets me apart is my commitment to excellence. I meticulously handpick each sander after rigorous testing, ensuring that only the best tools make it to your hands. My goal is to empower you with the knowledge and recommendations you need to tackle any sanding task confidently. When you trust About Sanders, you're putting your faith in a seasoned expert who shares your passion for perfection and strives to deliver top-notch information and reviews for every sanding challenge.
