Do you know how to sand a door frame? Or Are you looking to paint a door frame and achieve a smooth, professional-looking finish? One essential step in the preparation process is sanding the door frame.
Discover the best techniques for sanding a door frame with our expert step-by-step guide. Get professional results and make your door frame look like new again. Read now!
This article will explore the proper technique for sanding a door frame and the materials needed to get the job done right. Following these steps, you’ll go to a beautifully painted door frame that looks as good as new.
Here is A Step-by-Step Guide About How to sand a door frame
Following these steps, we can easily sand a door frame:

1. Material Needed
Before you start sanding your door frame, ensure you have all the necessary materials. Here’s a list of what you’ll need:
A. Sandpaper with 120-150 Grit Range
Sandpaper is crucial when sanding a door frame. Choose sandpaper with a grit range of 120-150 to remove any rough spots or imperfections while keeping the surface smooth.
B. Sanding Block or Sander for Door Frames:
While sanding by hand can be effective, a sanding block or sander designed for door frames can make the process much easier. Choose the tool that works best for you.
C. Electric Sander (Optional):
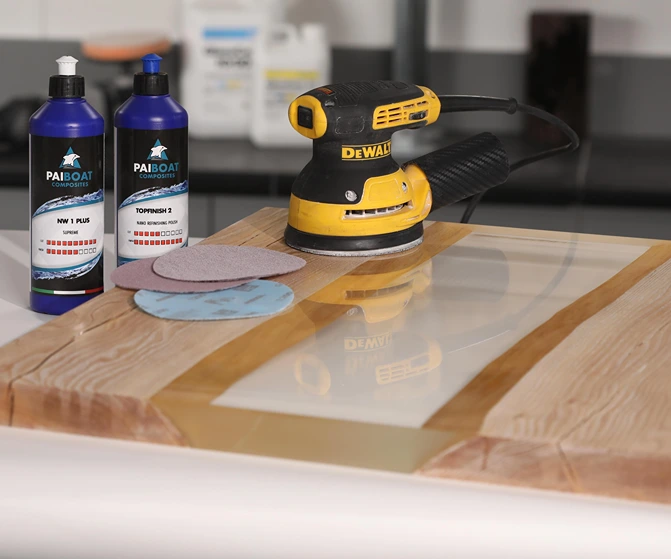
An electric sander can significantly speed up the sanding process, but it’s unnecessary if you prefer to sand by hand. If you choose to use an electric sander, ensure you have the appropriate sandpaper for it.
D. Soft Cloth:
You’ll need a soft cloth to wipe away any dust or debris that accumulates during the sanding process. A microfiber cloth or an old T-shirt will work well.
E. Painter’s Tape (Optional):
If you’re worried about getting paint or primer on surrounding areas, use painter’s tape to cover them up. This is especially important if you paint a door frame attached to a wall.
You can also check out our other related article Can You Use a Polisher as a Sander? You Bet!
2. Preparation:
Now that you have all the necessary materials, it’s time to prepare the door frame for Sanding. Here are the steps involved:

A. Remove the Door from Its Hinges:
It’s best to remove the door from its hinges before sanding. This will allow you to work on the door frame without worrying about accidentally sanding the door itself. remove the screws from the hinges, and carefully place the door aside.
B. Tape off Surrounding Areas (Optional):
If you’re worried about getting dust or debris on surrounding areas or getting paint or primer on them later on, use painter’s tape to cover them up. This is especially important if the door frame is attached to a wall. Place the tape along the surrounding areas’ edges, ensuring it’s secure and covers everything you want to protect. Once you’re done, you’re ready to move on to the next step.
3. Sanding by Hand
If you’re sanding by hand, follow these steps for the best results:

A. How to Use a Sanding Block:
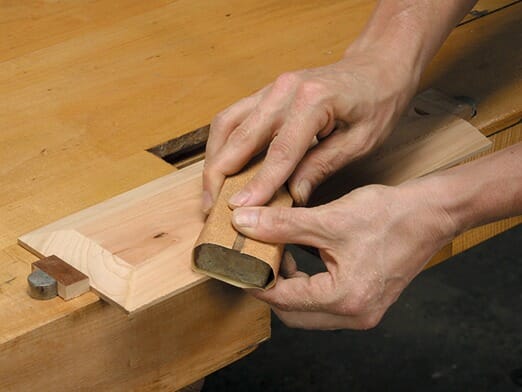
Using a sanding block can help you achieve a more even and consistent sanding job. Wrap the sandpaper around the block and secure it in place. Hold the block firmly with one hand and sand with the other.
B. Technique for Sanding in the Direction of the Grain:
When sanding a door frame, sand in the direction of the Grain. This will help you avoid scratches and ensure a smooth finish. Use long, even strokes, and avoid applying too much pressure.
C. Progressing to Finer Grit Sandpaper:
Start with sandpaper with a grit range of 120-150 This will help you remove any rough spots or imperfections on the surface. Be sure to wipe away dust or debris with a soft cloth between the sanding sessions.
D. Tips for Avoiding Scratches:
To avoid scratches, always sand in the direction of the Grain and avoid using too much pressure. If you notice scratches or rough spots, go back over them with finer grit sandpaper until the surface is smooth.
4. Sander for Door Frames
A sander designed specifically for door frames can save you time and effort. Here are some tips on using one effectively:
A. Benefits of Using a Sander Designed for Door Frames
Using a sander designed specifically for door frames can provide several benefits:
1: More Even and Consistent Sanding Job:
A sander designed for door frames can help you achieve a more even and consistent sanding job. The design of these sanders allows them to reach all areas of the door frame, including tight spaces and corners, resulting in a more uniform finish.
2: Saves Time and Effort:
Sanding a door frame by hand can be time-consuming and tiring. You can save time by using a sander designed for door frames. These sanders are designed to be efficient and effective, allowing you to complete the job quickly and easily.
3: Fits Into Tight Spaces and Corners:
The unique design of door frame sanders makes them ideal for sanding in tight spaces and corners. These sanders can reach areas that are difficult to access by hand, resulting in a more thorough sanding job.
B. Types of Sanders Available for Door Frames
| Sander type | Description | Reason to use |
| Belt sander | A larger sander with a continuous sanding belt | Best for larger surfaces |
| Orbital sander | A Hand-Held sander with a square or rectangular pad that vibrates in small circles | Ideal for flat surfaces and finishing work |
| Detail sander | A smaller sander with a triangular-shaped pad that is designed to reach tight corners and angles | Best for tight surfaces |
| Multi tool | A versatile tool that can be fitted with various sanding attachments | Can be used for a variety of sanding tasks, including door frames |
Tips for using a sander effectively:
Here are some tips for using a sander effectively, broken down into small paragraphs with subheadings:

1: Choose the Right Sandpaper Grit:
When using a sander, choosing the appropriate grit sandpaper for the job is important. Start with a coarser grit to remove any rough spots or imperfections, then gradually work up to a finer grit for a smoother finish.
2: Sand in the direction of the Grain.:
Always move the sander toward the Grain to avoid damaging the wood and achieve the smoothest possible finish. This will help to prevent scratches and ensure a consistent sanding job.
3: Use a Light Touch:
Don’t apply too much pressure when using a sander. Let the sander’s weight and the sandpaper’s grit do the work for you. Applying too much pressure can result in uneven Sanding and even damage to the wood.
4: Wipe Away Dust and Debris:
Between sanding sessions, clean any dust or debris with a soft cloth. This will help ensure the surface remains clean and smooth, allowing you to achieve the best possible finish.
How to use an Electric Sander for Sanding door Frames?
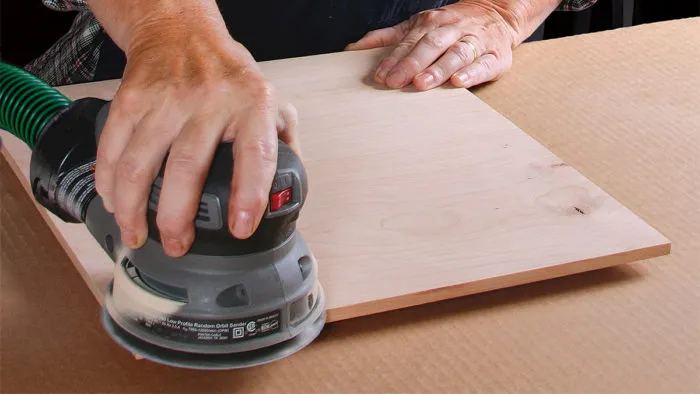
Using an electric sander can save you time and effort compared to sanding by hand. It’s also a great way to achieve a more consistent finish, especially if working on a larger surface area.
Electric sanders come in various sizes and shapes, including models for sanding door frames.

A: Appropriate Sandpaper for Electric Sanders:
When using an electric sander, choosing the appropriate grit sandpaper for the job is important. Start with a coarser grit and work up to a finer grit for the smoothest possible finish. Read the manufacturer’s instructions to determine your sander model’s sandpaper type and grit.
B: Safety Precautions:
- Wear eye protection and a dust mask to avoid inhaling dust and debris.
- Keep your body parts away from the sanding surface to avoid injury.
- Additionally, be aware of any electrical hazards and follow the manufacturer’s instructions for safely using and maintaining your sander.
C: Cleaning the Surface
- Use a soft cloth or vacuum to gently remove dust and debris from the surface of the door frame.
- Be sure to clean the surrounding area to avoid dust or debris
- To achieve the cleanest possible surface, wipe down the door frame with a damp cloth to remove any remaining dust or debris.
- Let the surface dry completely before applying any paint or finish.
D: Checking for Rough Spots
- Inspect the surface of the door frame for any rough spots or imperfections.
- Run your hand over the surface to feel any bumps or rough areas.
- If you notice any imperfections, use finer grit sandpaper to sand until it’s smooth and even.
- Repeat the Sanding Process if Necessary If you find any rough spots or imperfections after inspecting the surface.
FAQs:
Get the answers to the questions:
Why is sanding a door frame necessary before painting?
Sanding a door frame is necessary before painting because it helps to smooth out any rough spots or imperfections on the surface of the wood. Sanding creates a smooth and even surface for the paint.
What kind of sandpaper should I use to sand a door frame?
It is recommended to use sandpaper with a grit range of 120-150 for sanding a door frame. You must start with a coarser grit sandpaper and progress to a finer grit for the best results.
Can I use an electric sander for sanding a door frame?
Yes, you can use an electric sander for sanding a door frame. However, you should take appropriate safety precautions, such as wearing a dust mask and safety glasses, to protect yourself from debris and dust.
Conclusion
To send a door frame, you must gather the necessary materials and prepare the surrounding area. You can sand by hand using a sanding block or a sander designed specifically for door frames. If using an electric sander, be sure to take appropriate safety precautions. After sanding, clean the surface and check for any rough spots or imperfections, repeating the sanding process as necessary.

Why Trust About Sanders?
When it comes to the world of sanding and sanders, you need a trusted source of information and guidance to ensure you achieve those perfect finishes. That's where I come in – I'm Martin, a dedicated sanding enthusiast with a relentless passion for attaining flawless surfaces. With years of hands-on experience in the sanding industry, I've honed my skills and expertise to provide you with the most reliable and accurate insights. What sets me apart is my commitment to excellence. I meticulously handpick each sander after rigorous testing, ensuring that only the best tools make it to your hands. My goal is to empower you with the knowledge and recommendations you need to tackle any sanding task confidently. When you trust About Sanders, you're putting your faith in a seasoned expert who shares your passion for perfection and strives to deliver top-notch information and reviews for every sanding challenge.
