Renew your deck’s beauty with our 10-step guide on how to sand a deck. Uncover the natural charm of your outdoor oasis effortlessly!
Are you tired of looking at your weathered, splintered deck? Imagine lounging on a smooth, rejuvenated surface, sipping your favorite drink.
In just 10 easy steps, you can transform your deck into a backyard oasis.
- Gather your tools, clear the deck, and sweep away debris.
- Inspect for any damage and secure loose boards. Pay extra attention to high traffic areas.
- Clean away dust and apply a protective finish.
Get ready to enjoy your newly sanded deck and embrace your liberated outdoor space!
Key Takeaways to Sand a Deck
- Preparation and safety are important before starting the deck sanding process.
- Clearing and cleaning the deck thoroughly is necessary to ensure a dust-free surface.
- Inspecting and repairing any loose boards or nails is crucial for a sturdy and safe deck.
- Paying extra attention to high traffic areas while sanding will ensure a smooth and even surface.
1- Gather All Necessary Tools and Materials
Before you begin sanding your deck, it’s important to gather all the necessary tools and materials. This will ensure that you have everything you need to complete the job efficiently and safely.
Take the time to gather items such as:
- A sander
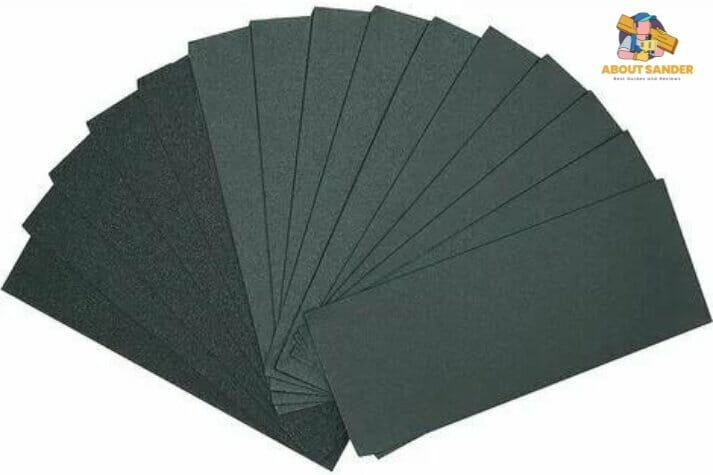
- Sandpaper
- Safety goggles
- A dust mask
- A broom to sweep away debris.
Safety considerations before you begin
To ensure a safe and efficient deck sanding process, gather all the necessary tools and materials before you begin. Here are three safety considerations to keep in mind:
- Protective Gear: Wear safety goggles, a dust mask, and work gloves to shield yourself from flying debris and harmful particles that may be released during the sanding process.
- Stable Ladder: Use a sturdy ladder that can support your weight and reach the entire deck surface without wobbling. This will prevent accidents and ensure your stability while sanding.
- Power Tools: If you’re using power tools, make sure they’re in good working condition and have appropriate safety features. Inspect the cords for any damage and ensure that they’re properly grounded.
By gathering these necessary tools and materials, you’ll create a safe environment for yourself during the deck sanding process.
Now, let’s move on to the next step and clear the deck of any furniture or obstacles.
2- Clear the Deck of Any Furniture or Obstacles
Remove all furniture and obstacles from the deck before beginning the sanding process. Clearing the deck of any furniture or obstacles is essential to ensure a smooth and efficient sanding process. Start by removing any chairs, tables, or decorations that may be present on the deck. These items can obstruct your movement and make sanding difficult. You want to create a clear and open space to work in.
Next, check for any other obstacles that may be in your way. Look for plants, potted flowers, or any other objects that could hinder your progress. It’s important to remove these items to prevent damage and ensure a thorough sanding job.
By clearing the deck of furniture and obstacles, you create a safe and uncluttered environment for sanding. This step allows you to move freely and reach all areas of the deck without any hindrances. It also prevents any potential accidents or damage to your furniture.
Once the deck is clear, you can proceed to the next step of the process: sweeping the deck to remove loose dirt and debris. This step ensures a clean surface for sanding and helps to achieve a smooth finish.
3- Sweep the Deck to Remove Loose Dirt and Debris
Clearing the deck of furniture and obstacles, you’ll want to grab a broom and start sweeping to remove any loose dirt and debris. This step is crucial before you begin the belt sanding process, as it ensures a clean surface for optimal results. Here are three reasons why sweeping the deck is an essential first step:
- Prevent damage to your sander: Loose dirt and debris can get trapped in the belt sander, causing it to clog or malfunction. By sweeping the deck beforehand, you’ll minimize the risk of damaging your equipment and ensure a smooth sanding process.
- Achieve a more even sanding: Dust, leaves, and other debris can create uneven surfaces, affecting the quality of your sanding job. By sweeping away these particles, you’ll create a level playing field for the belt sander, resulting in a more uniform and professional-looking deck.
- Enhance safety: Loose dirt and debris on your deck can be a slipping hazard, especially when you’re working with a belt sander. By sweeping the deck, you’ll remove potential obstacles and create a safer environment for yourself and others.
Now that you’ve swept the deck to remove loose dirt and debris, it’s time to inspect the deck for any damaged or rotten boards. This inspection is crucial to address any necessary repairs before proceeding with the sanding process.
4- Inspect the Deck for Any Damaged or Rotten Boards
After sweeping the deck and ensuring a clean surface, proceed to inspect for any damaged or rotten boards. This step is crucial to ensure the stability and safety of your deck. Look out for any signs of decay, such as discoloration, soft spots, or splintering. Here is a table to guide you in identifying and addressing any issues you may encounter:
| Issue | Description | Action |
|---|---|---|
| Rot | Soft, spongy texture, discoloration | Replace the rotten board immediately to prevent further damage and ensure a sturdy deck. |
| Cracks | Visible splits or cracks in the board | Fill the cracks with a wood filler and sand it down for a smooth finish. If the cracks are extensive, consider replacing the board. |
| Warping | Curved or twisted boards | Use a pry bar to remove the warped board and replace it with a new one. Ensure proper alignment and secure it with screws. |
Inspecting and addressing damaged or rotten boards before sanding your deck is essential. Neglecting this step could result in an uneven and unstable surface, compromising the overall finish and longevity of your deck. By taking the time to identify and fix any issues, you ensure a solid foundation for your deck refinishing project. Remember, it is always better to address these problems early on rather than waiting for them to worsen. So, be vigilant and proactive in maintaining your deck’s integrity.
5- Secure Any Loose Boards or Nails
Next, you’ll want to make sure that any loose boards or nails are securely fastened before proceeding with sanding your deck. Follow these steps to ensure that your deck is safe and ready for sanding:
- Inspect the deck: Walk around your deck and carefully examine each board. Look for any boards that are loose or have nails sticking out. These can be tripping hazards and should be fixed before sanding.
- Tighten loose boards: Use a screwdriver or drill to tighten any loose boards. Make sure the screws or nails are secure and flush with the surface of the board.
- Hammer in protruding nails: If you find any nails sticking out, use a hammer to gently tap them back into place. Be careful not to damage the wood while doing this.
6- Start Sanding the deck With Coarse-Grit Sandpaper

Now that you’ve secured any loose boards or nails, it’s time to start sanding your deck with coarse-grit sandpaper.
The first point to consider is choosing the right grit. Coarse-grit sandpaper, typically around 40-60 grit, is ideal for removing any rough or uneven surfaces and tackling stubborn stains or old paint.
Choosing the Right Grit
To begin sanding your deck, start with a coarse-grit sandpaper. This is essential in removing any old finish or rough spots on the surface.
Here are three reasons why choosing the right grit is crucial for a successful deck sanding project:
- Efficient removal: Coarse-grit sandpaper, typically around 40-60 grit, is designed to aggressively remove material. It’s perfect for tackling stubborn stains, splinters, or weathered wood.
- Smooth preparation: By starting with a coarse-grit sandpaper, you create a smooth and level surface for the next sanding stages. This allows the finer grits to work more effectively, resulting in a polished finish.
- Time-saving: Coarse-grit sandpaper quickly removes the toughest debris, reducing the time and effort required for sanding. It sets the foundation for a faster and more efficient overall sanding process.
7- Sand the Entire Surface of the Deck
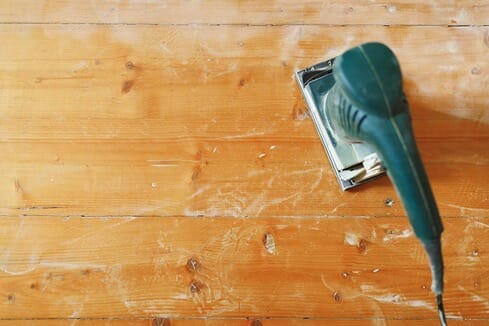
Start by using a sanding machine to smooth the entire surface of your deck. This step is crucial in preparing the deck for refinishing and ensuring a clean, even finish. The sanding machine, equipped with the appropriate grit sandpaper, will effectively remove any old stain, paint, or rough patches from the wood.
To help you visualize the process, here’s a table that outlines the steps involved in sanding the entire surface of your deck:
| Step | Description |
|---|---|
| 1 | Clear the deck of furniture, plants, and other obstacles. |
| 2 | Start sanding along the length of the boards, moving in the same direction as the wood grain. |
| 3 | Use a back-and-forth motion to cover the entire width of each board. |
| 4 | Repeat the process until the entire deck is sanded, paying attention to any missed spots or uneven areas. |
Remember to wear protective gear, such as safety goggles and a dust mask, to shield yourself from flying debris and dust particles. Additionally, be mindful of the sanding machine’s power and adjust your technique accordingly to avoid damaging the wood.
Once you have completed this step, you can proceed to the next phase of refinishing your deck.
8- Pay Extra Attention to High Traffic Areas
Begin by identifying the areas of your deck that receive the most foot traffic. These high traffic areas are prone to wear and tear, and therefore require extra attention during the sanding process.
Here are three reasons why you should pay special attention to these areas:
- Smoothness: High traffic areas tend to have more imperfections and rough patches due to constant use. By focusing on these areas, you can ensure a smoother and more comfortable surface for walking and lounging.
- Durability: Sanding these areas thoroughly helps to remove any splinters or rough edges that may cause injury. It also allows you to assess the condition of the wood and address any potential weaknesses before applying a protective finish.
- Aesthetics: Since high traffic areas are often the most visible parts of your deck, paying extra attention to them will enhance the overall appearance of your outdoor space. A smooth and well-maintained surface in these areas can make a significant difference in the overall look and feel of your deck.
9- Clean the Deck Thoroughly to Remove Any Dust
Now, it’s time to ensure the cleanliness of your deck by thoroughly removing any dust that may have accumulated. Dust can interfere with the sanding process and affect the final result, so it’s important to clean the deck properly.
Here’s a step-by-step guide to help you get rid of the dust and prepare your deck for sanding.
- Start by sweeping the entire deck with a broom to remove loose dirt and debris. Pay close attention to corners, cracks, and crevices where dust tends to collect.
- Use a leaf blower or a compressed air canister to blow away any remaining dust. This will help ensure that all the nooks and crannies are free from debris.
- For stubborn dust or dirt, use a stiff bristle brush and some water to scrub the affected areas. Rinse thoroughly with a hose to remove any residue.
- If there are stains or mildew on your deck, consider using a deck cleaner or a mixture of water and mild detergent. Scrub the stains gently with a brush and rinse well.
- Allow the deck to dry completely before proceeding to the next step. Moisture can hinder the sanding process and lead to uneven results.
10- Apply a Protective Finish or Stain

To ensure long-lasting protection, apply a protective finish or stain to your deck using a high-quality product. This step is crucial in maintaining the beauty and durability of your deck. Here are three key reasons why applying a protective finish or stain is essential:
- Preserve the Wood: A protective finish or stain acts as a barrier, shielding the wood from harmful elements such as UV rays, moisture, and rot. It prevents the wood from cracking, warping, or fading, ensuring its longevity.
- Enhances Aesthetic Appeal: By applying a finish or stain, you can enhance the natural beauty of the wood. Clear finishes highlight the wood’s grain and color, while stains offer a wide range of colors to suit your style and preference. This adds visual appeal to your deck, making it an inviting space.
- Reduces Maintenance: A protective finish or stain not only protects the wood but also reduces the need for frequent maintenance. It minimizes the chances of mold or mildew growth and makes cleaning easier. Additionally, it helps prevent moisture damage and extends the life of your deck.
Enjoy Your Newly Sanded and Rejuvenated Deck!
After applying a protective finish or stain to your deck, you can now fully enjoy your newly sanded and rejuvenated outdoor space. Your deck is not only visually appealing but also protected from the elements. To make the most of your deck, here are a few tips to enhance your experience:
| 1. Outdoor Furniture | 2. Lighting | 3. Decorative Touches |
|---|---|---|
| Invest in comfortable outdoor furniture to create a cozy seating area. Choose weather-resistant materials like teak or aluminum. | Install outdoor lighting to extend the usability of your deck into the evening. Consider string lights, lanterns, or even built-in fixtures. | Add decorative touches such as potted plants, outdoor rugs, or hanging baskets. These small details can elevate the ambiance of your deck and make it feel more inviting. |
Frequently Asked Questions
Can I Sand My Deck Without Removing Any Furniture or Obstacles?
You can definitely sand your deck without removing any furniture or obstacles. It might require some extra effort and attention to detail, but it’s possible to work around them and achieve a smooth and even finish.
How Often Should I Inspect My Deck for Damaged or Rotten Boards?
It would be best if you regularly inspected your deck for damaged or rotten boards. It’s better to catch these issues early on and make necessary repairs. Remember, a stitch in time saves nine!
What Should I Do if I Find Any Loose Boards or Nails While Inspecting the Deck?
If you find any loose boards or nails while inspecting the deck, you should take immediate action. Secure loose boards with screws or nails, and replace any damaged boards. This will ensure the safety and longevity of your deck.
Is It Necessary to Sand the Entire Surface of the Deck or Can I Focus on Specific Areas?
You can focus on specific areas of the deck while sanding. It’s not necessary to sand the entire surface. This allows you to save time and effort while still achieving a smooth and even finish.
How Long Should I Wait Before Using the Deck After Applying a Protective Finish or Stain?
You should wait at least 24-48 hours before using the deck after applying a protective finish or stain. This allows the finish to properly dry and cure, ensuring long-lasting protection for your deck.
Conclusion
In just 10 easy steps, you can transform your weathered deck into a rejuvenated outdoor oasis.
By gathering the necessary tools and materials, clearing the deck of furniture and obstacles, and thoroughly sanding and cleaning the surface, your deck will be ready for a protective finish or stain.
Like a breath of fresh air for your outdoor space, this process will leave you with a deck that shines like a polished gem.
Enjoy the beauty and durability of your newly sanded deck!

Why Trust About Sanders?
When it comes to the world of sanding and sanders, you need a trusted source of information and guidance to ensure you achieve those perfect finishes. That's where I come in – I'm Martin, a dedicated sanding enthusiast with a relentless passion for attaining flawless surfaces. With years of hands-on experience in the sanding industry, I've honed my skills and expertise to provide you with the most reliable and accurate insights. What sets me apart is my commitment to excellence. I meticulously handpick each sander after rigorous testing, ensuring that only the best tools make it to your hands. My goal is to empower you with the knowledge and recommendations you need to tackle any sanding task confidently. When you trust About Sanders, you're putting your faith in a seasoned expert who shares your passion for perfection and strives to deliver top-notch information and reviews for every sanding challenge.
