When Orbital sander slows down, Check the power source and ensure a stable connection. Clean or replace the sanding pad and ensure proper ventilation to prevent overheating, which may cause slowdowns.
Orbital sanders are incredibly useful when sanding large areas of wood, plastic, or metal. If you encounter this problem with the orbital sander, you must know how to fix it.
In this article, we will tell you some valuable tips and tricks on fixing orbital sander slows down problems so you can get back to your sanding projects quickly.
Key takeaways:
- Check and Replace Worn-Out Parts: Regularly inspect your sanding pad and sanding disc for signs of wear and tear. Replace them if necessary to maintain efficient sanding.
- Keep the Dust Collection System Clean: Clean the dust collection system regularly to prevent clogs and maintain optimal airflow and suction power.
- Inspect and Replace Motor Brushes: If your sander’s motor brushes are worn out, replace them promptly to ensure proper electricity transfer and prevent power loss.
- Check and Repair the Switch: A faulty switch can lead to slower sanding speeds or a non-functional sander. Inspect and replace the switch if necessary.
- Tighten Loose Components: Loose parts, like the motor belt, can hinder the sander’s performance. Make sure all components are secure and properly installed.
- Ensure Adequate Power Supply: Ensure your sander is receiving sufficient power from the outlet or battery to avoid slowdowns due to low voltage.
- Inspect and Maintain Speed Control System: Check the speed control system for any damage or malfunction and replace damaged components to maintain consistent sanding speeds.
- Proper Ventilation and Preventing Overheating: Use the sander in well-ventilated areas to prevent overheating of the motor. Avoid prolonged continuous use without breaks.
Here are 10 problems Why Orbital Sander Slows Down.
Completing sanding projects can be frustrating and time-consuming when an orbital sander slows down. Identifying that problem is the first step in fixing it, and regular maintenance can help prevent these issues from occurring in the first place.
| Problem | Reason | Possible Fixes |
| Worn-out sanding pad | Wear and tear from use | Replace sanding pad |
| Damaged sanding disc | Damage from use or storage | Replace sanding disc |
| Clogged dust collection system | Buildup of dust and debris | Clean or replace dust collection system |
| Worn-out motor brushes | Wear and tear from use | Replace motor brushes |
| Faulty switch | Malfunction due to use or damage | Repair or replace switch |
| Loose motor belt | Wear and tear from use or improper installation | Adjust or replace motor belt |
| Low power supply | Insufficient power source | Check power supply and circuit |
| Damaged speed control system | Malfunction due to use or damage | Repair or replace speed control system |
| Overheating motor | Excessive use or lack of proper ventilation | Allow motor to cool or improve ventilation |
1: Worn-out sanding pad
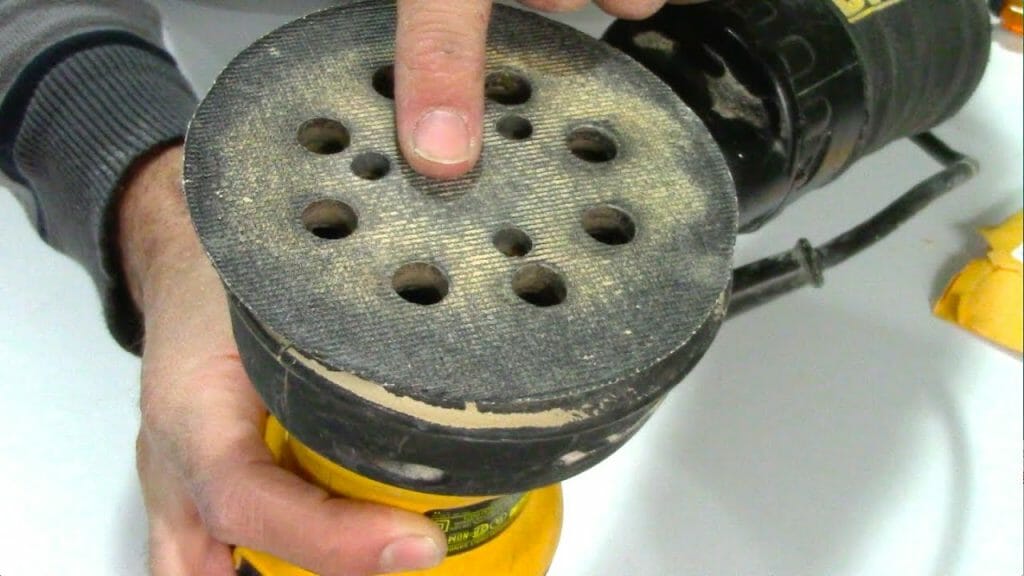
A sanding pad that is worn out will not grip the sandpaper properly, leading to decreased sanding efficiency and ultimately causing your sander to slow down. This problem is common with regular use, as the pad can lose its grip due to friction and heat generated during sanding.
Why Worn Out Sanding Pad?
The sanding pad on an orbital sander is a rubber-like material that can wear out over time. This can happen due to various reasons, including frequent use, excessive pressure, or exposure to high temperatures. When the sanding pad loses its grip, the sandpaper can slip and slide, causing the sander to slow down and reduce efficiency.
Steps to Fix:
Fixing a worn-out sanding pad is an easy and affordable solution to the problem of a slowing down orbital sander. Following these simple steps, you can quickly restore your sander’s efficiency and return to your sanding projects.
Step 1: Remove the Sanding Pad
The first step in fixing a worn-out sanding pad is to remove it from the sander. This can be done by loosening the screws or clips holding it.
Step 2: Clean the Sanding Pad
Once the sanding pad is removed, clean it thoroughly using a soft brush and mild soap. Remove any dirt, debris, or old adhesive that may be stuck on the pad.
Step 3: Apply New Adhesive
After cleaning the sanding pad, apply a new adhesive layer to the back. Use a high-quality adhesive suitable for your sander’s make and model.
Step 4: Attach a New Sandpaper Disc
Once the adhesive has been applied, attach a new sandpaper disc to the pad. Ensure the disc is centered and aligned properly before tightening the screws or clips.
Step 5: Test the Sander
After reattaching the sanding pad and new sandpaper disc, test the sander to ensure it runs smoothly and efficiently. If you still encounter problems, repeat the process or consult a
professional.
2: Damaged sanding disc

A damaged sanding disc can cause an orbital sander to slow down, produce uneven sanding results, or even damage your working surface. This can happen for various reasons, including wear and tear, exposure to heat or moisture, or accidentally dropping the sander.
Why is the Damaged sanding disc?
The sanding disc is a vital component of an orbital sander, responsible for removing the material from the sanded surface. When the disc is damaged, it can reduce sanding efficiency and cause the sander to slow down. The most common reason for disc damage is wear and tear, but other factors, such as exposure to moisture or heat, can also cause damage.
Steps to Fix:
Regular maintenance and inspection can help prevent this problem from occurring in the first place, and choosing the right sanding discs can also improve your sanding results. With these tips, you can learn how to fix an orbital sander that slows problems and return to your sanding projects quickly.
Step 1: Remove the Damaged Disc
The first step in fixing a damaged sanding disc is to remove it from the sander. This can be done by loosening the screws or clips holding it.
Step 2: Clean the Sanding Pad
Before attaching a new disc, clean the sanding pad thoroughly using a soft brush and mild soap. Remove any dirt, debris, or old adhesive that may be stuck on the pad.
Step 3: Choose a New Sanding Disc
Choose a new sanding disc compatible with your sander’s make and model. Different types of sanding discs are available, such as adhesive-backed or hook-and-loop, so make sure to choose the right type for your sander.
Step 4: Attach the New Disc
Once you have chosen a new sanding disc, could you attach it to the sanding pad? Ensure the disc is centered and aligned properly before tightening the screws or clips.
Step 5: Test the Sander
After reattaching the sanding disc, test the sander to ensure it runs smoothly and efficiently. If you still encounter problems, repeat the process or consult a professional.
3: Clogged dust collection system
Dust and debris can accumulate inside the dust collection system of an orbital sander, reducing its efficiency and causing it to slow down. This can happen for various reasons, such as sanding dusty surfaces or not cleaning the system afterwards.
Why a Clogged dust collection system?
A clogged dust collection system can reduce an orbital sander’s airflow and suction power, leading to a slower sanding speed and less effective dust removal. When dust and debris accumulate inside the system, they can also cause damage to the sander’s motor or other components.
Steps to Fix:
Step 1: Turn Off the Sander
Before inspecting or cleaning the dust collection system, please turn off the sander and unplug it from the power source. This will ensure your safety and prevent any accidental damage to the sander.
Step 2: Inspect the Dust Collection System
Inspect the dust collection system of your sander for any visible signs of dust or debris buildup. Use a flashlight to see inside the system and identify any clogs or blockages.
Step 3: Clean the Dust Collection System
If you find any dust or debris buildup, clean the dust collection system using a soft brush, compressed air, or a vacuum cleaner. Remove all visible dust and debris and ensure the system is free from clogs or blockages.
Step 4: Replace the Dust Collection Bag
If your sander uses a dust collection bag, replace it with a new one if it is full or damaged. A full or damaged bag can also reduce the efficiency of the dust collection system and cause the sander to slow down.
Step 5: Test the Sander
After cleaning and inspecting the dust collection system, test the sander to ensure it runs smoothly and efficiently. If you still encounter problems, repeat the process or consult a professional.
4: Worn-out motor brushes
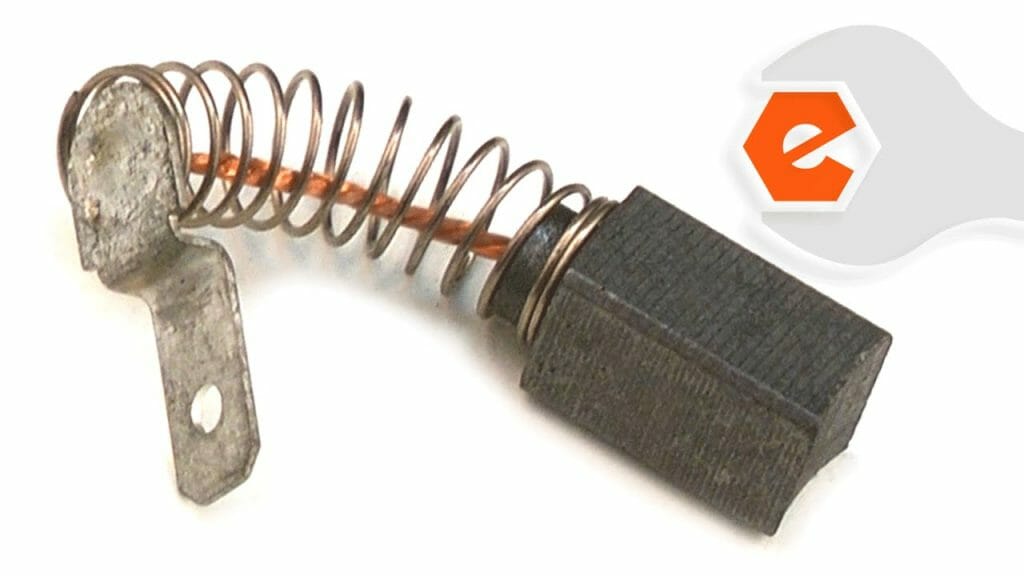
The motor brushes of an orbital sander can become worn out due to normal wear and tear, frequent use, or exposure to dust and debris. When the brushes wear out, they can no longer efficiently transfer electricity to the motor, leading to reduced power and a slower sanding speed.
Why Worn-out motor brushes?
Worn-out motor brushes can cause an orbital sander to slow down or even stop working. If you notice a decrease in power or speed or the sander emits a burning smell, it may be due to worn-out motor brushes.
Steps to Fix:
Regular maintenance and inspection can help prevent this issue from occurring in the first place, and using high-quality motor brushes can also improve your sander’s performance and lifespan. With these tips, you can keep your orbital sander running smoothly and easily tackle your sanding projects.
Step 1: Turn Off the Sander and Unplug it
Before fixing the motor brushes, please turn off the sander and unplug it from the power source. This will ensure your safety and prevent any accidental damage to the sander.
Step 2: Locate the Motor Brushes
Locate the motor brushes of your sander, which are usually located near the motor on either side. Consult your user manual if you need help finding them.
Step 3: Remove the Worn-Out Motor Brushes
Carefully remove the worn-out motor brushes from their holders using a screwdriver or other appropriate tool. You may need to remove a cover or housing to access the brushes.
Step 4: Replace the Motor Brushes
Once you’ve removed the old motor brushes, replace them with new ones of the same size and type. Be sure to insert them in the correct orientation and secure them firmly in their holders.
Step 5: Test the Sander
After replacing the motor brushes, test the sander to ensure it runs smoothly and efficiently. If you still encounter problems, repeat the process or consult a professional.
5: Faulty Switch
The switch of an orbital sander can become faulty due to frequent use, wear and tear, or exposure to dust and debris. When the switch becomes faulty, it can no longer send the proper signals to the motor, leading to a slower sanding speed and reduced performance.
Why Faulty Switch?
A faulty switch can cause an orbital sander to slow or stop working. If you notice a decrease in power or speed or the sander fails to start, it may be due to a faulty switch.
Steps to Fix:
A faulty switch can significantly impact the performance of an orbital sander, causing it to slow down or even stop working. However, by following these simple steps, you can learn how to fix an orbital sander that slows down problems caused by a faulty switch. With these tips, you can keep your orbital sander running smoothly and easily tackle your sanding projects.
Step 1: Turn off the Sander and Unplug
Before attempting to fix the switch, turn off the sander and unplug it from the power source. This will ensure your safety and prevent any accidental damage to the sander.
Step 2: Remove the Switch Cover
Remove the switch cover using a screwdriver or other appropriate tool to access the switch. Keep track of any screws or other parts you remove so you can reassemble the switch correctly.
Step 3: Inspect the Switch
Inspect the switch for any visible signs of damage, such as corrosion or wear and tear. If the switch appears damaged, you may need to replace it.
Step 4: Test the Switch
Using a multimeter, test the switch to ensure it functions correctly. If the switch is not functioning correctly, you may need to replace it.
Step 5: Replace the Switch
If the switch is damaged or not functioning correctly, replace it with a new one of the same size and type. Be sure to insert it correctly and secure it firmly in place.
Step 6: Reassemble the Sander
After replacing the switch, reassemble the sander in the reverse order of disassembly. Be sure to check all the connections and components to ensure that they are correctly reattached.
Step 7: Test the Sander
After reassembling the sander, test it to ensure it runs smoothly and efficiently. If you still encounter problems, repeat the process or consult a professional.
6: Loose motor belt
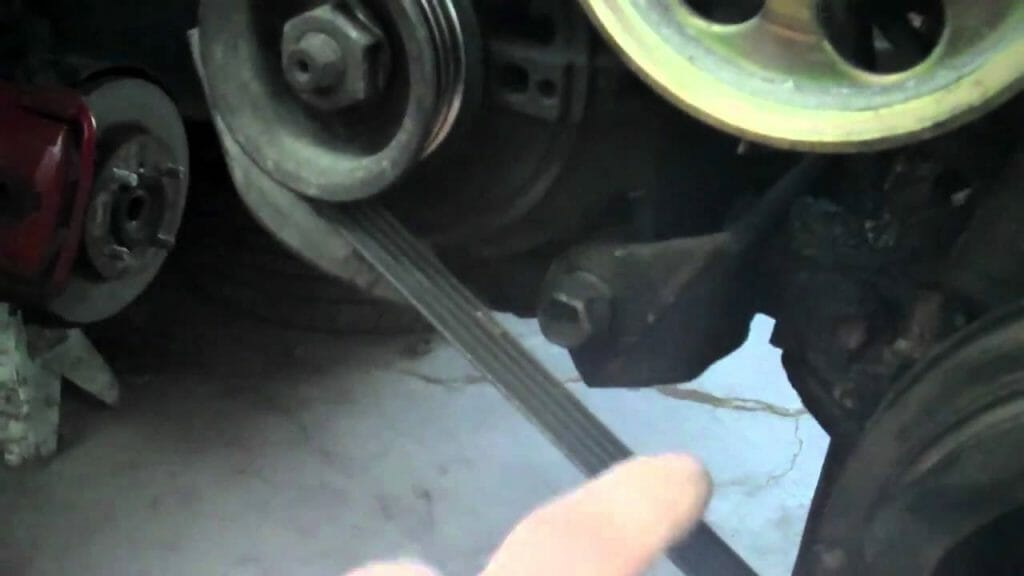
The motor belt in an orbital sander transfers power from the motor to the sanding pad. Over time, the belt can become loose due to frequent use and wear and tear. When the belt is loose, it won’t be able to transfer power efficiently, and the sander’s performance will decrease. This can result in slower sanding speeds and less effective sanding.
Causes of a loose motor belt:
A loose motor belt can occur due to various reasons. The most common causes are prolonged sander use, wear and tear, or improper maintenance. The belt can also become loose due to the vibrations caused by the sander during operation, which can cause the belt to loosen over time.
Steps to fix the loose motor belt:
Fixing a loose motor belt in an orbital sander is a simple process you can do independently. Here are the steps to follow:
Step 1: Unplug the sander
Before beginning any repair work, ensure the sander is unplugged from the power source. This will prevent any accidents from occurring.
Step 2: Access the motor belt
Remove the sanding pad and inspect the motor belt. Check if it is loose or damaged. If it is loose, proceed with tightening the belt. If it is damaged, replace it with a new one.
Step 3: Tighten the belt
To tighten the belt, locate the belt tensioning screw and turn it clockwise until it is taut. Be careful not to overtighten the belt, as this can cause it to break or wear out quickly.
Step 4: Reassemble the sander
Once you have tightened the belt, reassemble the sander by attaching the sanding pad and any other components you removed earlier.
Step 5: Test the sander
Plug in the sander and turn it on to ensure it operates at full speed. If the speed has improved, the problem of a loose motor belt has been fixed.
A loose motor belt can be one of the reasons why your orbital sander slows down. By following the simple steps mentioned above, you can fix the problem easily and restore your sander’s full speed and effectiveness. Remember to take proper care of your sander by performing regular maintenance to prevent such issues from occurring in the future.
7: Low power supply
An orbital sander requires a consistent and stable power supply to operate at full speed. If the power supply is low, the sander’s motor won’t be able to function at its maximum capacity, resulting in slower sanding speeds and reduced effectiveness. This can be frustrating when you need to sand a large surface area, and the sander slows down.
Causes of a low power supply:
A low power supply can occur due to various reasons. The most common cause is using an extension cord that is too long or has a lower voltage rating than required. Other causes can include a low-voltage power outlet, a weak or old battery in cordless sanders, or an overloaded circuit.
Steps to fix the low power supply:
Fixing a low power supply issue in an orbital sander is a simple process you can do independently. Here are the steps to follow:
Step 1: Check the power supply
First, check if the power supply meets the sander’s voltage requirements. Use a voltage meter to measure the voltage at the power outlet or battery.
Step 2: Replace or repair the power supply
If the voltage is low, you may need to replace the power cord or repair the outlet. If the issue is with a cordless sander, you may need to replace the battery.
Step 3: Use a shorter extension cord
Using an extension cord, use a shorter one with the required voltage rating. This will help reduce the voltage drop and ensure a stable power supply to the sander.
Step 4: Avoid overloading the circuit
Avoid using multiple high-power tools on the same circuit. This can cause a voltage drop and lead to a low power supply to the sander.
Step 5: Test the sander
Plug in the sander and turn it on to ensure it operates at full speed. If the speed has improved, then the problem of a low power supply has been fixed. A low power supply can be one of the reasons why your orbital sander slows down. By following the simple steps mentioned above, you can fix the problem easily and restore your sander’s full speed and effectiveness.
8: Damaged speed control system
The speed control system of your orbital sander is responsible for regulating the speed of the sanding pad. If this system is damaged, it can cause your sander to slow down, making your sanding project take longer to complete. The damage can occur for various reasons, such as wear and tear, overuse, or mishandling.
Why a Damaged speed control system?
The speed control system of your orbital sander consists of several components, including the speed controller, variable resistor, capacitor, and wiring. If any of these components are damaged or malfunctioning, it can affect the speed of your sander.
Steps to fix the Damaged speed control system:
Completing your sanding project can be frustrating and time-consuming if your orbital sander slows down. One of the possible causes of this issue could be a damaged speed control system. Your orbital sander’s speed control system regulates the sanding pad’s speed, and if it is not working correctly, it can cause your sander to slow down.
1: Disassemble the sander:
Before repairing the speed control system, you must disassemble the sander and remove the sanding pad and housing to access the internal components.
2: Identify the damaged component:
Once you can access the internal components, you must identify the damaged component. You can use a multimeter to test the components and determine which is malfunctioning.
3: Replace the damaged component:
Once you have identified the damaged component, you must replace it with a new one. You can purchase the replacement component from a hardware store or online.
4: Reassemble the sander:
After replacing the damaged component, you need to reassemble the sander and test it to ensure it is functioning correctly.
5: Maintain the sander:
To prevent any further damage to the speed control system, it is essential to maintain your orbital sander regularly. You should clean the sander after each use, inspect the components for any signs of wear and tear, and replace them as necessary.
9: Overheating motor
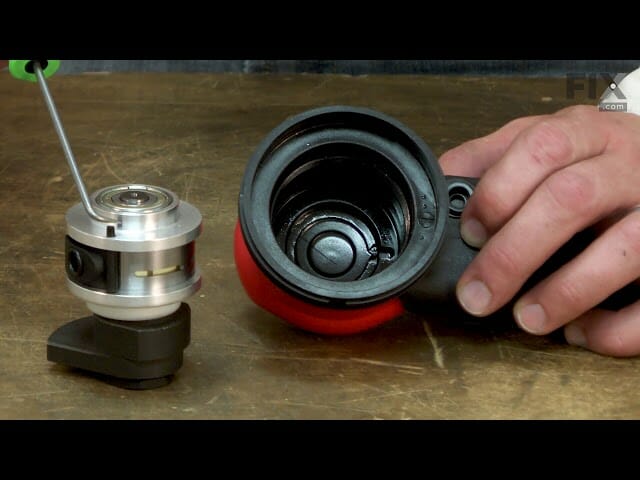
When the tool is used continuously for a prolonged period, the motor heats up, causing the tool to slow down or stop working. Another reason for overheating is the accumulation of dust and debris in the motor. This can cause the motor to work harder than it should, resulting in overheating.
Steps to Fix the Problem:
Following the above steps, you can prevent your motor from overheating and ensure that your sander remains in good condition for years. Always use your sander responsibly and take proper care of it to avoid unnecessary damage.
Step 1: Turn off the Sander and Unplug it
The first step to fixing an overheating motor is to turn off the sander and unplug it from the power source. This will ensure that the motor is not working while you are trying to fix it.
Step 2: Remove the Sanding Pad and Check the Motor
Once the sander is unplugged, remove the sanding pad and check the motor for any signs of damage or wear and tear. If the motor appears in good condition, proceed to the next step.
Step 3: Clean the Motor and Dust Collection System
If you notice any dust or debris around the motor, use a clean, dry cloth to wipe it away. Also, check the dust collection system and clean it thoroughly.
Step 4: Check the Power Source
Ensure that the power source you use is appropriate for the sander. If the power source is insufficient, it can cause the motor to overheat.
Step 5: Let the Sander Cool Down
If the motor is still hot, let it cool down before using the sander again. Overuse of the tool can cause permanent damage to the motor, so it’s important to allow it to cool down before using it again.
Step 6: Reduce the Load on the Motor
To prevent the motor from overheating in the future, reduce the load on it by sanding in short bursts instead of continuous use. This will help to reduce the amount of heat generated by the motor.
10: Improper maintenance
Improper maintenance is one of the reasons that can cause an orbital sander to slow down. When the tool is poorly maintained, dust and debris can accumulate inside the motor and other parts, causing friction and reducing efficiency. Over time, this can lead to the slowdown of the tool and even its complete breakdown.
Steps to fix the problem:
Proper maintenance of an orbital sander is essential to ensure its efficient and long-lasting performance. By following these simple steps, you can easily fix the problem of a slow-down orbital sander caused by improper maintenance. Regular cleaning and lubrication of the tool can go a long way in keeping it functioning at its best.
1: Clean the sander:
Start by unplugging the sander and disassembling it. Use a soft brush or compressed air to clean the dust and debris from the motor, housing, and other tool parts.
2: Lubricate the parts:
After cleaning the sander, apply a few drops of lubricating oil to the motor and other parts that require lubrication. This will help reduce friction and improve the efficiency of the tool.
3: Replace worn-out parts:
Check for any damaged or worn-out parts of the sander, such as the sanding pad or the motor brushes. If any parts are damaged, replace them with new ones to ensure the proper functioning of the tool.
4: Store the tool properly:
After using the sander, make sure to store it properly. Please keep it dry and clean and cover it with a dust cover to prevent dust and debris from entering the tool.
10 orbital sander troubleshooting tips
Orbital sanders are a great tool for smoothing surfaces but can develop problems over time. One of the most common issues is when the sander slows down or stops working. Fortunately, you can try several troubleshooting tips before calling in a professional. This article has 10 tips on how to fix an orbital sander that slows down.
1: Check the power source
The first thing to do when an orbital sander slows down is to check the power source. Ensure the sander is plugged into a working outlet or that the battery is charged if it’s cordless. If the power source works properly, move on to the next tip.
2: Inspect the sandpaper
The sandpaper on your orbital sander can become clogged or worn out over time, causing the sander to slow down or stop working. Inspect the sandpaper and replace it if necessary. You should also ensure you’re using the correct grit for the job.
3: Clean the dust collection system
Another common cause of orbital sander slowdown is a clogged dust collection system. Clean the system thoroughly, removing any debris or dust blocking the airflow.
4: Check the motor brushes
Over time, the motor brushes on your orbital sander can wear out, causing it to slow down or stop working altogether. Check the brushes and replace them if necessary.
5: Tighten loose parts
Loose parts can cause an orbital sander to slow down or produce uneven results. Check all the parts of your sander, including the pad, sandpaper, and screws, and tighten any loose.
6: Inspect the motor belt
If the motor belt is loose or damaged, it can cause the orbital sander to slow down or stop working altogether. Inspect the belt and replace it if necessary.
7: Check the speed control system
If your orbital sander has a speed control system, it may cause a slowdown. Inspect the system and replace any damaged parts.
8: Ensure proper ventilation
Orbital sanders generate a lot of heat during use, so proper ventilation is essential. Ensure the air vents on your sander are not blocked, and you use them in a well-ventilated area.
9: Avoid overheating the motor
Overheating the motor can cause an orbital sander to slow down or stop working. Please avoid using the sander for long periods without giving it a break to cool down.
10: Follow proper maintenance practices
Regular maintenance can help prevent orbital sander slowdowns. Clean the sander regularly, replace worn-out parts, and follow the manufacturer’s recommended maintenance schedule.
Following these 10 tips, you can troubleshoot and fix an orbital sander that slows down. It’s important to keep your sander well-maintained and address any issues as soon as they arise to avoid more serious problems. If you’re uncomfortable making repairs, don’t hesitate to seek professional help.
FAQs
When using an orbital sander, you may encounter various issues that can slow it down or cause it to stop working altogether. These issues can range from simple problems, such as a clogged dust collection system, to more complex ones, like faulty speed control systems.
1: What are some common causes of an orbital sander slowing down?
Several factors can cause an orbital sander to slow down. These include a worn-out sanding pad, damaged sanding disc, clogged dust collection system, low power supply, overheating motor, and loose motor belts.
2: How can I tell if my orbital sander’s sanding pad is worn out?
A worn-out sanding pad can cause an orbital sander to slow down. You can check if your sanding pad is worn out by inspecting it for cracks, tears, or uneven wear.
3: How do I fix a clogged dust collection system?
A clogged dust collection system can also cause an orbital sander to slow down. First, unplug the sander and remove the dust bag or canister to fix this issue. Then, use compressed air or a soft-bristled brush to clean the dust collection system. Make sure to clean the filter and replace it if it’s damaged.
4: What can I do if my orbital sander’s motor is overheating?
Various factors, such as a low power supply or a damaged speed control system, can cause an overheating motor. To fix this issue, unplug the sander and let it cool down for at least 30 minutes. Then, check the power supply and ensure it provides enough voltage.
5: How can I prevent my orbital sander from slowing down in the future?
Regularly clean the dust collection system and replace the sanding pad when necessary to prevent your orbital sander from slowing down. Avoid pressing down too hard on the sander, which can cause the motor to overheat. Also, ensure that you use the correct grit sandpaper for the job.
Conclusion
In conclusion, an orbital sander slowing down during operation can be caused by a variety of factors, including worn-out sanding pads, damaged sanding discs, a clogged dust collection system, worn-out motor brushes, a faulty switch, a loose motor belt, low-power supply, damaged speed control system, and an overheating motor.

Why Trust About Sanders?
When it comes to the world of sanding and sanders, you need a trusted source of information and guidance to ensure you achieve those perfect finishes. That's where I come in – I'm Martin, a dedicated sanding enthusiast with a relentless passion for attaining flawless surfaces. With years of hands-on experience in the sanding industry, I've honed my skills and expertise to provide you with the most reliable and accurate insights. What sets me apart is my commitment to excellence. I meticulously handpick each sander after rigorous testing, ensuring that only the best tools make it to your hands. My goal is to empower you with the knowledge and recommendations you need to tackle any sanding task confidently. When you trust About Sanders, you're putting your faith in a seasoned expert who shares your passion for perfection and strives to deliver top-notch information and reviews for every sanding challenge.
