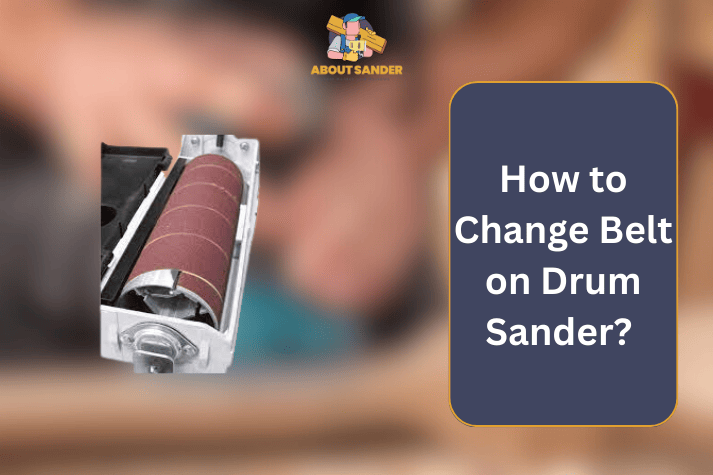
Discover the expert way to change belt on drum sander with our comprehensive step-by-step guide. Simplify the process and enhance your sanding experience today. Learn how to change belt on drum sander like a pro. Follow our detailed instructions to ensure a smooth and efficient belt replacement for optimal sanding results.
Key Takeaways:

- To Change belt on drum sander is a critical maintenance task for optimal sanding performance.
- Select the right replacement belt that matches the manufacturer’s specifications to avoid issues.
- Adjust the belt tension properly to ensure smooth sanding and prevent premature wear.
- Regularly inspect the drum and tracking mechanism for debris and wear.
- Conduct a test run before sanding projects to ensure the belt’s proper alignment and functionality.
How to Change Belt on Drum Sander? A Comprehensive Step-by-Step Expert Guide
A drum sander is an indispensable tool for achieving smooth and precise sanding results in woodworking and carpentry. In this detailed and expert guide, we will walk you through the entire process to change belt on drum sander, from removing the old belt to adjusting the new one, ensuring your sander continues to deliver top-notch results for all your projects.
Step 1: Power Off and Unplug the Drum Sander
Before starting any maintenance procedure, safety should be your top priority. Power off the drum sander and disconnect it from the power source to prevent accidental starts during the belt replacement process.
Step 2: Remove the Dust Collection Port and Access Covers
To access the drum and sanding belt, you may need to remove the dust collection port and any access covers on the drum sander. These are typically secured with screws or latches. Keep these components and their fasteners in a safe place for reassembly later.
Step 3: Release Belt Tension
Locate the tension release lever or knob, usually positioned near the drum or on the side of the drum sander. Gradually loosen the tension to reduce pressure on the existing sanding belt. This will facilitate the removal of the old belt.
Step 4: Carefully Remove the Old Belt
With the tension released, gently slide the old sanding belt off the drum. Be cautious not to force it or use tools that could damage the belt or the sander. Proper handling ensures the belt can be reused if it is still in good condition.
Step 5: Inspect the Drum and Tracking Mechanism
Take a moment to inspect the drum and the tracking mechanism for any signs of wear, debris, or damage. Clear away any sawdust or residue using a soft brush or compressed air. A clean and well-maintained drum and tracking system are essential for optimal belt performance.
Step 6: Select the Right Replacement Belt
Refer to the drum sander’s manual or specifications to determine the correct replacement belt size and grit. Using the right belt ensures the best sanding results and extends the life of both the belt and the sander.
Step 7: Position and Align the New Belt
Carefully position the new sanding belt over the drum, aligning it with the tracking mechanism. Ensure the belt fits evenly and smoothly on the drum without any wrinkles or misalignment.
Step 8: Adjust Belt Tension
Gradually tighten the tension lever or knob to apply the appropriate tension to the new belt. The belt should be snug enough to stay in place during operation but not excessively tight, as this can cause premature wear.
Step 9: Verify Belt Alignment
Power on the drum sander and observe the belt’s movement. Make any necessary adjustments to the tracking mechanism to keep the belt running smoothly and centered on the drum. An adequately aligned belt enhances sanding precision and reduces the risk of premature belt wear.
Step 10: Reassemble and Test Run
With the new belt securely installed and properly tensioned, reassemble any components removed earlier, such as the dust collection port and access covers. Conduct a test run without any material on the sander to ensure everything functions smoothly and the belt is correctly tracking.
5 Important Considerations: Change Belt on Drum Sander: An Expert Guide

Changing the belt on a drum sander is a critical maintenance task that directly affects the machine’s performance and the quality of your sanding projects. Whether you are a seasoned woodworker or a DIY enthusiast, understanding the key considerations for this process is essential to ensure a smooth and successful belt replacement.
1. Check the Belt Compatibility and Specifications
Before proceeding with the belt replacement, it is vital to ensure that the replacement belt is compatible with your drum sander model. Refer to the manufacturer’s specifications or the sander’s manual to determine the correct belt size, type, and grit recommended for your specific model.
2. Inspect the Drum and Tracking Mechanism
Thoroughly inspect the drum and the tracking mechanism before installing the new belt. Look for any signs of wear, damage, or debris that could hinder the proper functioning of the belt. Clean the drum and tracking system using a soft brush or compressed air to remove any sawdust or residue that may affect belt alignment and performance.
3. Properly Tension the New Belt
Achieving the right tension for the new belt ensures optimal sanding performance. Follow the drum sander’s manual or guidelines to appropriately adjust the tension lever or knob. The belt should be taught enough to stay in place during operation, but not overly tight, as excessive tension can lead to premature wear and affect sanding results.
4. Verify Belt Alignment
Accurate belt alignment is essential for smooth and even sanding. Power on the drum sander and observe the belt’s movement. Adjust the tracking mechanism to keep the belt centered on the drum. A misaligned belt can result in uneven sanding, increased wear on the belt, and potential damage to the sander.
5. Conduct a Test Run and Final Checks
Before fully engaging in your sanding projects, perform a test run without any material on the sander. Observe the belt’s performance, ensuring it runs smoothly and tracks accurately on the drum. Additionally, check all safety components, such as access covers and dust collection ports, to ensure they are securely in place before resuming regular use of the drum sander.
5 Common Pitfalls to Avoid: How to Change Belt on Drum Sander: An Expert Guide

Changing the belt on a drum sander is a crucial maintenance task that directly impacts the performance and longevity of the machine. In this expert guide, we will highlight five common mistakes to avoid when changing the belt on a drum sander, ensuring a smooth and successful belt replacement process for optimal sanding performance.
1. Neglecting to Power Off and Unplug the Sander
Safety is paramount when working with power tools; the drum sander is no exception. Before attempting to change the belt, always power off the machine and disconnect it from the power source to prevent accidental starts or electrical hazards. Double-check that the sander is entirely powered down before replacing the belt.
2. Using an Incompatible or Poor-Quality Belt
One of the most critical aspects of changing the belt on a drum sander is selecting the correct replacement belt. Avoid using belts not explicitly designed for your sander model or those of inferior quality. Using an incompatible or poor-quality belt can lead to tracking issues, uneven sanding, and premature wear on the belt and sander.
3. Over-Tensioning the New Belt
Proper belt tension is crucial for achieving optimal sanding results. Avoid over-tensioning the new belt, as excessive tension can cause undue stress on the sander’s components and lead to premature wear. Refer to the manufacturer’s guidelines or the sander’s manual to determine the appropriate tension for the specific belt and model.
4. Neglecting to Clean and Inspect the Drum and Tracking Mechanism
Before installing the new belt, take the time to clean the drum and tracking mechanism thoroughly. Accumulated sawdust or debris can interfere with proper belt alignment and tracking, affecting sanding performance. Additionally, inspect the drum and tracking components for signs of wear or damage, addressing any issues before proceeding with the belt replacement.
5. Skipping the Test Run and Final Checks
After installing the new belt and adjusting the tension, it’s crucial to conduct a test run before engaging in your sanding projects. Skipping this step can lead to unforeseen issues during actual sanding tasks, such as misalignment, tracking problems, or belt slippage.
Frequently Asked Questions: (FAQs) How to Change Belt on Drum Sander?
Here are brief answers to some commonly asked questions about changing the belt on a drum sander:
1: How often should I change belt on drum sander?
Inspect the belt regularly for wear and tear. Replace it when you notice signs of damage or reduced sanding efficiency.
2: Can I use any sanding belt on my drum sander?
Use the belt recommended by the manufacturer to avoid tracking and sanding performance issues.
3: How do I adjust the tension on the new belt?
Adjust the tension release lever or knob until the belt is taut but not overly tight. Follow the manufacturer’s guidelines for your specific sander model.
Conclusion:
In conclusion, changing the belt on a drum sander is an essential skill every woodworker should master. Following the expert guide, you can confidently and safely replace the sanding belt, ensuring smooth and flawless sanding results for all your woodworking projects. Remember to prioritize safety, cleanliness, and regular maintenance, as these factors play a crucial role in prolonging the life of your drum sander.

Why Trust About Sanders?
When it comes to the world of sanding and sanders, you need a trusted source of information and guidance to ensure you achieve those perfect finishes. That's where I come in – I'm Martin, a dedicated sanding enthusiast with a relentless passion for attaining flawless surfaces. With years of hands-on experience in the sanding industry, I've honed my skills and expertise to provide you with the most reliable and accurate insights. What sets me apart is my commitment to excellence. I meticulously handpick each sander after rigorous testing, ensuring that only the best tools make it to your hands. My goal is to empower you with the knowledge and recommendations you need to tackle any sanding task confidently. When you trust About Sanders, you're putting your faith in a seasoned expert who shares your passion for perfection and strives to deliver top-notch information and reviews for every sanding challenge.
