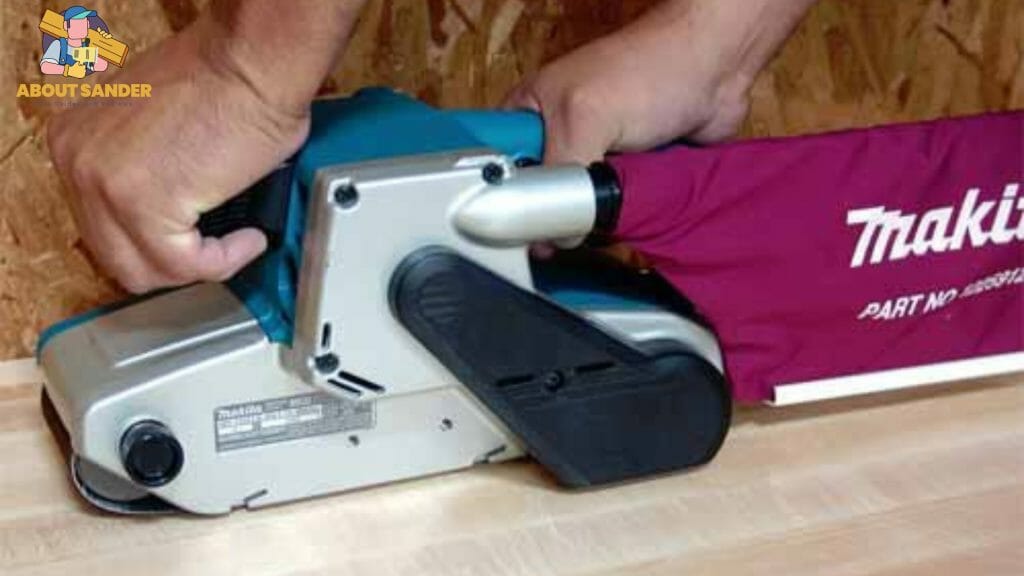
Sanding floors with a belt sander is highly effective for achieving a smooth and polished surface. Whether you’re renovating an old hardwood floor or preparing a new one for finishing, sanding with a belt sander can significantly enhance your floors’ overall appearance and durability.
In this guide, we will explore the critical steps in sanding the floor with a belt sander, providing valuable insights and techniques to accomplish professional-grade results. So, let’s delve into the world of floor sanding and discover how a belt sander can transform your floors into stunning masterpieces.
6 Steps for Sanding Floors with a Belt Sander
Sanding floors with a belt sander is crucial in achieving a flawless and refined floor surface. This comprehensive guide will take you through the essential steps of sanding your floor using a belt sander, ensuring you obtain professional-grade results. So let’s dive into the world of floor sanding and discover how a belt sander can revolutionize the appearance and durability of your floors.
Step 1: Prepare the area
Before you begin sanding, it is essential to prepare the area properly. Remove all furniture, rugs, and any other obstacles from the room. Cover nearby surfaces, such as walls and baseboards, with plastic or drop cloths to protect them from dust and debris. Ensure the floor is clean and free of any loose materials or debris that could interfere with the sanding process.
Step 2: Select the appropriate grit
Choosing the correct grit for your belt sander is crucial. Start with a coarse grit, such as 36 or 40, to remove any existing finishes, paint, or deep scratches. As you progress, gradually move to finer grits, such as 60, 80, and 120, to achieve a smoother surface. The selection of grit will depend on the condition of your floor, so it’s important to assess its needs before proceeding.
Step 3: Begin sanding
Start sanding along the grain of the wood, moving the belt sander in a controlled and steady motion. Avoid applying excessive pressure, resulting in uneven sanding or gouging the floor. Allow the sander to do the work, and let its weight guide the process. Overlap each passes slightly to ensure even sanding, and be mindful of any corners or edges that may require hand sanding.
Step 4: Progress with finer grits
Once you have completed the initial sanding with the coarse grit, transition to finer grits. This step will further refine the surface and remove any remaining imperfections. Follow the same sanding technique, working along the grain and overlapping each pass. Take your time and be thorough to achieve a consistently smooth result.
Step 5: Finish with edge sanding
To ensure a uniform appearance, it’s essential to sand the edges and corners of the floor. Use a handheld belt or edge sander designed explicitly for this purpose. Employ the same technique, starting with coarse grit and gradually progressing to finer grits. Pay close attention to detail and be careful not to damage adjacent surfaces.
Step 6: Clean the floor
After completing the sanding process, remove all the dust and debris from the floor. Use a vacuum cleaner and a damp cloth to clean the surface, ensuring no residue remains thoroughly. Cleaning the floor will prepare it for the next steps, such as applying finishes or stains.
8 Essential Considerations for Sanding Floors with a Belt Sander

When sanding floors with a belt sander, attention to detail and proper technique are vital for achieving flawless results. This guide will give you eight essential considerations to remember throughout the sanding process. By understanding these key factors, you can ensure that your floor sanding project succeeds, resulting in a beautifully smooth and polished surface.
1: Floor Condition Assessment
Before beginning the sanding process, carefully assess the condition of the floor. Identify any significant imperfections that require extra attention, such as deep scratches or uneven areas. Understanding the existing situation will help you determine the appropriate grit sequence and the level of sanding required.
2: Equipment Selection
Selecting the right equipment is crucial for efficient and effective floor sanding. Invest in a high-quality belt sander with adjustable speed settings for different floor types and sanding requirements. Ensure the sanding belts are in good condition and properly aligned to avoid uneven sanding.
3: Grit Progression
Choosing the correct grit progression is essential for achieving a smooth and even surface. Start with a coarse-grit belt to remove old finishes and imperfections, then gradually progress to finer grits for a refined finish. Remember to follow the manufacturer’s recommendations and test the grit sequence on a small inconspicuous area before proceeding.
4: Sanding Direction
Always sand in the direction of the wood grain to avoid creating noticeable scratches or inconsistencies. Consistent sanding strokes will result in a uniform appearance and prevent the belt sander from digging into the wood.
5: Pressure and Speed Control
Maintaining a steady pace and applying consistent pressure is crucial for optimal sanding results. Avoid pushing down excessively on the belt sander, as it may cause uneven sanding or damage to the wood. Allow the machine’s weight to do most of the work while guiding it smoothly across the floor.
6: Edges and Corners
Pay special attention to sanding the edges and corners of the floor, as the central belt sander often misses these areas. Use an edger or a hand-held belt sander to reach these tight spots and ensure a seamless transition between the main floor and edges.
7: Dust Containment
Dust control is essential for maintaining a clean and healthy work environment. Invest in a high-quality vacuum or dust extraction system designed for floor sanding. This will help minimize airborne dust particles and ensure easier clean-up after sanding.
8: Floor Inspection and Preparation for Finishing
After completing the sanding process, thoroughly inspect the floor for any remaining imperfections. Use a bright light source to identify any uneven areas or scratches that must be addressed. Once you are satisfied with the sanding results, clean the floor thoroughly to remove all dust and debris before finishing.
7 Things to Avoid When Sanding Floors with a Belt Sander

Sanding floors with a belt sander is crucial in achieving a smooth and polished surface. This guide will highlight key considerations and provide expert advice on what to avoid when sanding floors with a belt sander. By understanding these potential pitfalls, you can ensure a successful sanding project that delivers exceptional results.
1: Skipping the Preparation
Skipping or inadequately preparing the floor before sanding can lead to subpar results. Ensure the bed is free of any furniture, rugs, or debris hindering the sanding process. Additionally, inspect the base for nails or other protrusions that can damage the sanding belt or create deep scratches.
2: Neglecting Safety Precautions
Safety should always be a priority when using power tools such as a belt sander. Neglecting safety precautions, such as wearing protective goggles, a dust mask, and ear protection, can result in serious injuries. Follow the manufacturer’s safety guidelines and protect yourself from dust particles and excessive noise.
3: Incorrect Grit Selection
Choosing the wrong grit sequence can significantly impact the final outcome of your floor sanding project. Avoid starting with a too-fine grit, as it may not effectively remove old finishes or imperfections. Begin with a coarse-grit belt and progressively move to finer grits to achieve a smooth and even surface.
4: Excessive Pressure and Speed
One common mistake is applying too much pressure or sanding too quickly with the belt sander. Excessive pressure can result in uneven sanding and damage the wood surface. Maintain a steady and consistent pace, allowing the machine’s weight to do most of the work. This approach will ensure a more controlled and uniform sanding process.
5: Inadequate Dust Containment
Please address dust containment during sanding to avoid a messy and unhealthy environment. Avoid using a belt sander without a proper dust extraction system or vacuum attachment. The accumulation of dust can not only affect the quality of the finish but also pose health risks. Invest in a reliable dust containment solution to minimize airborne particles and make clean-up easier.
6: Ignoring Edges and Corners
Overlooking the edges and corners of the floor is a common mistake when using a belt sander. These areas often require special attention and a different approach. Pay attention to them using an edger or hand-held belt sander to achieve consistent results throughout the floor, including the hard-to-reach corners.
7: Rushing the Sanding Process
Patience is key when sanding floors with a belt sander. Rushing through the process can result in incomplete sanding, uneven surfaces, and overlooked imperfections. Take your time to ensure each section of the floor receives proper sanding and inspect the results before proceeding to the next stage.
5 Expert Tips for Sanding Floors with a Belt Sander
Sanding floors with a belt sander is a skill that can transform the look and feel of your space. Following effective techniques and utilizing the right tools is essential to achieve professional-quality results. This guide will share five expert tips for sanding floors with a belt sander. These tips will help you confidently navigate the process, ensuring a smooth and flawless finish.
1: Start with a Coarse Grit Belt
Begin sanding with a coarse grit belt, such as 40 or 60, to remove old finishes, paint, or deep scratches effectively. Coarse grits are essential for leveling the floor and creating a clean foundation for subsequent sanding. Gradually progress to finer grits for a smoother finish, allowing each grit to refine the surface fully.
2: Keep the Belt Sander Moving
One crucial tip is to keep the belt sander moving steadily. Avoid dwelling or applying excessive pressure in one spot, as it can result in uneven sanding or even wood damage. Maintain a consistent speed and movement across the floor, overlapping each pass slightly to ensure uniform sanding.
3: Use Proper Technique for Edges and Corners
Edges and corners require special attention during the sanding process. Use an edger or a hand-held belt sander to sand these areas effectively. Approach the edges and corners carefully, ensuring smooth transitions between the main floor and these harder-to-reach spots. Take your time and maintain control even to sand the entire floor.
4: Sand in the direction of the Wood Grain
Sanding in the direction of the wood grain is a crucial technique for achieving a professional finish. Following the natural grain pattern can minimize visible scratches and achieve a more consistent appearance. Sanding against the grain can result in unwanted marks that are difficult to remove, so always work with the grain direction.
5: Perform a Final Pass with a Fine Grit
Switch to a fine-grit belt or sanding screen for the last sanding pass to achieve a polished surface. A fine grit, such as 120 or 150, will help smooth out any remaining imperfections and prepare the floor for finishing. Take your time during this final step to ensure a flawless result that will enhance the overall aesthetics of your floor.
FAQs
Here are three frequently asked questions regarding sanding floors with a belt sander, along with brief answers for quick reference:
1: Using a belt sander, how do I prevent gouges or uneven sanding?
Answer: To prevent gouges and uneven sanding, maintain a steady and consistent pace, avoid applying excessive pressure, and ensure the belt sander is properly aligned and balanced.
2: Can I use a belt sander for all types of flooring?
Answer: Belt sanders are generally suitable for solid wood floors, but caution should be exercised with engineered wood or delicate surfaces to prevent excessive material removal.
3: How often should I replace the sanding belts?
Answer: Sanding belts should be replaced periodically depending on the extent of usage and wear. Regular inspection of the belt’s condition is recommended, and replacement should be done when the belt becomes worn or ineffective.
Conclusion:
In conclusion, sanding floors with a belt sander can be a transformative process that rejuvenates your space. You can achieve exceptional results by following proper techniques, selecting suitable grits, and paying attention to detail. Remember to prioritize safety, maintain a steady pace, and address edges and corners effectively. With these considerations in mind, you’ll be well-equipped to tackle your floor sanding project and enjoy the satisfaction of a beautifully renewed floor.

Why Trust About Sanders?
When it comes to the world of sanding and sanders, you need a trusted source of information and guidance to ensure you achieve those perfect finishes. That's where I come in – I'm Martin, a dedicated sanding enthusiast with a relentless passion for attaining flawless surfaces. With years of hands-on experience in the sanding industry, I've honed my skills and expertise to provide you with the most reliable and accurate insights. What sets me apart is my commitment to excellence. I meticulously handpick each sander after rigorous testing, ensuring that only the best tools make it to your hands. My goal is to empower you with the knowledge and recommendations you need to tackle any sanding task confidently. When you trust About Sanders, you're putting your faith in a seasoned expert who shares your passion for perfection and strives to deliver top-notch information and reviews for every sanding challenge.
